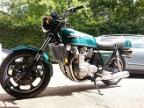
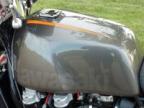
1982 KZ1300 rescue and rebuild
- StanG
-
 Topic Author
- Offline
- Banned
-

- Posts: 2118
- Thanks: 248
Please Log in or Create an account to join the conversation.
- zed_thirteen
-
- Offline
- Sustaining Member
-

- Posts: 587
- Thanks: 149
Re: 1982 KZ1300 rescue and rebuild
7 years 8 months ago
1980 KZ1300 B2 Touring/A2
1980 CBX1000-A
1990 ZZ-R1100 C1
1980 CBX1000-A
1990 ZZ-R1100 C1
The following user(s) said Thank You: StanG
Please Log in or Create an account to join the conversation.
- Daro
-

- Offline
- Premium Member
-

- Posts: 144
- Thanks: 80
Re: 1982 KZ1300 rescue and rebuild
7 years 8 months ago
Hi Stan, the oil level "controller" could be located on the left hand side behind the main switch cover. But i only know this from the picture i once found on E-bay. Hope it helps.
The following user(s) said Thank You: StanG
Please Log in or Create an account to join the conversation.
- StanG
-
 Topic Author
- Offline
- Banned
-

- Posts: 2118
- Thanks: 248
Re: 1982 KZ1300 rescue and rebuild
7 years 8 months ago
I don't have this triangular bracket.. Maybe it's a different year and model. I can't see where I could bolt down the one I have, but I will improvise something.
Please Log in or Create an account to join the conversation.
- tackelhappy
-

- Offline
- Platinum Member
-

- Posts: 435
- Thanks: 168
Re: 1982 KZ1300 rescue and rebuild
7 years 8 months ago
Ok Stan. Several things here.
1. The wiring loom I have does not match the Canadian bikes diagram in the manual. So its not much use a t this point.
2.I have taken a number of photo's yesterday and after seeing the post by zed-thirteen- that maybe is better way to go where you post a question along with photo's and then I can go and look at my bike and photo back- maybe the next day.
3. You appear to have the main loom which terminates in the headlight. Do you have the headlight bucket and the corresponding connections that go inside it . The easiest way to decide is matching male and female connectors and the corresponding wire colours going into and out of both.
4. The main loom runs underneath the main frame member and is held in place by a bracket and nut and bolt set-up welded to the frame member. Here's a photo.
" If you can't say what you think, very soon you won't be able to think !
OKANAGAN FALLS. BC ,Canada
OKANAGAN FALLS. BC ,Canada
The following user(s) said Thank You: StanG
Please Log in or Create an account to join the conversation.
- StanG
-
 Topic Author
- Offline
- Banned
-

- Posts: 2118
- Thanks: 248
Re: 1982 KZ1300 rescue and rebuild
7 years 8 months ago
First a quick remark concerning the wintergreen oil and rubbing alcohol treatment of old rubbers.
I used it exactly as described - one part oil 3 parts alcohol. The rubber camshaft plugs felt like a tough solid hard rubber, almost plastic. After soaking them for about 4 hours they became soft. Now, few days later, they still feel soft and like new. In my opinion, an amazing transformation.
The carburetor manifold holders, three, were very hard. Very similar to the above camshaft cover plugs. After soaking overnight they became soft and like new rubber. One had swollen rubber around one of the holes for mounting bolts. This corrected itself after a couple days sitting on the shelf.
Conclusion - this method works. Smaller parts need just a few hours, bigger parts longer. This confirms penetration of the oil, carried by the alcohol, which then evaporates. Some swelling might occur, mostly to very thin sections, but it corrects itself after a couple days of 'rest'. I would suggest a resting period of a few days after treatment anyway. The parts become soft and not changed in size or shape, and stay this way.
Please Log in or Create an account to join the conversation.
Moderators: dcarver220b
Time to create page: 0.202 seconds
