
Kawboy's restoration/conversion of a 1980 KZ13
- biltonjim
-

- Offline
- Platinum Member
-

- Posts: 971
- Thanks: 250
Re: Kawboy's restoration/conversion of a 1980 KZ13
1 year 5 months ago
On the issue of the shells standing proud - I encountered this about fifty years ago, whilst rebuilding a small British Ford engine. Unsure how to proceed, I looked through some old motoring magazines, the type devoted to modifications and uprating performance. In one article, it was stated that the shells should be filed flush with the mating surface of the crankcase / bearing caps. However, I consulted a local precision engineer who had a good reputation for engine machining, and he told me that the shell must be slightly proud of these surfaces when fitted, in order to prevent any movement of the shell in its housing when tightened down. A search of the internet - 'bearing crush' - turns up this very topic. As for the mis-alignment of the oil holes in your shells, are they the originals? Are the shells identical for both upper and lower crankcase halves?
The following user(s) said Thank You: Kawboy
Please Log in or Create an account to join the conversation.
- Kawboy
-
Topic Author
- Offline
- Sustaining Member
-

- Posts: 3243
- Thanks: 1198
Re: Kawboy's restoration/conversion of a 1980 KZ13
1 year 5 months agoI can appreciate the "bearing crush" idea. I think what may be happening here is that the old shell has sprung a bit and not fully sitting in the case, although all of the upper shells are sitting just fine. Wierd .On the issue of the shells standing proud - I encountered this about fifty years ago, whilst rebuilding a small British Ford engine. Unsure how to proceed, I looked through some old motoring magazines, the type devoted to modifications and uprating performance. In one article, it was stated that the shells should be filed flush with the mating surface of the crankcase / bearing caps. However, I consulted a local precision engineer who had a good reputation for engine machining, and he told me that the shell must be slightly proud of these surfaces when fitted, in order to prevent any movement of the shell in its housing when tightened down. A search of the internet - 'bearing crush' - turns up this very topic. As for the mis-alignment of the oil holes in your shells, are they the originals? Are the shells identical for both upper and lower crankcase halves?
As for the oil hole- the bearing shell looks identical to the main bearing shells but the parts manual has different part #'s for the secondary shaft bearings, so maybe the previous owner replaced the plain bearings and could only get the mains and used a set for the secondary shaft??
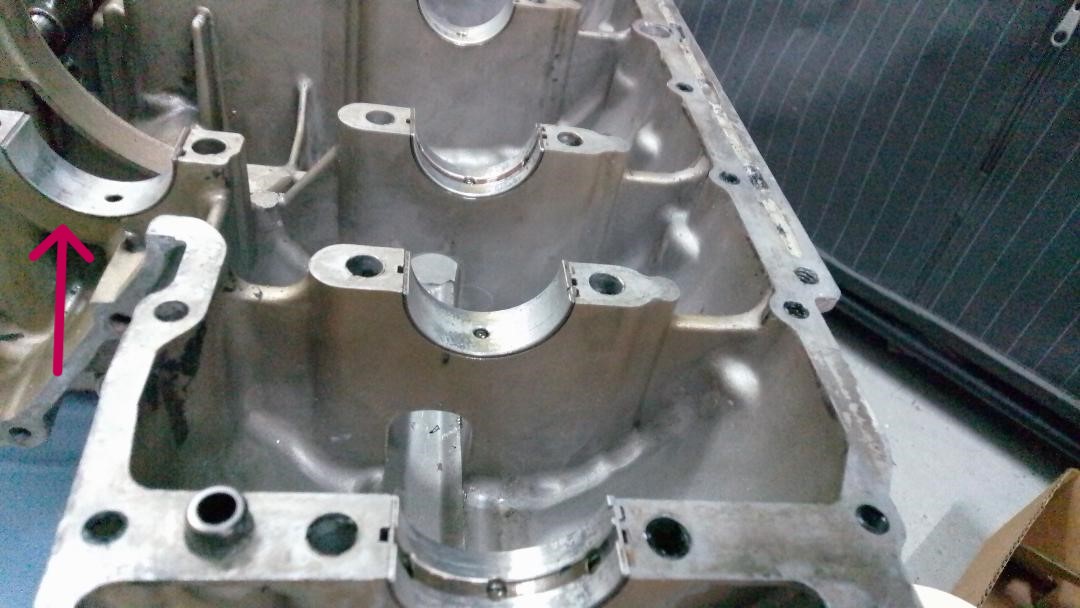
If anyone could post a pic of the lower case half with the bearing shell in it, it would be appreciated.
At the moment I'm at a loss. This set up doesn't follow any normal standard that I know of. Even the fact that the oil gallery is cut into the support in the casing that the shell fits in. That would have system oil pressure pressing on the back side of the bearing shell. Neverr seen anything like it before.
Please Log in or Create an account to join the conversation.
- kawaBCN
-

- Offline
- Platinum Member
-
- Posts: 384
- Thanks: 147
Re: Kawboy's restoration/conversion of a 1980 KZ13
1 year 5 months ago
I don't know if it will be of much help to you but these photos are all I have found of the partition of my crankcase block.

RUN LIKE THE WIND¡¡¡
The following user(s) said Thank You: Kawboy
Please Log in or Create an account to join the conversation.
- Kawboy
-
Topic Author
- Offline
- Sustaining Member
-
- Posts: 3243
- Thanks: 1198
Re: Kawboy's restoration/conversion of a 1980 KZ13
1 year 5 months ago
Thanks for posting KawaBCN. It confirms exactly what I'm looking at and I'm still not sure if it's a sound way to lubricate the secondary shaft.
Please Log in or Create an account to join the conversation.
- Kawboy
-
Topic Author
- Offline
- Sustaining Member
-
- Posts: 3243
- Thanks: 1198
Re: Kawboy's restoration/conversion of a 1980 KZ13
1 year 5 months ago - 1 year 5 months ago
I figured out the oil feed to the outboard secondary shaft bearing and I can honestly say it's the worst design I could have never imagined.
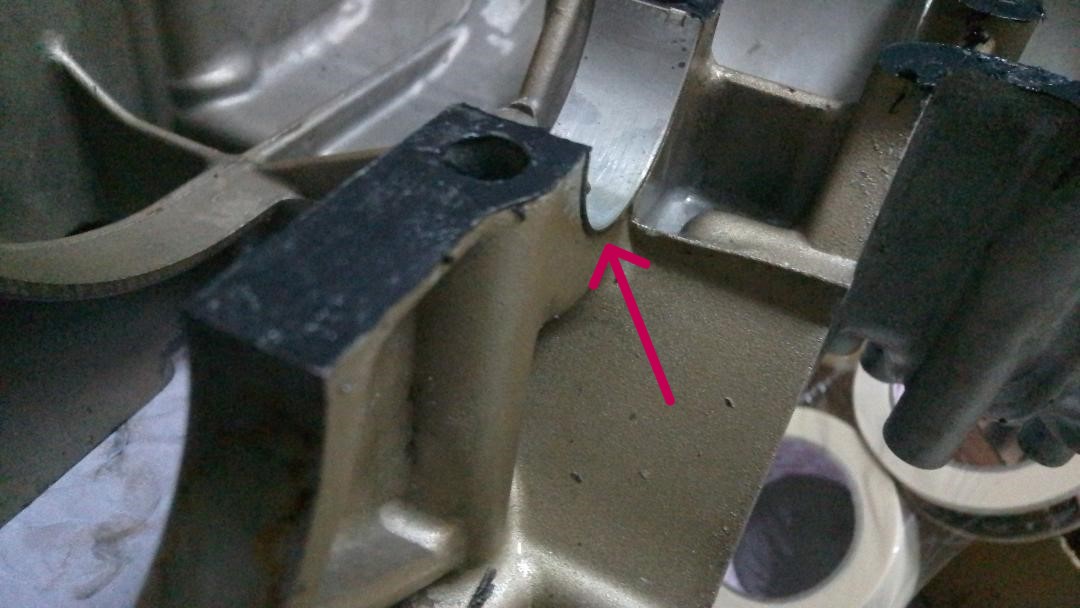
The oil supply is fed through the lower crankcase to the port at the secondary bearing and then channeled around the secondary bearing shell through that channel to a channel in the upper crankcase half to another port that feeds oil to the water pump shaft bearings and the squirt hole that oils the water pump chain. Where that channel in the upper crankcase enters the port, a hole in the upper plain bearing taps off oil supply to lubricate the secondary shaft bearing.
Now that being said, it's critical to not apply excessive crankcase sealant for fear of blocking that supply channel. I would even go so far as to not apply any sealant anywhere near that groove. the only fear here would be an oil leak from the head of the crankcase bolt adjacent to that groove.
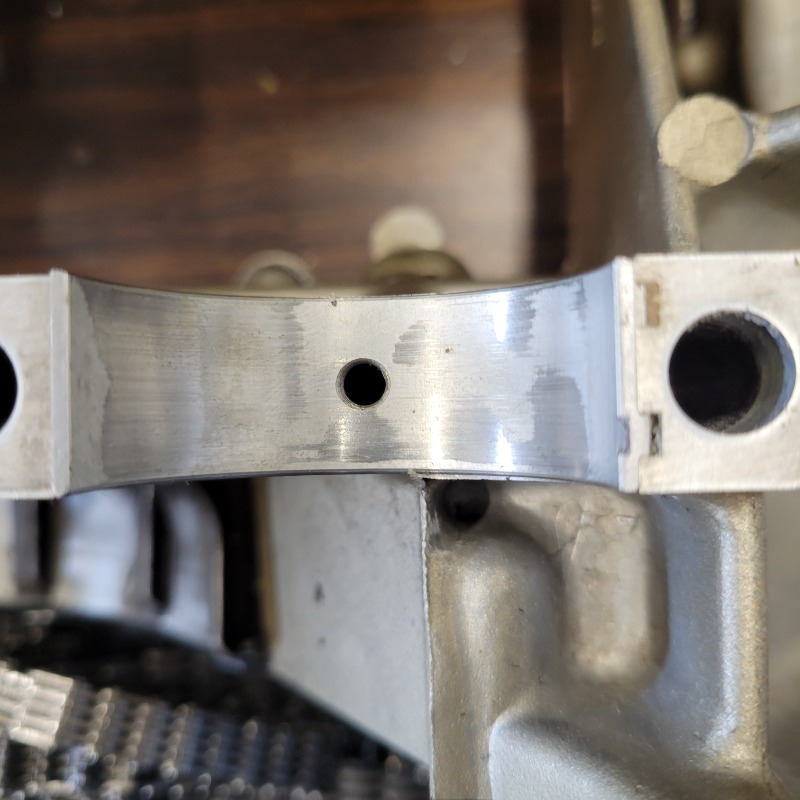
Now looking at the bearing shell in the upper case for the outboard bearing , it appears plugged as well. So where's the oil feed. Comes from the lower crankcase port that also happens to be the oil feed channel that the oil pressure switch is in, so I'm comfortable with that one.
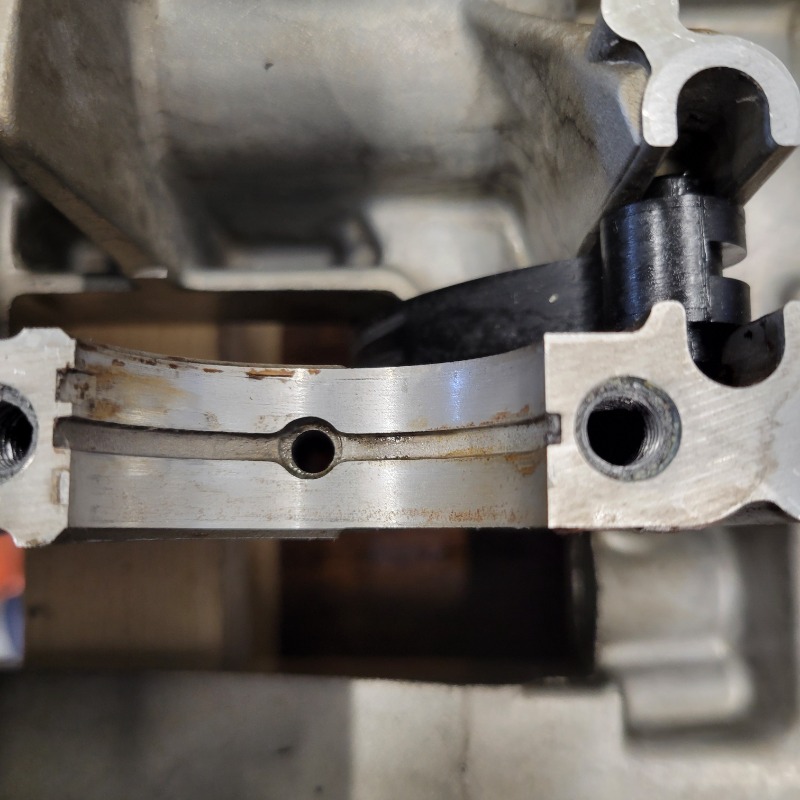
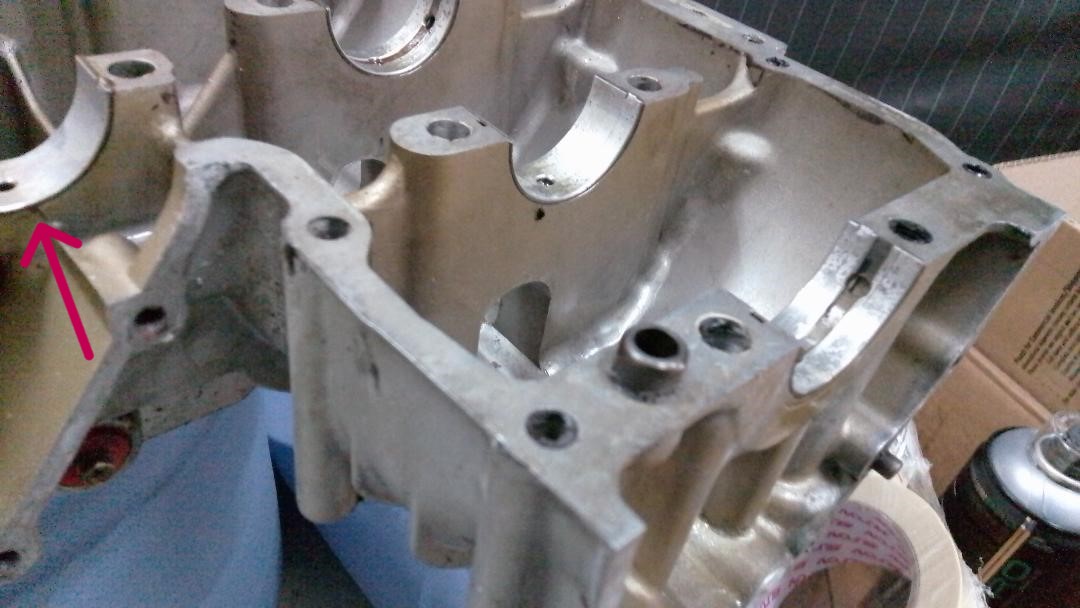
So this is the groove in the upper case half that receives oil from the mating groove in the lower case half and then feeds oil to the secondary shaft bearing and the port that supplies oil to the water pump shaft bearings
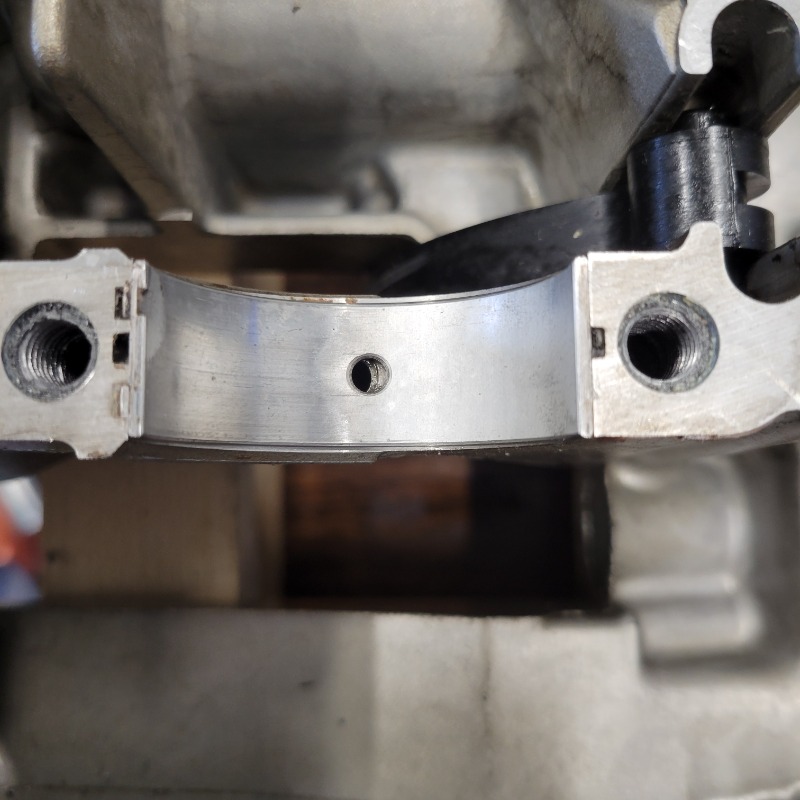
This bearing shell lines up with the oil port. My issue is that too much crankcase half joint sealant could block the groove that's behind the bearing shell and block oil flow to the secondary shaft bearing and the water pump bearings. Really stupid design and it could set you up for failure on a rebuild
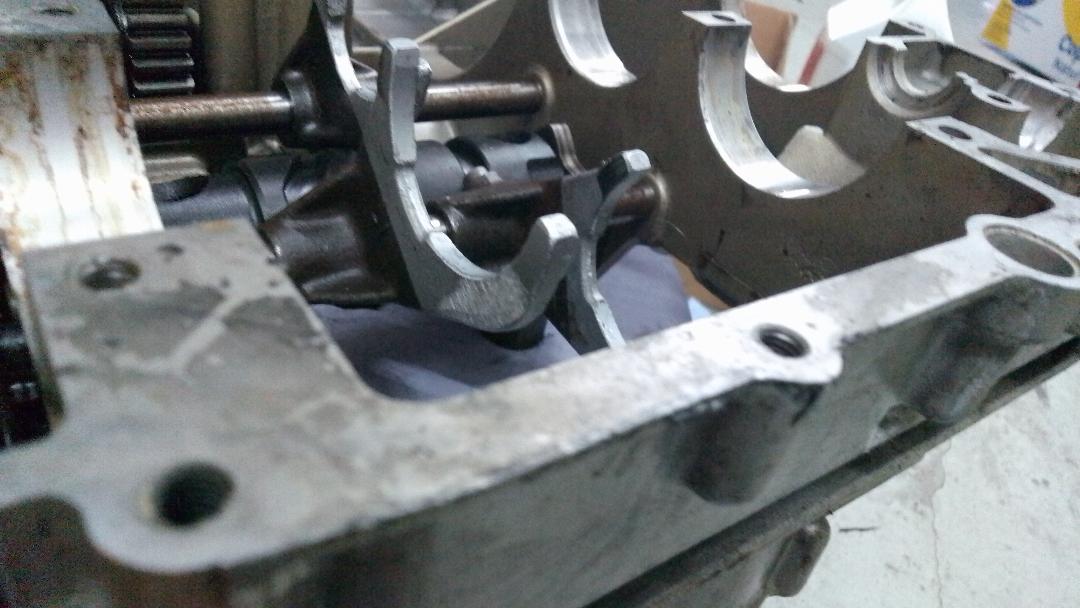
And here is the pic of the secondary shaft outer bearing shell that's lined up with the feed port in the lower crankcase.
The oil supply is fed through the lower crankcase to the port at the secondary bearing and then channeled around the secondary bearing shell through that channel to a channel in the upper crankcase half to another port that feeds oil to the water pump shaft bearings and the squirt hole that oils the water pump chain. Where that channel in the upper crankcase enters the port, a hole in the upper plain bearing taps off oil supply to lubricate the secondary shaft bearing.
Now that being said, it's critical to not apply excessive crankcase sealant for fear of blocking that supply channel. I would even go so far as to not apply any sealant anywhere near that groove. the only fear here would be an oil leak from the head of the crankcase bolt adjacent to that groove.
Now looking at the bearing shell in the upper case for the outboard bearing , it appears plugged as well. So where's the oil feed. Comes from the lower crankcase port that also happens to be the oil feed channel that the oil pressure switch is in, so I'm comfortable with that one.
So this is the groove in the upper case half that receives oil from the mating groove in the lower case half and then feeds oil to the secondary shaft bearing and the port that supplies oil to the water pump shaft bearings
This bearing shell lines up with the oil port. My issue is that too much crankcase half joint sealant could block the groove that's behind the bearing shell and block oil flow to the secondary shaft bearing and the water pump bearings. Really stupid design and it could set you up for failure on a rebuild
And here is the pic of the secondary shaft outer bearing shell that's lined up with the feed port in the lower crankcase.
Last edit: 1 year 5 months ago by Kawboy.
The following user(s) said Thank You: zed_thirteen
Please Log in or Create an account to join the conversation.
- Kawboy
-
Topic Author
- Offline
- Sustaining Member
-
- Posts: 3243
- Thanks: 1198
Re: Kawboy's restoration/conversion of a 1980 KZ13
1 year 5 months ago - 1 year 5 months ago
Got the crankcase back together using the Permatex Ultra Grey Seal . Laid a bead down 1/8" thick and then spread it with a 1/4" artist brush. I think I may have used 1 ounce of the Ultra Grey sealant.
Next, I decided to clean / inspect the clutch . 6 of the fiber plates were stuck to the steel plates and I had to tap them to break free. Light surface rust on the steel plates so I cleaned them off with 400 wet /dry sand paper.
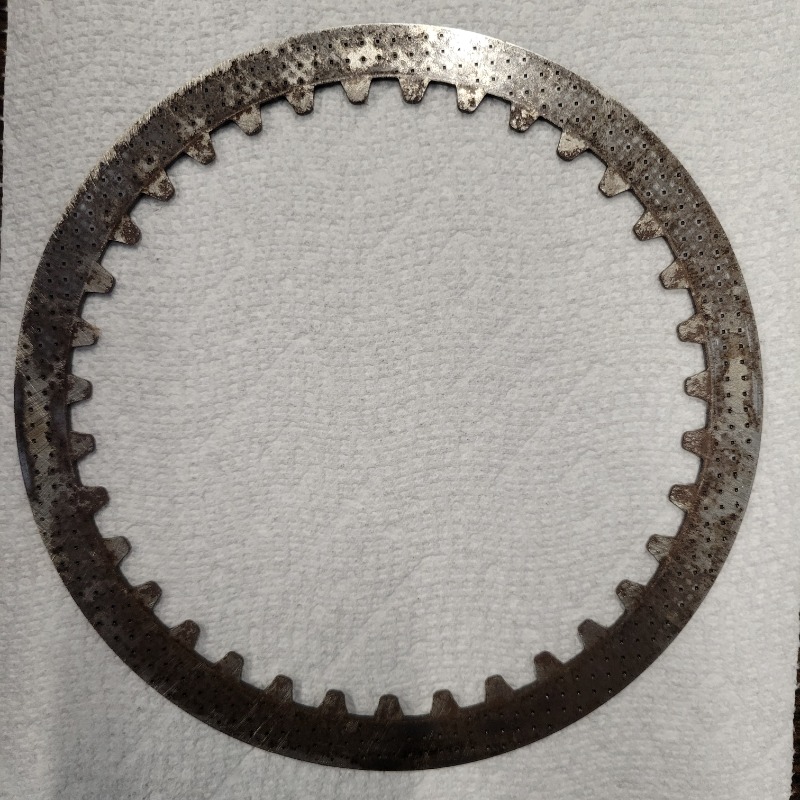
What they looked like when removed
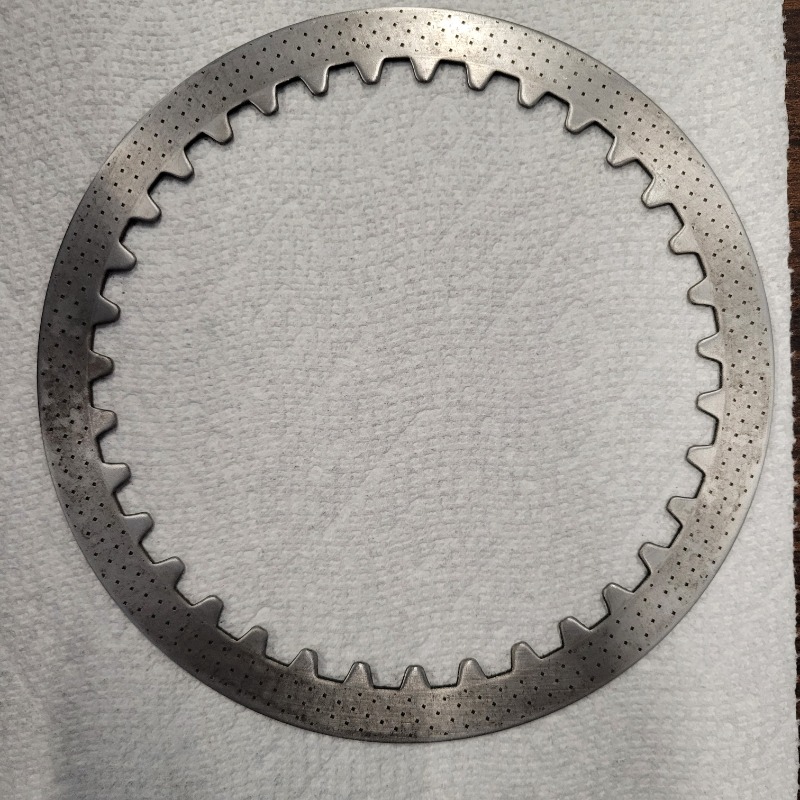
After cleaning with the 400 wet / dry sandpaper
I don't like the way the steel plates were stamped leaving a sharp edge on the one side that acts like a chisel face and can stop the steel discs from sliding on the hub causing a dragging clutch, so out comes a flat jewelers file to clean off the burrs.
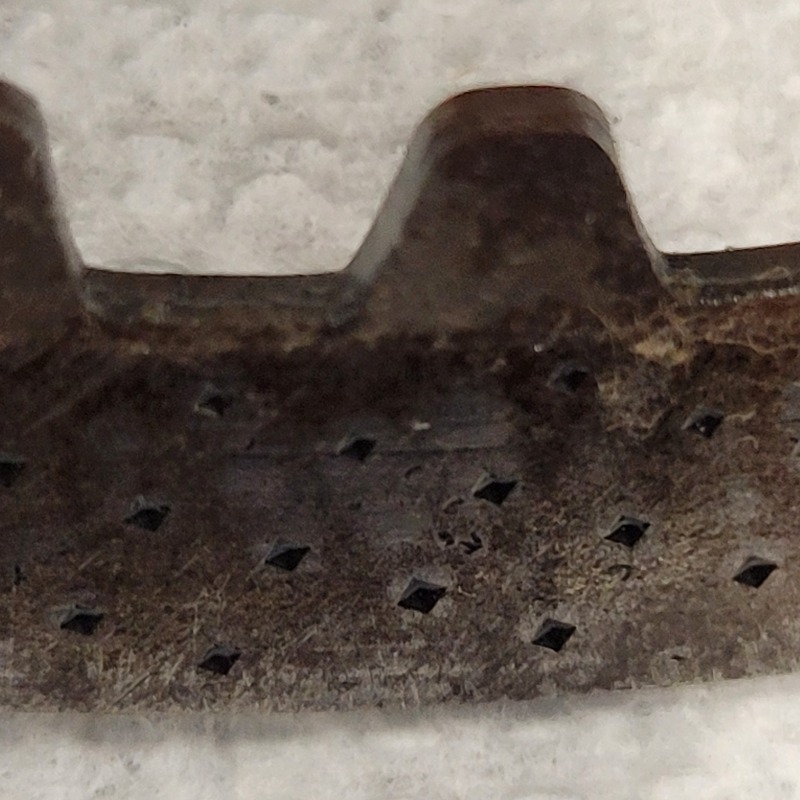
Sharp edge on drive tangs
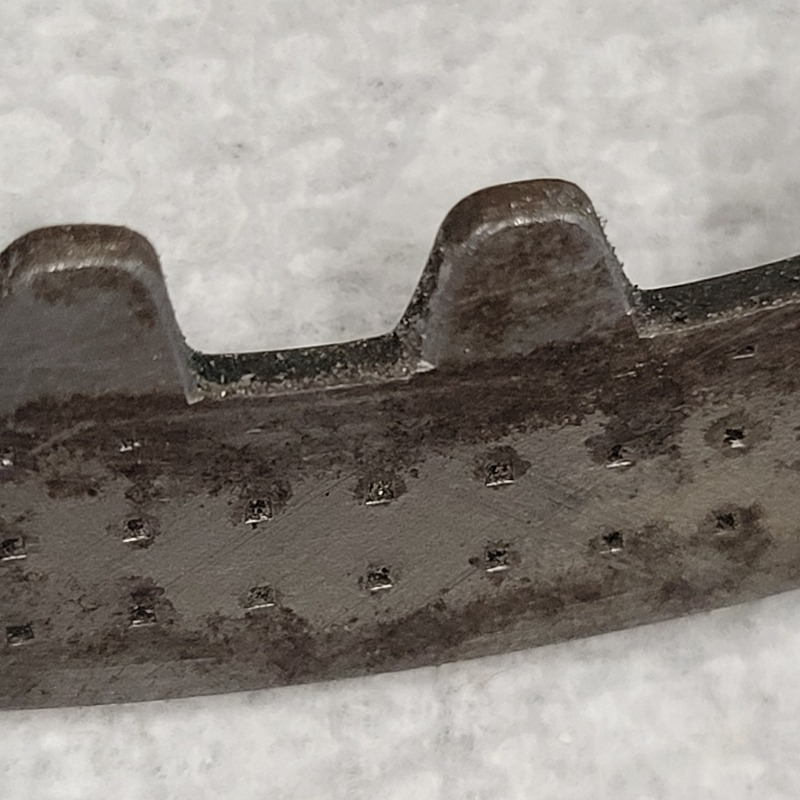
Tangs after a light touch with a jeweler's file
Also checked the fiber plates because they seemed thin. The service limit is 3.2mm and these are 3.4mm. I see that some of the aftermarket clutch plates are listed at 3.4mm thickness
Before I order new plates - Has anyone measured the thickness of new fiber plates ??
For the record - 9 fiber friction plates and
8 Steel plates
Next, I decided to clean / inspect the clutch . 6 of the fiber plates were stuck to the steel plates and I had to tap them to break free. Light surface rust on the steel plates so I cleaned them off with 400 wet /dry sand paper.
What they looked like when removed
After cleaning with the 400 wet / dry sandpaper
I don't like the way the steel plates were stamped leaving a sharp edge on the one side that acts like a chisel face and can stop the steel discs from sliding on the hub causing a dragging clutch, so out comes a flat jewelers file to clean off the burrs.
Sharp edge on drive tangs
Tangs after a light touch with a jeweler's file
Also checked the fiber plates because they seemed thin. The service limit is 3.2mm and these are 3.4mm. I see that some of the aftermarket clutch plates are listed at 3.4mm thickness
Before I order new plates - Has anyone measured the thickness of new fiber plates ??
For the record - 9 fiber friction plates and
8 Steel plates
Last edit: 1 year 5 months ago by Kawboy.
The following user(s) said Thank You: biltonjim
Please Log in or Create an account to join the conversation.
Moderators: dcarver220b
Time to create page: 0.196 seconds