
1981 KZ1300 A3 make over
- StanG
-
 Topic Author
- Offline
- Banned
-

- Posts: 1987
- Thanks: 237
Please Log in or Create an account to join the conversation.
- StanG
-
Topic Author
- Offline
- Banned
-
- Posts: 1987
- Thanks: 237
Re: 1981 KZ1300 A3 make over
6 years 5 months ago
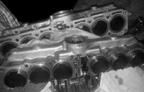
The package from Paul arrived. The brackets - hurray! Next is to make plans how to approach the transplantation. And that includes making a decision about removing the engine from the frame or not.
Please Log in or Create an account to join the conversation.
- StanG
-
Topic Author
- Offline
- Banned
-
- Posts: 1987
- Thanks: 237
Re: 1981 KZ1300 A3 make over
6 years 5 months ago - 6 years 5 months ago
It's going slow because.. I just don't spend much time on this project. So, not much of anything interesting to share. But I have brought the radiator back in shape.
It was brown inside, so flashed it with water a few times, then with radiator cleaning solution. It took a couple applications and the inside is clean, except for some minimal superficial discoloration in detail.
Next outside cleaning with sand paper and wire brush, then all painted flat black.
The two chrome plated guards were perfect on the outside, but rusty on the inside. First I used white vinegar to address the worst. Then wire brush, and some more vinegar (it did not have any adverse effects on the chrome). After all was rust free, except for the tight spots and some hard to get with a brush places, I used Metal Rescue overnight and the guards came out completely rust free. Since the inside is not visible, this time I chose to paint it with a zinc rich paint instead of chrome plating them again. This paint has great reviews, with people saying is durable for years even in marine environment. I think this will do the trick and keep the guards clean for a very long time, even if ridden in rain.
0ne of the reflectors had a very badly rusted nut, and the threaded part of the reflector with which you attach it to the guards was turning. I had to use a Dremel tool to remove the nut, then refresh the threads. With a new nut all is like new again.
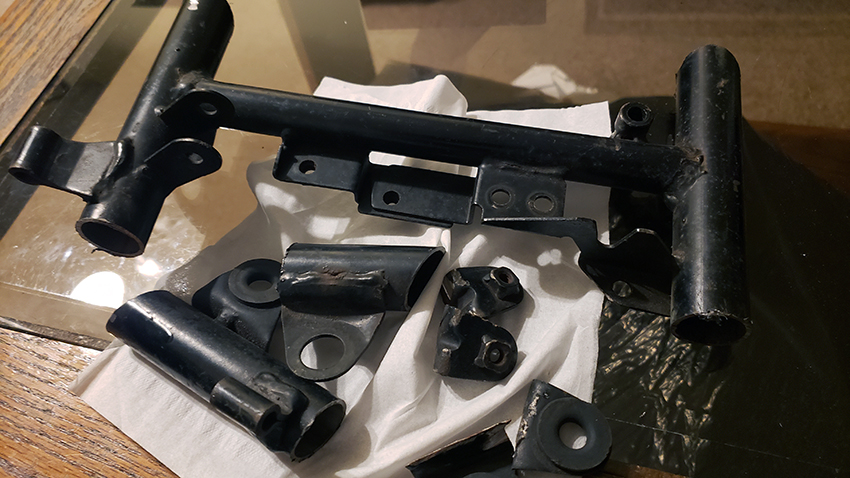
The grill is not from this radiator but just a spare grill I had. It is painted with a zinc rich paint and it actually looks good, so I am leaving it as is for now. The original grill which came with this radiator I will have painted gloss black and keep it as spare good stock looking grill. At one point in the future I might chrome plate the grill in the photo, but since it does not look bad as is, it's not a priority. There are a few other areas on the bike that need refreshment so I will need the funds for that. In terms of esthetics, the two big things to do are the clutch cover and the right engine cover, ast they are badly pitted with chrome peeling off.
The grill mounting nuts are not perfect and pretty, but they keep the grill in place. These I will either have plated, painted or if I can find stainless nuts matching these in design, I will have them replaced. Al, the hose clamps will be most likely replaced with stainless steel or I will clean these up further and re-use.
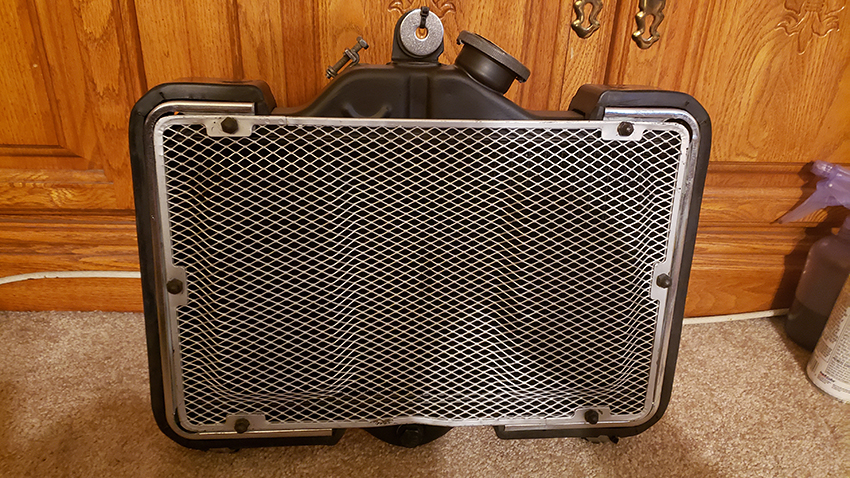
I am very excited because the fins on this radiator are pretty much perfect on both sides.
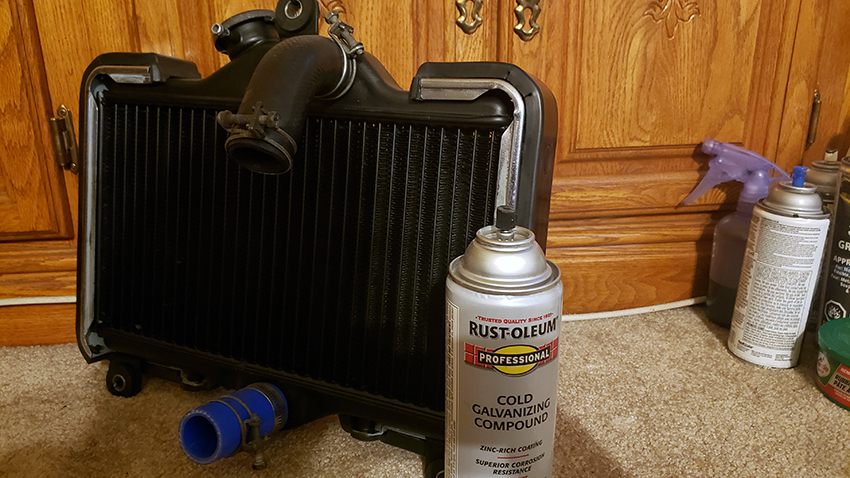
After running the engine again, I will do the radiator flush again. The temperature and the solution will work on the whole cooling system, especially all the passages within the engine block. So far the block and the head were flushed with water multiple times, until all that was coming out was just clean water.
It was brown inside, so flashed it with water a few times, then with radiator cleaning solution. It took a couple applications and the inside is clean, except for some minimal superficial discoloration in detail.
Next outside cleaning with sand paper and wire brush, then all painted flat black.
The two chrome plated guards were perfect on the outside, but rusty on the inside. First I used white vinegar to address the worst. Then wire brush, and some more vinegar (it did not have any adverse effects on the chrome). After all was rust free, except for the tight spots and some hard to get with a brush places, I used Metal Rescue overnight and the guards came out completely rust free. Since the inside is not visible, this time I chose to paint it with a zinc rich paint instead of chrome plating them again. This paint has great reviews, with people saying is durable for years even in marine environment. I think this will do the trick and keep the guards clean for a very long time, even if ridden in rain.
0ne of the reflectors had a very badly rusted nut, and the threaded part of the reflector with which you attach it to the guards was turning. I had to use a Dremel tool to remove the nut, then refresh the threads. With a new nut all is like new again.
The grill is not from this radiator but just a spare grill I had. It is painted with a zinc rich paint and it actually looks good, so I am leaving it as is for now. The original grill which came with this radiator I will have painted gloss black and keep it as spare good stock looking grill. At one point in the future I might chrome plate the grill in the photo, but since it does not look bad as is, it's not a priority. There are a few other areas on the bike that need refreshment so I will need the funds for that. In terms of esthetics, the two big things to do are the clutch cover and the right engine cover, ast they are badly pitted with chrome peeling off.
The grill mounting nuts are not perfect and pretty, but they keep the grill in place. These I will either have plated, painted or if I can find stainless nuts matching these in design, I will have them replaced. Al, the hose clamps will be most likely replaced with stainless steel or I will clean these up further and re-use.
I am very excited because the fins on this radiator are pretty much perfect on both sides.
After running the engine again, I will do the radiator flush again. The temperature and the solution will work on the whole cooling system, especially all the passages within the engine block. So far the block and the head were flushed with water multiple times, until all that was coming out was just clean water.
Last edit: 6 years 5 months ago by StanG.
Please Log in or Create an account to join the conversation.
- StanG
-
Topic Author
- Offline
- Banned
-
- Posts: 1987
- Thanks: 237
Re: 1981 KZ1300 A3 make over
6 years 5 months ago - 6 years 5 months ago
Another small update from last week. It took quite a bit of shuffling, but after laying out all the different parts for the turn signals I assembled a complete set. They didn't look this good of course! I had to clean and sand all the bodies, then painted them black. Made sure the electrical parts were right and moved freely, so more fiddling with connectors and wires. Then matching the stock bolts, as I don't have any stainless steel handy - it's all good. I like the stock look. All finished, and 100% stock. All wires including the bulbs correct, and the collars spotless chrome! Actually, some parts are brand new NOS Kawasaki. Great to have these crucial parts of the bike nice and ready. THey are actually looking better than those on my first bike!

Last edit: 6 years 5 months ago by StanG.
Please Log in or Create an account to join the conversation.
- StanG
-
Topic Author
- Offline
- Banned
-
- Posts: 1987
- Thanks: 237
Re: 1981 KZ1300 A3 make over
6 years 5 months ago - 6 years 5 months ago
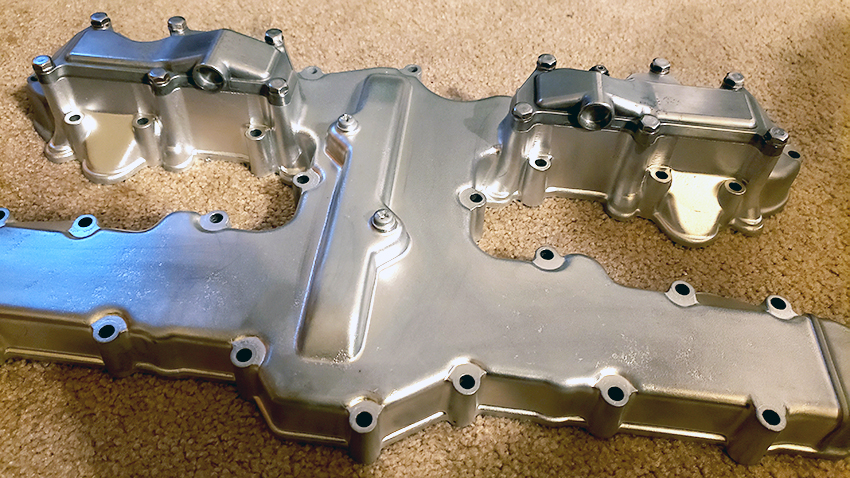
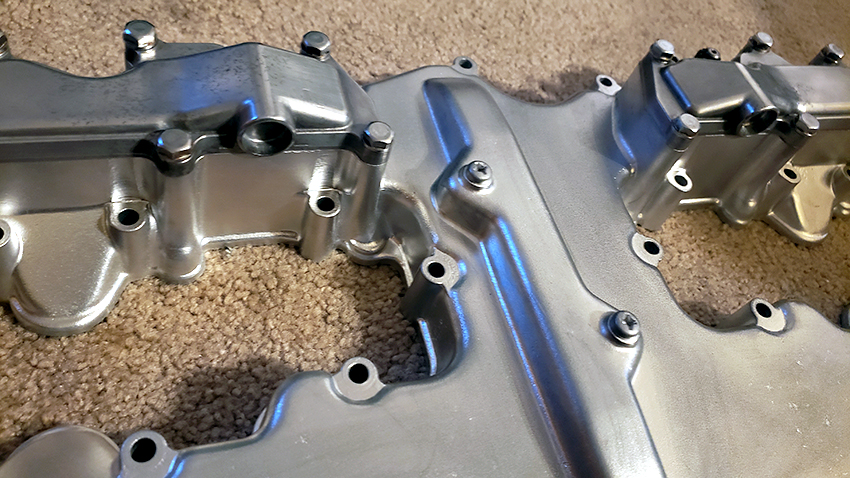
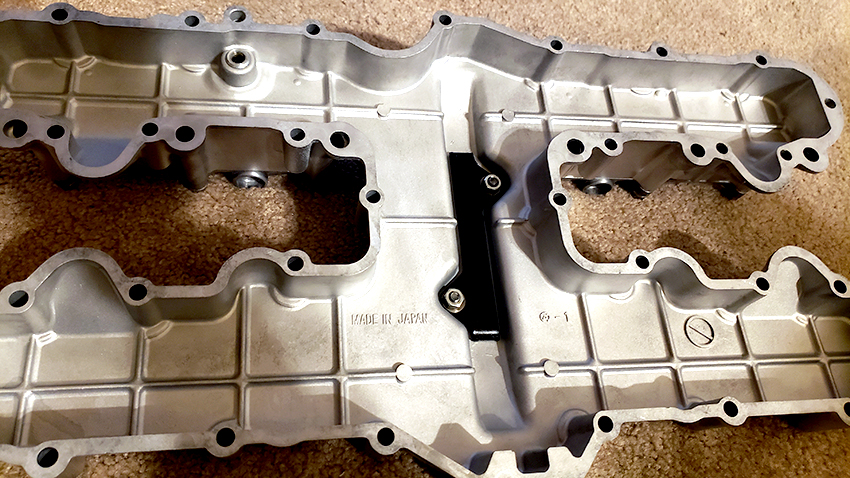
Not a final product, but close to it. All the bare aluminum parts will be polished way more, and this is a spare cover anyway. I will revisit what I have, and the original that came off this bike still needs cleaning to see what it is, then I will choose the one to use. It's all about pitting. This one, is actually really good. With photos, it's all about lighting and shadows.
PS. Spare does not mean disposable. It's always \ part of a bigger picture. Components that I source for the #2 or #3 KZ1300 are better at times as those already on #1, soI need to keep them back to at one point switch. It is pretty simple, but physically lots of work just to replace one spacer.
PS. Spare does not mean disposable. It's always \ part of a bigger picture. Components that I source for the #2 or #3 KZ1300 are better at times as those already on #1, soI need to keep them back to at one point switch. It is pretty simple, but physically lots of work just to replace one spacer.
Last edit: 6 years 5 months ago by StanG.
Please Log in or Create an account to join the conversation.
- StanG
-
Topic Author
- Offline
- Banned
-
- Posts: 1987
- Thanks: 237
Re: 1981 KZ1300 A3 make over
6 years 4 months ago - 6 years 4 months ago
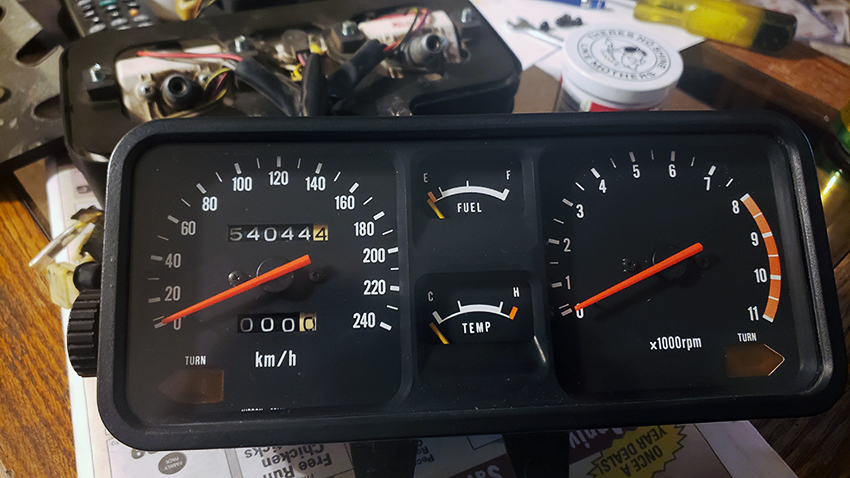
The cluster is ready - with beautiful new and straight indicators from Laurie. Awesome. The 'eyelashes' are gone! ")
The odometer - well, it's not the original mileage, and that bothers me a little. But what the hell, I have no clue about the original mileage as the bike came with aftermarket who knows what gauges, with 17k km on them. Judging by the look of the camshafts, it must be a low kilometers bike. So, it does not matter much as long as I keep the track of it. Most important, a stock cluster is good and ready to be mounted. 0ne burnt out bulb changed
Very happy to have a good speedo in kilometers! Kind of inconvenient always looking at the miles, but this will change with my numero dos KZ1300.
Last edit: 6 years 4 months ago by StanG.
Please Log in or Create an account to join the conversation.
Moderators: dcarver220b
Time to create page: 0.213 seconds