
1981 KZ1300 A3 make over
- StanG
-
 Topic Author
- Offline
- Banned
-

- Posts: 1987
- Thanks: 237
1981 KZ1300 A3 make over
6 years 10 months ago - 6 years 10 months ago
Following my total rebuild and resurrection of a 1982 KZ1300 A4, which I bet many will know about and remember, I was left with spare parts. Some dirty, some nice, some I thought I'd never use and not worth keeping. I also had some substantial engine parts, including a really good cylinder block, cylinder head, covers, valves, pistons, etc. etc. I came across a complete and in a really good shape transmission on Ebay for a great deal at $35. I had to get it. That's how I started building a complete engine from scratch.
It was not a very serious endeavor at first. Nothing more than an open ended fun learning experience. Then I found a clutch and an affordable empty crankcase. A set of forks in great shape came along, and there I was sitting with a serious plan in mind this time - I was set on building a complete KZ1300 from scratch. A sister to the older brother.
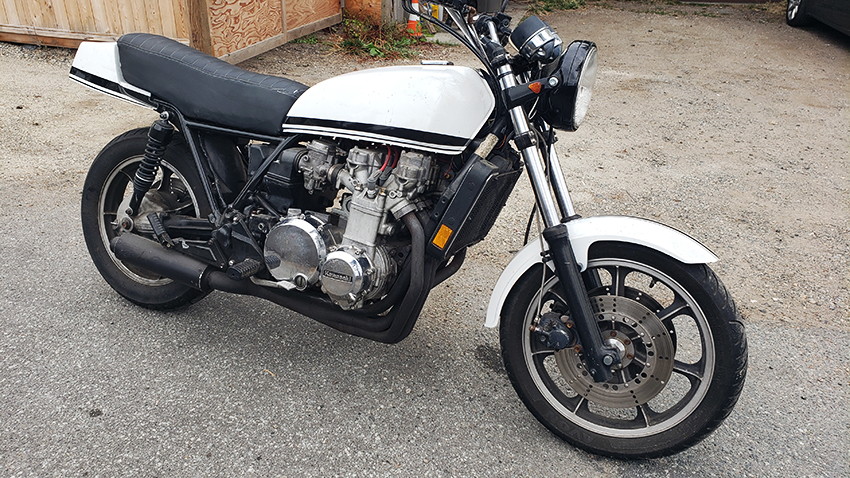
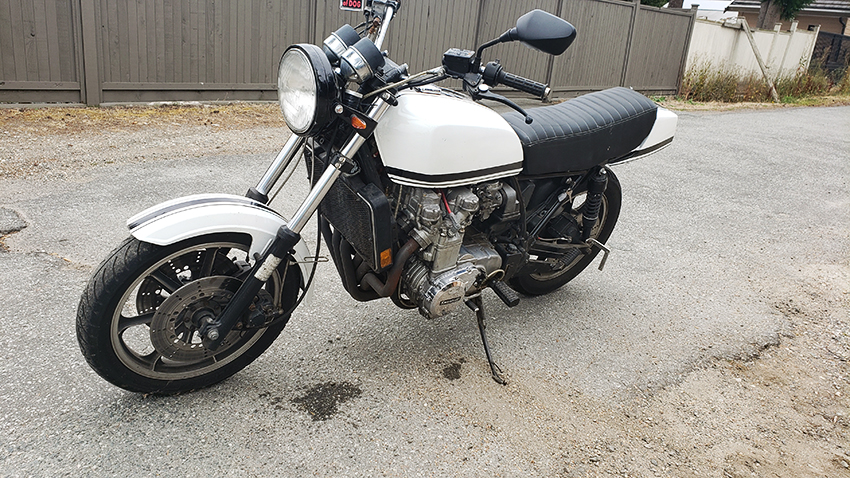
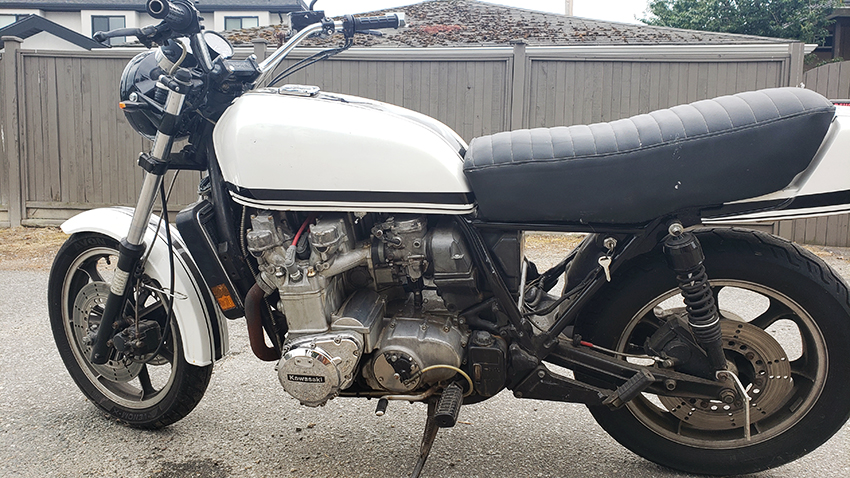
I've been collecting small parts, bits and pieces, cleaning, some components rebuilt - some waiting for rebuild kits. Eventually, well on the way to complete a bike except one crucial missing component - it's skeleton. For a motorcycle, a frame that is. I've been looking for a titled frame for quite some time, with no luck. Then, a few months ago, I came across a bike that was not just a titled frame, but it had wheels, a gas tank, and a running engine! It was made into a 'cafe racer', and I didn't want it when I went to see it. Too many parts missing. Then, recently by coincidence, I ran into that seller. He said he wants to get rid of it, and offered me the bike for a fraction of the original price. It made me think again. It had all what I've been looking for - a titled frame, wheels (even new tires!), and as a bonus - that running engine! Most importantly, it was local. No shipping, no border crossings, no paperwork, no truck rentals. It had enough on those two wheels to get my money back had I chosen to part it out and keep what I need. I think you already know what direction I decided to go with this bike - bring it back to it's stock original glory!
I paid for the bike and rode it home without issues. And so it's story begins. The engine I've been building is almost complete, but it will stay quiet for now where it is. I am going to check the one already in the bike, clean the carbs, do tune up, and since it's quite clean (and the frame is clean and rust free as well), it will stay with the bike. It's also the original engine for the frame. There is no need to remove it or take apart. The rest - all the spare parts I have will go on the bike. Tank and the rest of the body will get painted. Hopefully without many hiccups, I will turn this beast into a beautiful stock Kawasaki KZ1300.
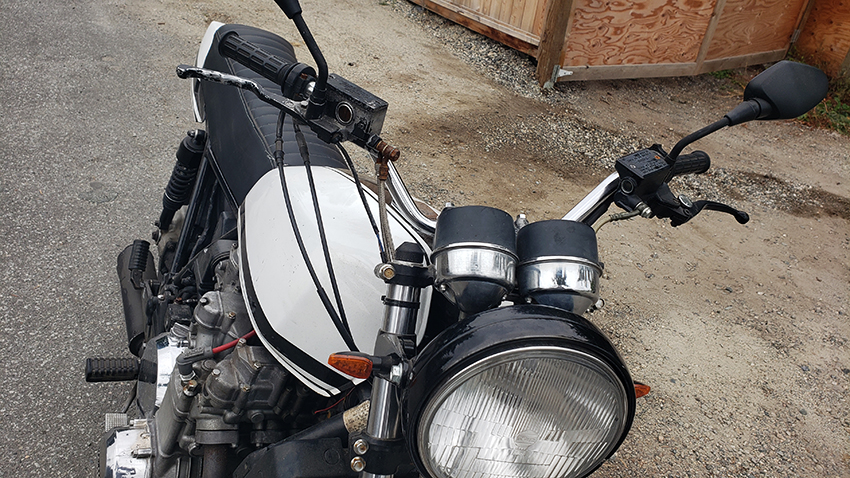
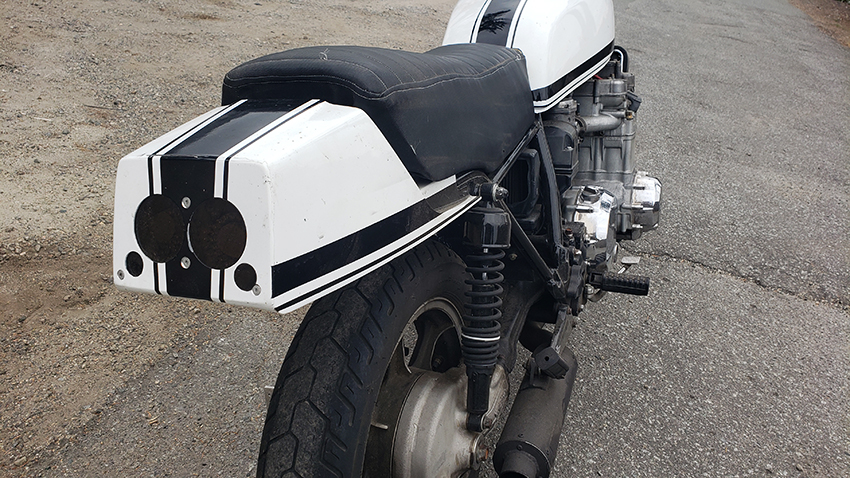
After this long introduction, it's time for a few photos.
It was not a very serious endeavor at first. Nothing more than an open ended fun learning experience. Then I found a clutch and an affordable empty crankcase. A set of forks in great shape came along, and there I was sitting with a serious plan in mind this time - I was set on building a complete KZ1300 from scratch. A sister to the older brother.
I've been collecting small parts, bits and pieces, cleaning, some components rebuilt - some waiting for rebuild kits. Eventually, well on the way to complete a bike except one crucial missing component - it's skeleton. For a motorcycle, a frame that is. I've been looking for a titled frame for quite some time, with no luck. Then, a few months ago, I came across a bike that was not just a titled frame, but it had wheels, a gas tank, and a running engine! It was made into a 'cafe racer', and I didn't want it when I went to see it. Too many parts missing. Then, recently by coincidence, I ran into that seller. He said he wants to get rid of it, and offered me the bike for a fraction of the original price. It made me think again. It had all what I've been looking for - a titled frame, wheels (even new tires!), and as a bonus - that running engine! Most importantly, it was local. No shipping, no border crossings, no paperwork, no truck rentals. It had enough on those two wheels to get my money back had I chosen to part it out and keep what I need. I think you already know what direction I decided to go with this bike - bring it back to it's stock original glory!
I paid for the bike and rode it home without issues. And so it's story begins. The engine I've been building is almost complete, but it will stay quiet for now where it is. I am going to check the one already in the bike, clean the carbs, do tune up, and since it's quite clean (and the frame is clean and rust free as well), it will stay with the bike. It's also the original engine for the frame. There is no need to remove it or take apart. The rest - all the spare parts I have will go on the bike. Tank and the rest of the body will get painted. Hopefully without many hiccups, I will turn this beast into a beautiful stock Kawasaki KZ1300.
After this long introduction, it's time for a few photos.
Last edit: 6 years 10 months ago by StanG.
Please Log in or Create an account to join the conversation.
- StanG
-
Topic Author
- Offline
- Banned
-
- Posts: 1987
- Thanks: 237
Re: 1981 KZ1300 A3 make over
6 years 10 months ago - 6 years 10 months ago
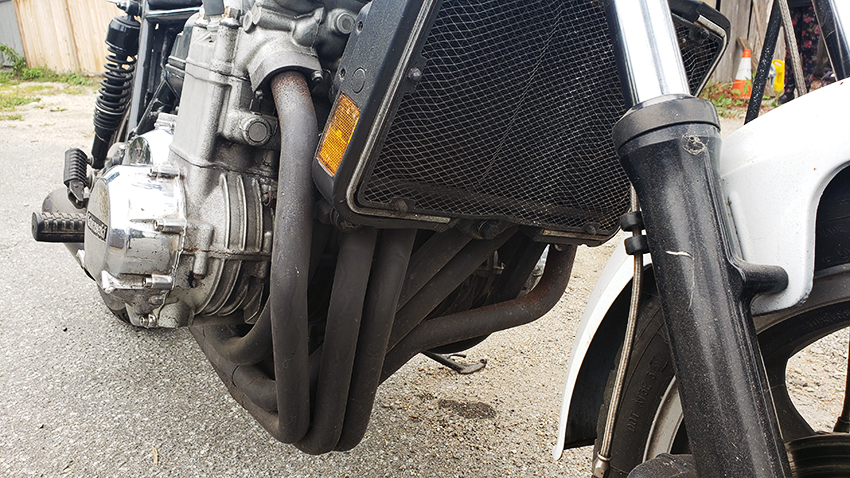
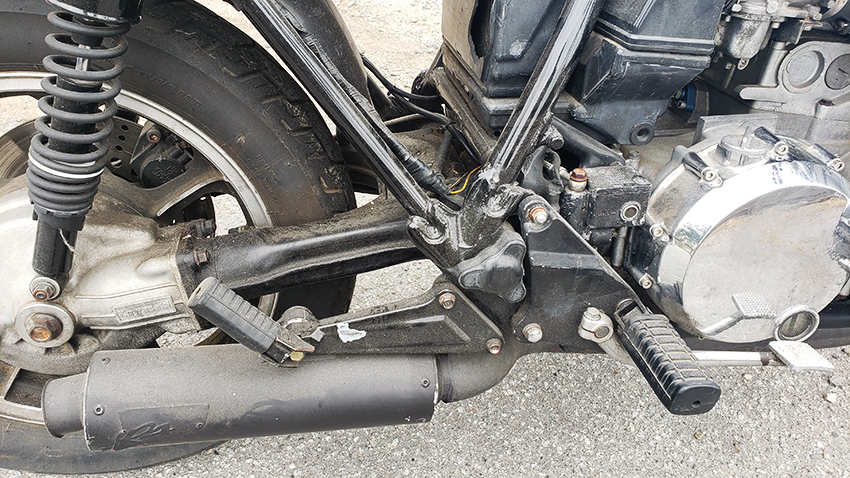
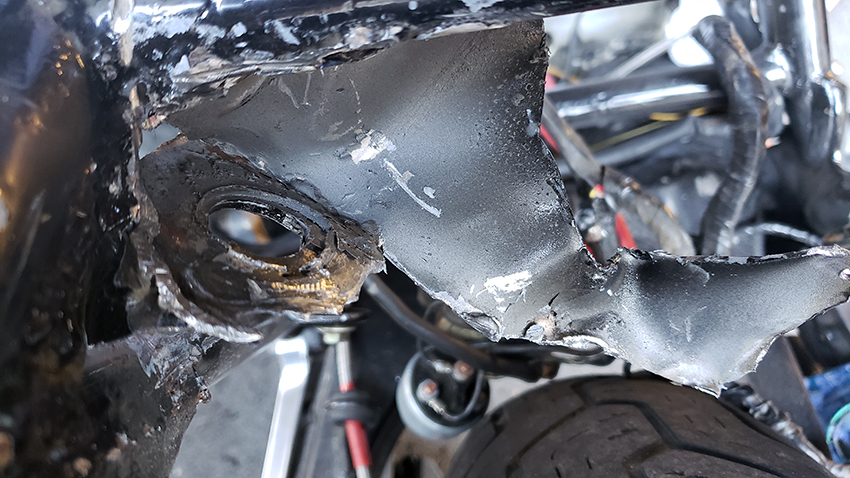
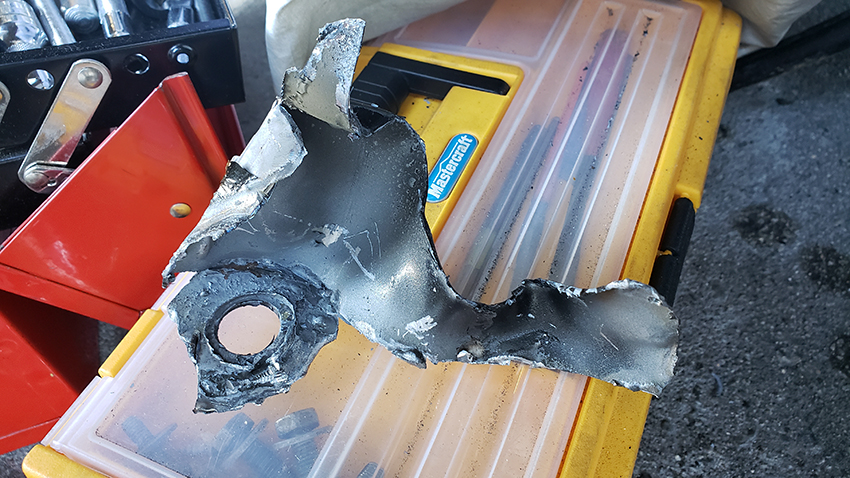
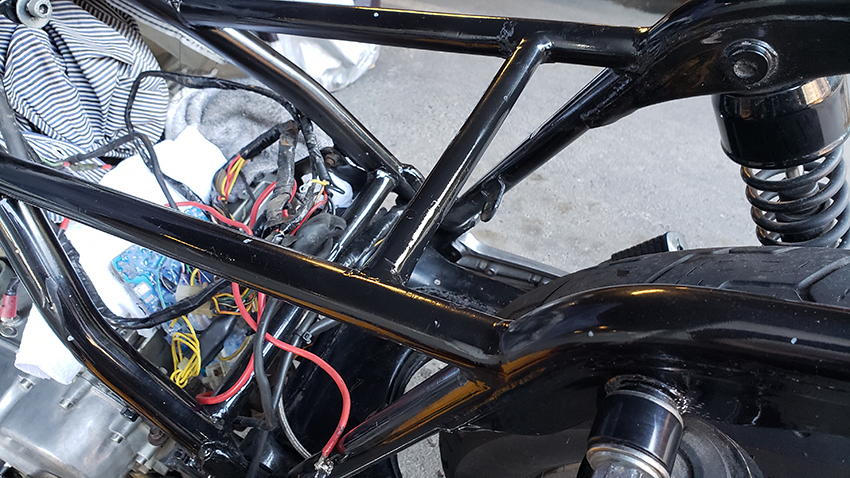
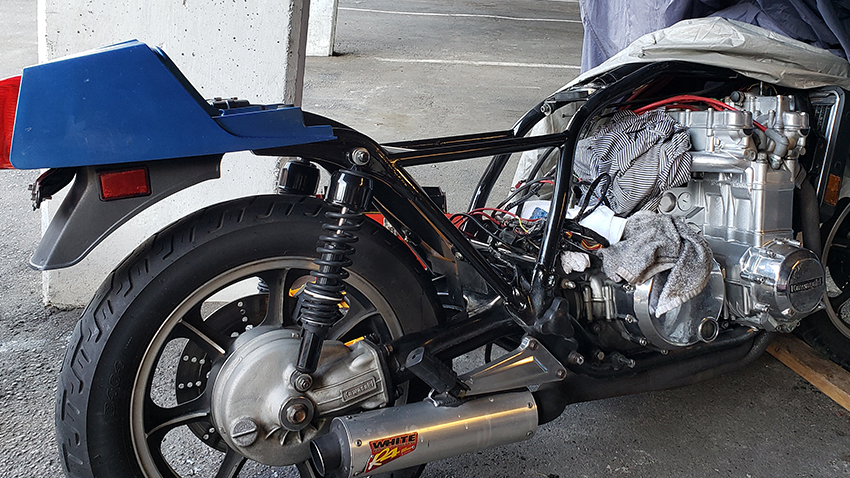
Getting right to the project, the photos describe very well what I am facing. The photo below shows a big, literally central, part of it - a see through void with ALL the mounting brackets missing! The rear turn signal brackets were cut off as well. This is the biggest obstacle so far - fabricating or getting those brackets from someone who himself is customizing their bike and doesn't need them. I've already talked to Paul and might be getting some bits from him as he progresses with work on his bike. But if anyone any of has those handy - please don't throw them in a bin! I'll take them and give them a new life welded to this bike. Thank you in advance.
Last edit: 6 years 10 months ago by StanG.
Please Log in or Create an account to join the conversation.
- StanG
-
Topic Author
- Offline
- Banned
-
- Posts: 1987
- Thanks: 237
Re: 1981 KZ1300 A3 make over
6 years 10 months ago - 6 years 10 months ago
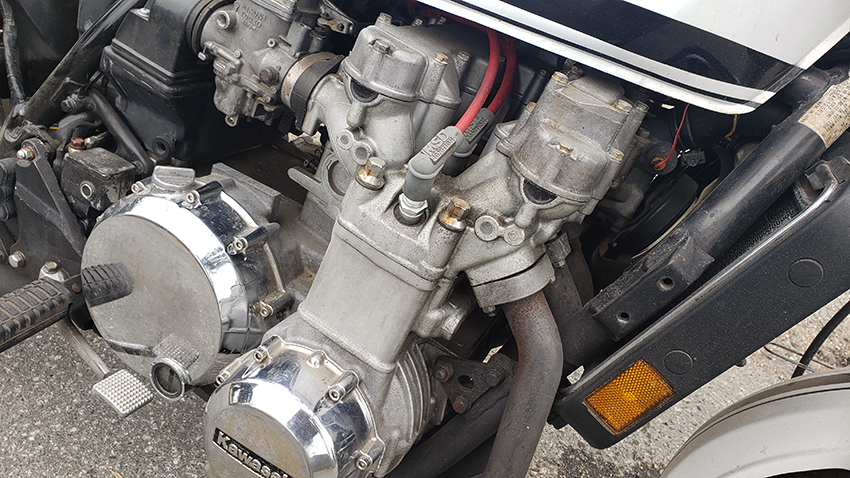
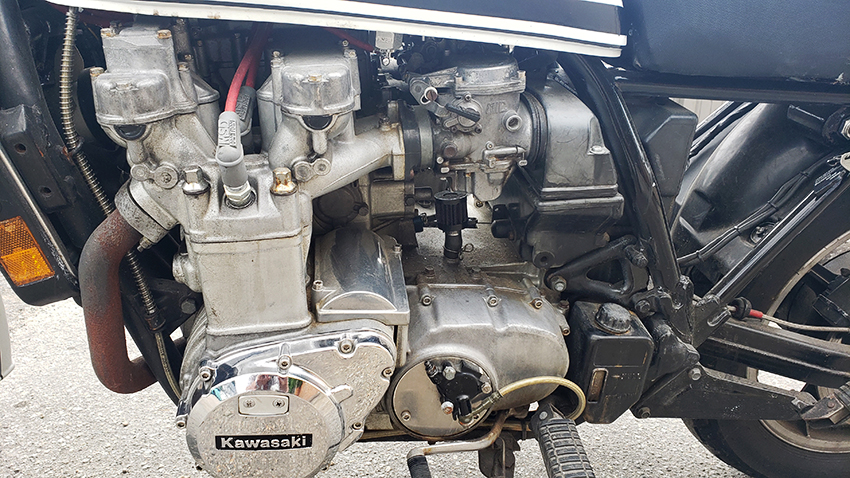
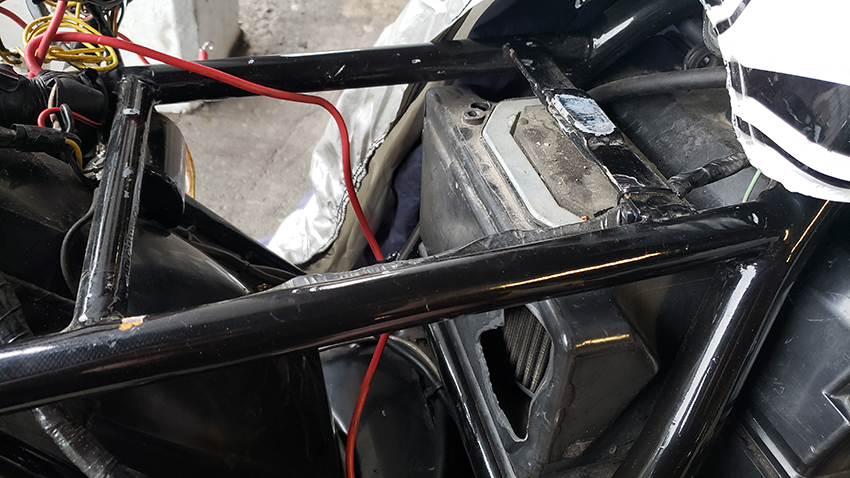
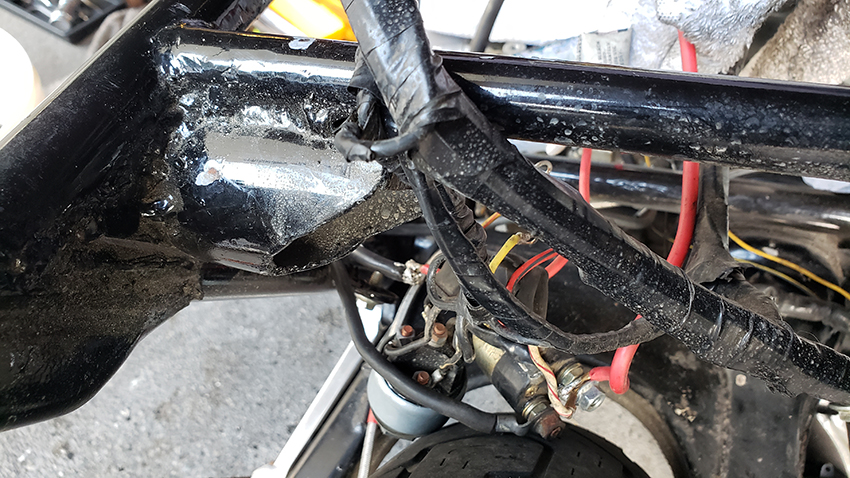
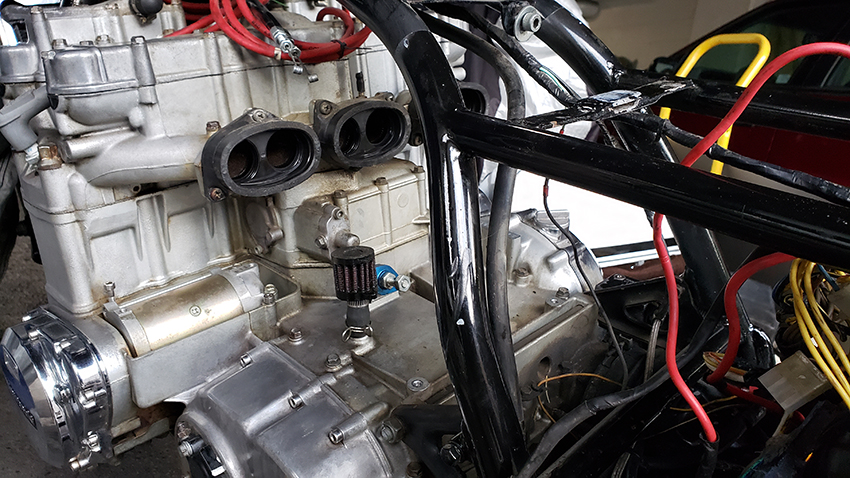
At this stage, it is mainly clean up and prep work. Starting with rear of the bike, the first thing is to get the wiring out of the way from the rear of the bike - everything and anything electric had been removed from the mid section of the bike and stuffed into the modified tail section.
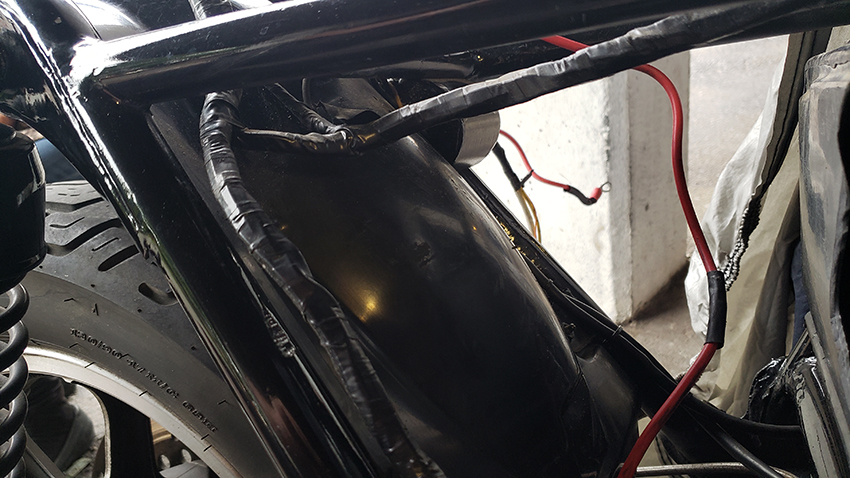
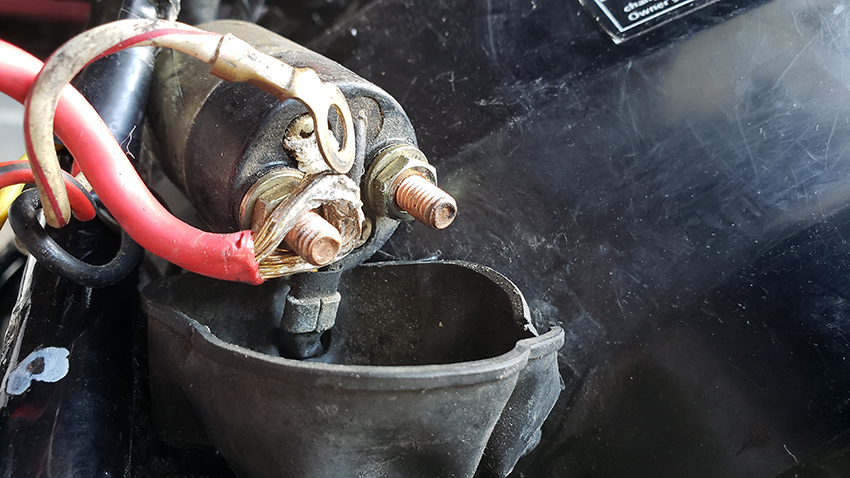
Removing and disconnecting the solenoid.
It's shoved between the fender, the frame and the ignition container and taped the with electrical tape. Just to get that tape out of the way wasn't easy!
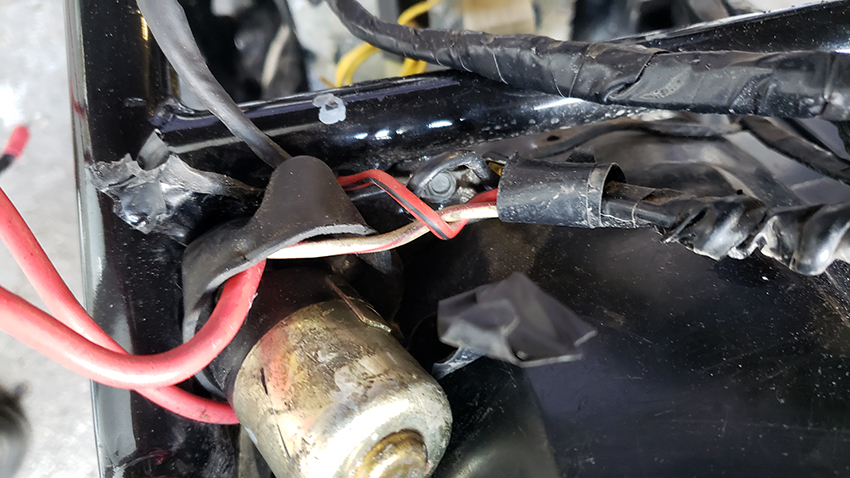
All sorts of ground literally 'screwed' - to the frame.
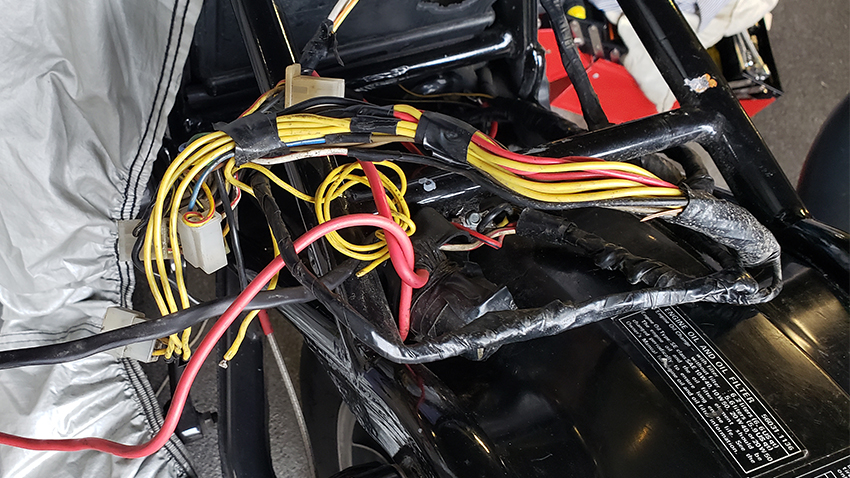
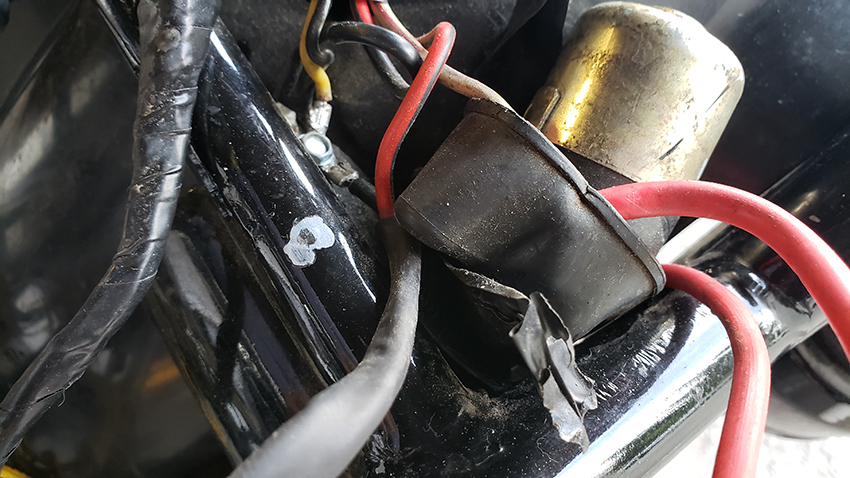
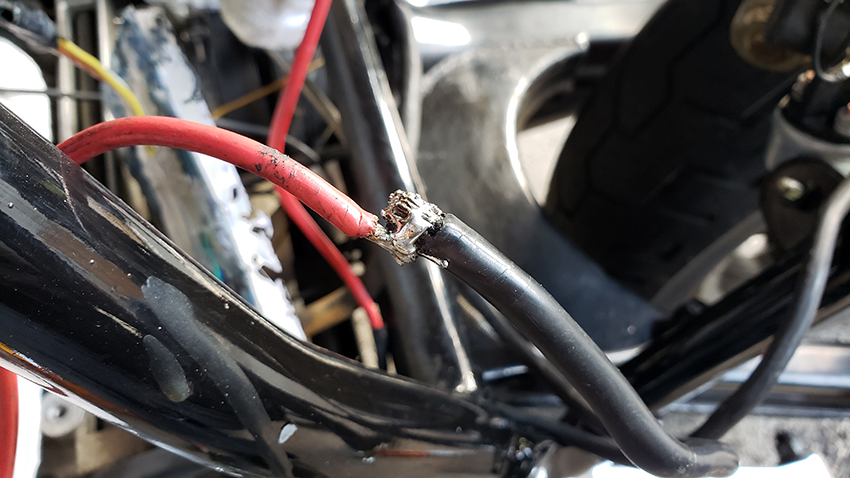
The ground and positive to the battery (there is a really small one cramped into the modified rear cowl) were extended. In quite a horrible way. There will be lots of work bringing the harness to what it should be. No wonder the bike had some cranking, especially when hot, problems! And who knows what the starter looks like inside. Judging by the state of other components, how 'half-assed' they were put together and maintained, everything has to be checked to eliminate any compound negative effect on how the bike ran.
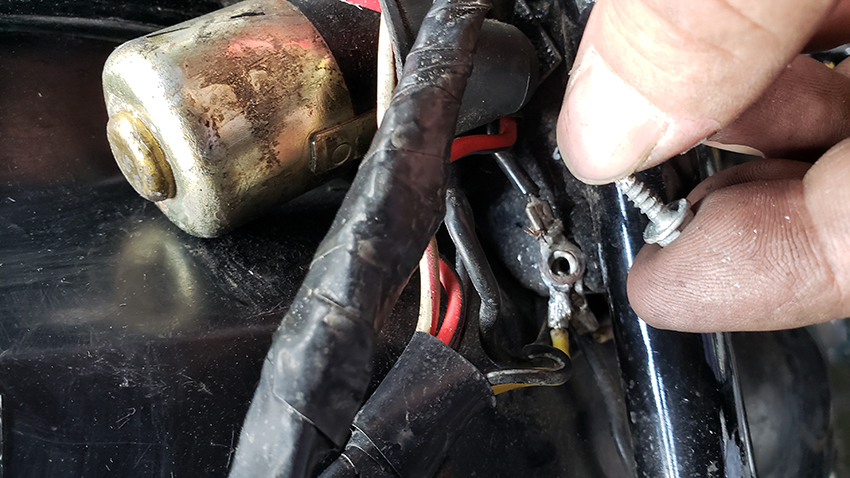
0ne of the main power 'extensions'.
The solenoid out ready to be disconnected, time for the fortified welded tube containing the ignition switch.
Removing and disconnecting the solenoid.
It's shoved between the fender, the frame and the ignition container and taped the with electrical tape. Just to get that tape out of the way wasn't easy!
All sorts of ground literally 'screwed' - to the frame.
The ground and positive to the battery (there is a really small one cramped into the modified rear cowl) were extended. In quite a horrible way. There will be lots of work bringing the harness to what it should be. No wonder the bike had some cranking, especially when hot, problems! And who knows what the starter looks like inside. Judging by the state of other components, how 'half-assed' they were put together and maintained, everything has to be checked to eliminate any compound negative effect on how the bike ran.
0ne of the main power 'extensions'.
The solenoid out ready to be disconnected, time for the fortified welded tube containing the ignition switch.
Last edit: 6 years 10 months ago by StanG.
Please Log in or Create an account to join the conversation.
- StanG
-
Topic Author
- Offline
- Banned
-
- Posts: 1987
- Thanks: 237
Re: 1981 KZ1300 A3 make over
6 years 10 months ago - 6 years 10 months ago
And it's out! I can tell you - it wasn't easy, and the frame is intact.
Last edit: 6 years 10 months ago by StanG.
Please Log in or Create an account to join the conversation.
- StanG
-
Topic Author
- Offline
- Banned
-
- Posts: 1987
- Thanks: 237
Re: 1981 KZ1300 A3 make over
6 years 10 months ago - 6 years 10 months ago
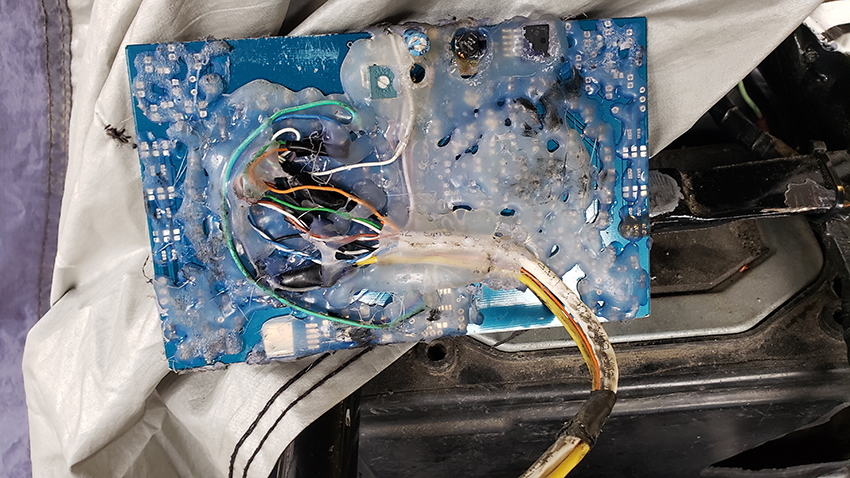
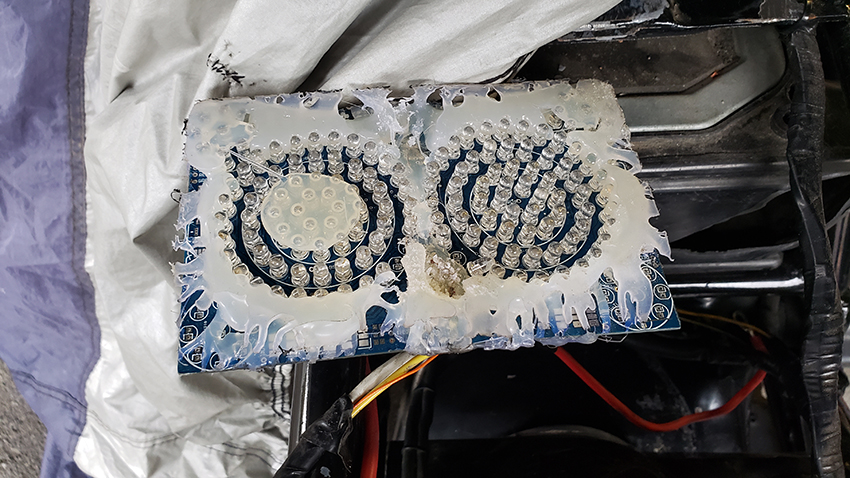
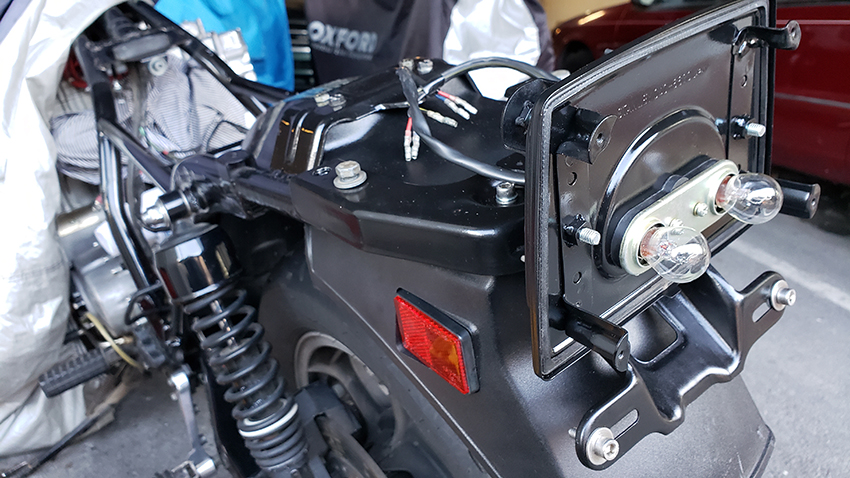
The tail light. All I can say, whoever installed it loves silicone! You could barely see it lit up red and some of the led bulbs were out. And I'm glad the whole thing is out.
Anyone wants it? haha
Anyone wants it? haha
Last edit: 6 years 10 months ago by StanG.
Please Log in or Create an account to join the conversation.
- StanG
-
Topic Author
- Offline
- Banned
-
- Posts: 1987
- Thanks: 237
Re: 1981 KZ1300 A3 make over
6 years 10 months ago
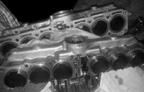
The upper air box removed.
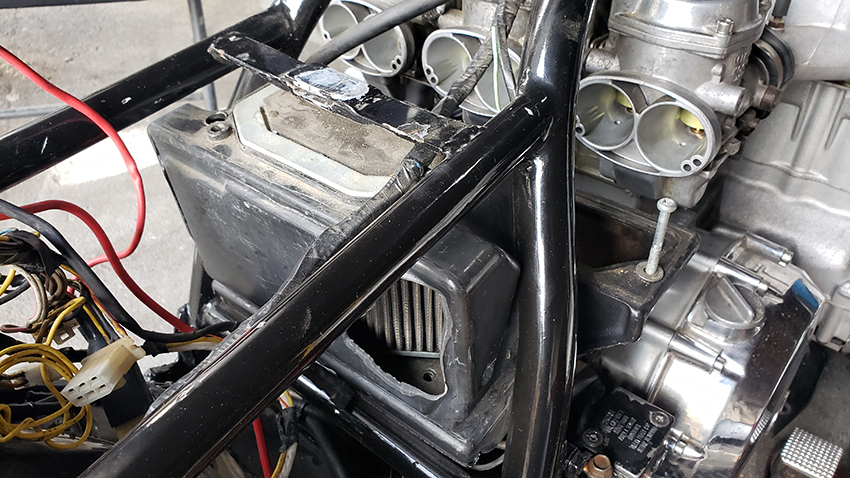
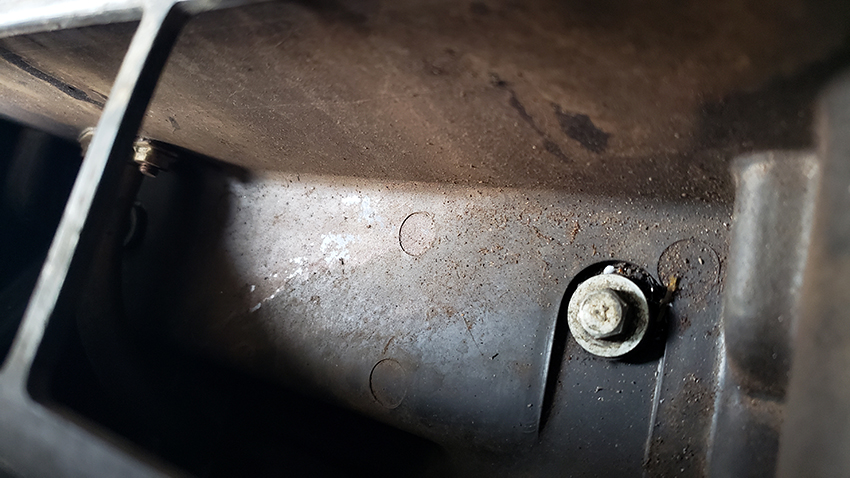
And this is the inside of the top section of the lower air box - AFTER the air filter!!! Certainly things weren't as sealed as intended.
The air boxes and carburetor out.
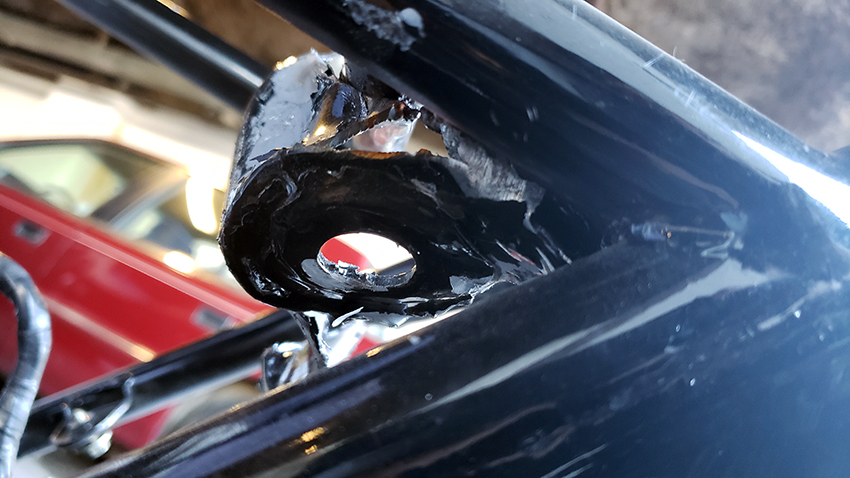
The rear - all wires out of the way, extra bracket cut off, all cleaned up and painted for protection.
The correct tail light bracket fits like a glove! It was as easy as attaching it. Proves how handy is to have spare parts and sub-components ready. 0f course, work was done on them earlier: all media blasted, etched, painted, the electrical components cleaned and checked, the light bulb sockets got a light coat of dielectric grease where applicable for smooth action and protection.
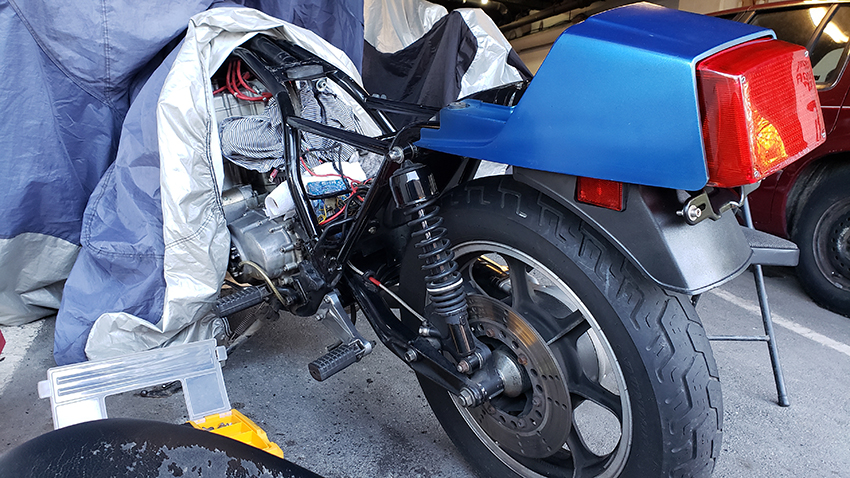
A quick mock up of the complete tail. Still wondering what color paint the bike, and I have time for that. I am considering the same as the first one - ebony black. But as I think it's a 'he', all tough in black, chrome and silver, maybe I should make this one sexy candy red? Would look good on a girl. But I am not sure if I can manage doing it correctly at home. Worth a try regardless.
And this is the inside of the top section of the lower air box - AFTER the air filter!!! Certainly things weren't as sealed as intended.
The air boxes and carburetor out.
The rear - all wires out of the way, extra bracket cut off, all cleaned up and painted for protection.
The correct tail light bracket fits like a glove! It was as easy as attaching it. Proves how handy is to have spare parts and sub-components ready. 0f course, work was done on them earlier: all media blasted, etched, painted, the electrical components cleaned and checked, the light bulb sockets got a light coat of dielectric grease where applicable for smooth action and protection.
A quick mock up of the complete tail. Still wondering what color paint the bike, and I have time for that. I am considering the same as the first one - ebony black. But as I think it's a 'he', all tough in black, chrome and silver, maybe I should make this one sexy candy red? Would look good on a girl. But I am not sure if I can manage doing it correctly at home. Worth a try regardless.
Please Log in or Create an account to join the conversation.
Moderators: dcarver220b
Time to create page: 0.209 seconds