
79 carb issues
- SIXPIPES
-
 Topic Author
- Offline
- Senior Member
-

- Posts: 52
- Thanks: 1
Re: 79 carb issues
10 years 2 months ago - 10 years 2 months ago
Some great advice here thank you all.
Only just seen your post Scotch and I have done the following.
Stripped the carbs (again) cleaned the bodies in the ultra sonic cleaner and blew them out with compressed air.
Double checked the jets with a magnifying glass and cleaned any crap off them.
Checked the float levels without the carb tops and slides, easier to level the carbs up with a sprit level. The floats were quite a way out. Carbs are back together but I still need to set the pilot screws and throttle set up.
Should get them back on tomorrow work permitting.
I found that if you use a plastic number plate screw, drill it through the centre,cut the head off and it works very well as an adaptor into the float bowl with some clear plastic tube pushed over it to do the levels.
To answer the question - where do I live. Well I live in Worcester, England, UK.
Having read some other topics I have just discovered my carbs are in fact 1980 onwards, 5 slots on the main needle and only one 10mm drain plug.
TRIUMPH T120R,BSA A7,BSA A10,BSA SPITFIRE,BSA ROCKET 3 RV,ARIAL SQ 4,S.O.S, RUDGE, BENELLI 750SEI,BENELLI 900SEI, KZ900, SUZUKI GT750, SUZUKI RE5, KAWASAKI H1A, KAWASAKI H2, MOTO GUZZI 850T, NORTON FASTBACK, NORTON INTERSTATE, SUNBEAM S8.
Last edit: 10 years 2 months ago by SIXPIPES. Reason: more info
Please Log in or Create an account to join the conversation.
- scotch
-

- Offline
- Sustaining Member
-

- Posts: 1970
- Thanks: 875
Re: 79 carb issues
10 years 2 months ago
sixpipes, welcome to the Mikuni BSW32 !
"These bikes command attention and demand imagination."
quote by me and not the least bit overstated or to be taken for granted, as "veterans of the 13" will attest!
Flow-check the idle-air bleed and the 3 transition ports! AND PLEASE: don't go buying jet kits, fuel-pumps and vacuum this and electric-that or other aftermarket bits and pieces in the belief they'll cure the problem. Dirty and blocked remains the same regardless of how much "Bling" you disguise it with !
The '79 carb rebuild article will explain in greater detail and I assure you again nothing involves Teflon and Springs :huh:
Keep us posted and don't be afraid to ask.
1980 KZ 1300 sr# KZT30A-009997
Always High - Know Fear !
Always High - Know Fear !
The following user(s) said Thank You: SIXPIPES
Please Log in or Create an account to join the conversation.
- SIXPIPES
-
Topic Author
- Offline
- Senior Member
-
- Posts: 52
- Thanks: 1
Re: 79 carb issues
10 years 2 months ago
If you mean - idle air bleed. I have blown through with compressed air and all seems ok, I have also pushed a single strand of copper wire through all the ports, very thin wire so it cannot scratch anything.
One thing I did notice, when I took the main needles out, they were very slightly blackened on the ends. Bear in mind that the bike has only ran for 10 minutes at a time - maybe a maximum of 50 minutes since its last carb re-build. Also I forgot to mention that before I re-built the carbs I used to get a lot of fuel coming out of the centre carb and running back into the air box.
One thing I did notice, when I took the main needles out, they were very slightly blackened on the ends. Bear in mind that the bike has only ran for 10 minutes at a time - maybe a maximum of 50 minutes since its last carb re-build. Also I forgot to mention that before I re-built the carbs I used to get a lot of fuel coming out of the centre carb and running back into the air box.
TRIUMPH T120R,BSA A7,BSA A10,BSA SPITFIRE,BSA ROCKET 3 RV,ARIAL SQ 4,S.O.S, RUDGE, BENELLI 750SEI,BENELLI 900SEI, KZ900, SUZUKI GT750, SUZUKI RE5, KAWASAKI H1A, KAWASAKI H2, MOTO GUZZI 850T, NORTON FASTBACK, NORTON INTERSTATE, SUNBEAM S8.
Please Log in or Create an account to join the conversation.
- scotch
-
- Offline
- Sustaining Member
-
- Posts: 1970
- Thanks: 875
Re: 79 carb issues
10 years 2 months ago - 10 years 2 months ago
1st: Fuel running out of a carb is either some crap in the float needle or the float height adjustment is way wrong (high) or the float is not floating. (hence the "brass floats" project.) With only 2mm variance, (6.5mm - 8.5mm) the float wet-level is critical. Everything must work in harmony and this is the starting point.
The year of the carbs is irrelevant to their operation and maintenance. The only differentiation is the '79's needle height was fixed whereas the '80 and up had 5 positions and of course the bowls differ as you've noted.
The problem with cleaning thoroughly that seems to elude most is this: One piece of rust, scale, gunk or any foreign material as small as .016" will plug an idle or transition port. I can guarantee that everyone blows in the direction of flow because it's easy. Simply put an air nozzle in the jet towers and squeeze. Problem is: you just "Rammed" the debris to the bleed end and nothing will come out of the metered ports being as small as they are. You've got to come up with your own device and technique to blow everything out - "backwards" - out of the BIG ends !
Remove the emulsion tubes and look VERY closely thru the various porting at the jet threads. They will have rust,scale and corrosion in them which must be removed with a matching tap or a dental-pic. The inside of the jets will have the same coating (pinkish) If you don't remove this material it will flake off when you install the jets and guess where it ends up ?
The discoloration on the needles and jets suggest fuel contamination but may be a natural reaction from the type of fuel or supplemental additives and the reaction to the brass. Regardless, it needs to be removed to mitigate the attraction and build up of varnish. The miracle cleaner for me is lacquer thinner and it should remove any such build up..
I respect your attention to Leveling the carbs before checking the wet-level, however
a basic 'eye-Ball is all that is required. If they "look" level, then that is good enough. Consider the various angles the carbs are at during riding and side-stand running and you'll understand the point. In addition to this point is the fact that the carbs mount on a down ward angle of about 5 (?) degrees and I choose not to account for this for my own set-up nor for the pre-setting of the brass-floats. If your preference is to "level" the carbs then setting the level on top of the covers across the embossed writing is good too and will negate the need to remove the tops.
1980 KZ 1300 sr# KZT30A-009997
Always High - Know Fear !
Always High - Know Fear !
Last edit: 10 years 2 months ago by scotch.
The following user(s) said Thank You: SIXPIPES
Please Log in or Create an account to join the conversation.
- Kawboy
-
- Offline
- Sustaining Member
-
- Posts: 3193
- Thanks: 1135
Re: 79 carb issues
10 years 2 months ago - 10 years 2 months ago
Coincidentally, I just happened to get in to my carbs today. Pulled off the 5-6 carb and popped off the float bowl. It was so clean inside I thought it was new. Maybe not so bad after all.
First thought was I'll run them through my ultrasonic cleaner anyways. I got them apart so why not. Only two passages in the float bowl. Did a quick blow through with the air gun and who'd a guessed the passage in the bottom of the bowl which feeds gas to the enrichment jet tube is blocked. How could a carb that clean have a blocked passage?
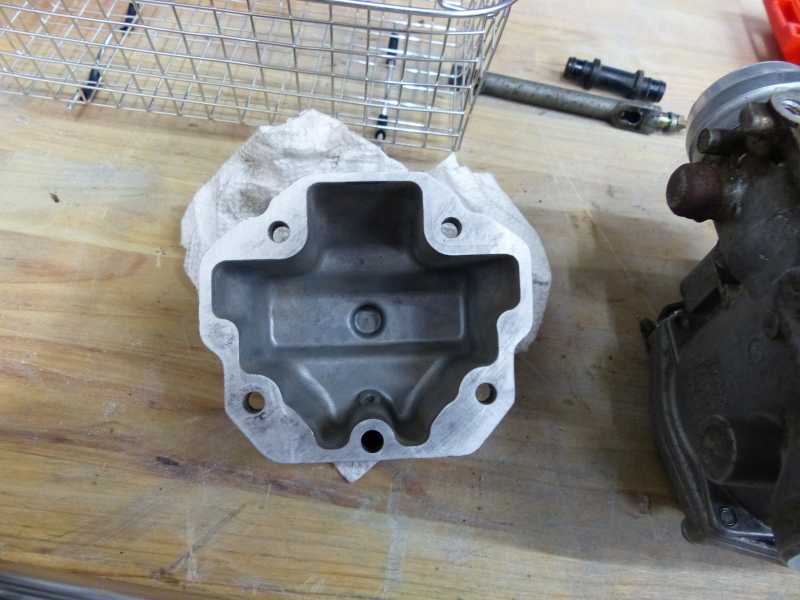
Also note the oxide on the enrichment jet tube
Quick look at the float level and it's obviously set too high.
So this is my basket case I'm working on and if this is the kind of work the previous owner has been doing, then I've got my work cut out for me.
First thought was I'll run them through my ultrasonic cleaner anyways. I got them apart so why not. Only two passages in the float bowl. Did a quick blow through with the air gun and who'd a guessed the passage in the bottom of the bowl which feeds gas to the enrichment jet tube is blocked. How could a carb that clean have a blocked passage?
Also note the oxide on the enrichment jet tube
Quick look at the float level and it's obviously set too high.
So this is my basket case I'm working on and if this is the kind of work the previous owner has been doing, then I've got my work cut out for me.
Last edit: 10 years 2 months ago by Kawboy. Reason: correct pic
The following user(s) said Thank You: SIXPIPES
Please Log in or Create an account to join the conversation.
- scotch
-
- Offline
- Sustaining Member
-
- Posts: 1970
- Thanks: 875
Re: 79 carb issues
10 years 2 months ago - 10 years 4 weeks ago
kawboy wrote: <" Did a quick blow through with the air gun and who'd a guessed the passage in the bottom of the bowl which feeds gas to the enrichment jet tube is blocked. How could a carb that clean have a blocked passage?">
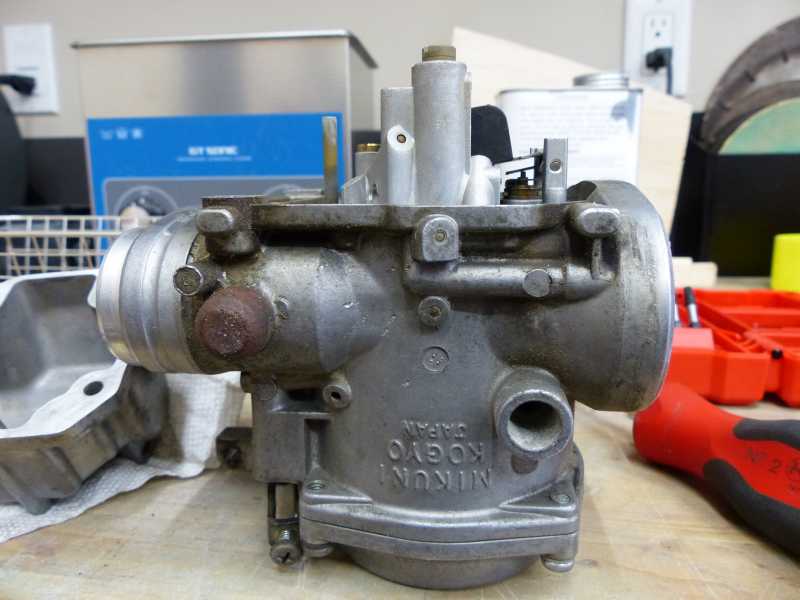
Thanks for these photos and comments. You have in so few words validated the entire point of my ranting on & on & on & on & on & on..... about why these carbs can give so many owners....seizures! And for clarity; that's the "choke supply tube" you're referring too. I prefer to keep the word"enrichment" strictly for the enrichment valve ( the assembly under the small aluminum cover on the left side of each carb.
So, Now you can see how a tiny gallery and the metered .025" "transition-ports" can remain plugged.
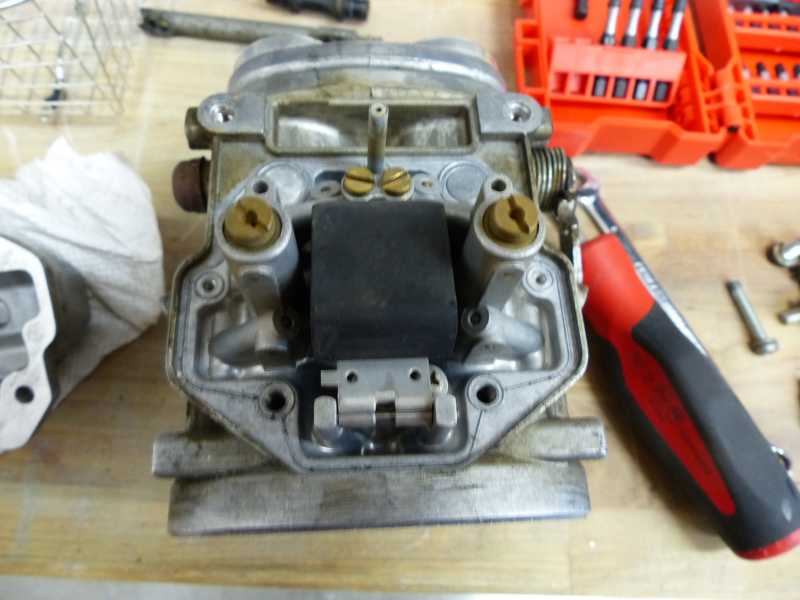
Strip the 3 carbs down to the throttle-plates and shafts (DON'T TOUCH THESE !) and soak them 1 at a time and fully submerged in a pot of Lacquer thinner for 24 hours. Flip the bodies around initially to burp the air out. 6 hours soaking on the air-filter end, the cyl-head end, the diaphragm end and and finally sitting on the float-towers. The bodies need to be fully submerged !
IMPORTANT: Before blowing out with compressed air ensure the metering jet in the choke pickup tube is secure! I have found these to be loose and have had them blow out. PITA
If it's loose, look for a crack running up the side of the tube. It's easily repaired with some careful soldering.
Use the appropriate cautions with the highly flammable lacquer thinner !
THEN: The VERY FIRST attempt to blow out with comp.-air should be from the inside of the venturi with the throttle plate open just enough to expose the transition ports. This will blow back debris from these tiny ports so it can come out of the other (larger) end of the open galleries.
Then systematically blow out the rest and repeat with #2 & #3 body. You can soak all 3 at once if you can justify the cost of the thinner required to fill a vessel large enough for the task. When you're done: use a syringe to flow-check the idle-air and transition ports. The rest has been documented in detail elsewhere.
The "oxide" on the choke pick-up is likely due to contact with water !!!!
Do not judge the float level by the photo. Wet level setting only !
The aluminum, throttle-rods ( I see one in your photo) have a very small piece in the end opposite the adjuster. Be careful not to have this drop out! Study a parts exploded view for this part and the other pieces plus a spring and the specific way they assemble. Google: "Kawasaki Motorcycle Parts 1980 KZ1300-A2 CARBURETOR ASSY Diagram"
hope this gets you on your way !
Thanks for these photos and comments. You have in so few words validated the entire point of my ranting on & on & on & on & on & on..... about why these carbs can give so many owners....seizures! And for clarity; that's the "choke supply tube" you're referring too. I prefer to keep the word"enrichment" strictly for the enrichment valve ( the assembly under the small aluminum cover on the left side of each carb.
So, Now you can see how a tiny gallery and the metered .025" "transition-ports" can remain plugged.
Strip the 3 carbs down to the throttle-plates and shafts (DON'T TOUCH THESE !) and soak them 1 at a time and fully submerged in a pot of Lacquer thinner for 24 hours. Flip the bodies around initially to burp the air out. 6 hours soaking on the air-filter end, the cyl-head end, the diaphragm end and and finally sitting on the float-towers. The bodies need to be fully submerged !
IMPORTANT: Before blowing out with compressed air ensure the metering jet in the choke pickup tube is secure! I have found these to be loose and have had them blow out. PITA
If it's loose, look for a crack running up the side of the tube. It's easily repaired with some careful soldering.
Use the appropriate cautions with the highly flammable lacquer thinner !
THEN: The VERY FIRST attempt to blow out with comp.-air should be from the inside of the venturi with the throttle plate open just enough to expose the transition ports. This will blow back debris from these tiny ports so it can come out of the other (larger) end of the open galleries.
Then systematically blow out the rest and repeat with #2 & #3 body. You can soak all 3 at once if you can justify the cost of the thinner required to fill a vessel large enough for the task. When you're done: use a syringe to flow-check the idle-air and transition ports. The rest has been documented in detail elsewhere.
The "oxide" on the choke pick-up is likely due to contact with water !!!!
Do not judge the float level by the photo. Wet level setting only !
The aluminum, throttle-rods ( I see one in your photo) have a very small piece in the end opposite the adjuster. Be careful not to have this drop out! Study a parts exploded view for this part and the other pieces plus a spring and the specific way they assemble. Google: "Kawasaki Motorcycle Parts 1980 KZ1300-A2 CARBURETOR ASSY Diagram"
hope this gets you on your way !
1980 KZ 1300 sr# KZT30A-009997
Always High - Know Fear !
Always High - Know Fear !
Last edit: 10 years 4 weeks ago by scotch.
The following user(s) said Thank You: SIXPIPES
Please Log in or Create an account to join the conversation.
Time to create page: 0.190 seconds