
Part 2: Complete rebuild 1979 carburettors
- KZQ
-
- Offline
- Administrator
-

- Posts: 1161
- Thanks: 344
Re: Carb rebuild continues with some cautionary notes.
11 years 6 months ago
Hi Scotch,
Thanks for composing this great thread I have moved your "Cautionary Notes" thread into the main thread for now. Eventually, I'm sure that your effort will be rolled up as one of the best reference resources for Kawasaki Sixes known. I'm not sure what form that will take. I hope you don't mind my reconfiguring things in the meantime. I have not, nor will I, delete any of it.
Thanks
Bill
1968 BSA Shooting Star, 1970 BSA 650 Lightning, 1974 Kawasaki W3, 1976 KZ900 A4, 1979 KZ750 B4, 1979 KZ750 B4 Trike, 1981 KZ1300, 1982 KZ1100 Spectre, 1985 Kawasaki ZN1300, 2000 Honda Valkyrie Tourer, 2009 Yamaha RoadLiner S
Please Log in or Create an account to join the conversation.
- scotch
-
 Topic Author
- Offline
- Sustaining Member
-

- Posts: 2030
- Thanks: 932
Re: Carb rebuild continues with some cautionary notes.
11 years 6 months ago
Hi Bill: Organize and sort as necessary and best for the Forum. All I ask of anyone is to give appropriate credit for anything used outside this Forum.
thanks !
thanks !
1980 KZ 1300 sr# KZT30A-009997
Always High - Know Fear !
Always High - Know Fear !
Please Log in or Create an account to join the conversation.
- scotch
-
Topic Author
- Offline
- Sustaining Member
-
- Posts: 2030
- Thanks: 932
Re: 1979 Carb. Rebuild (Pt 2): The reassembly begins.
11 years 6 months ago - 5 months 1 week ago
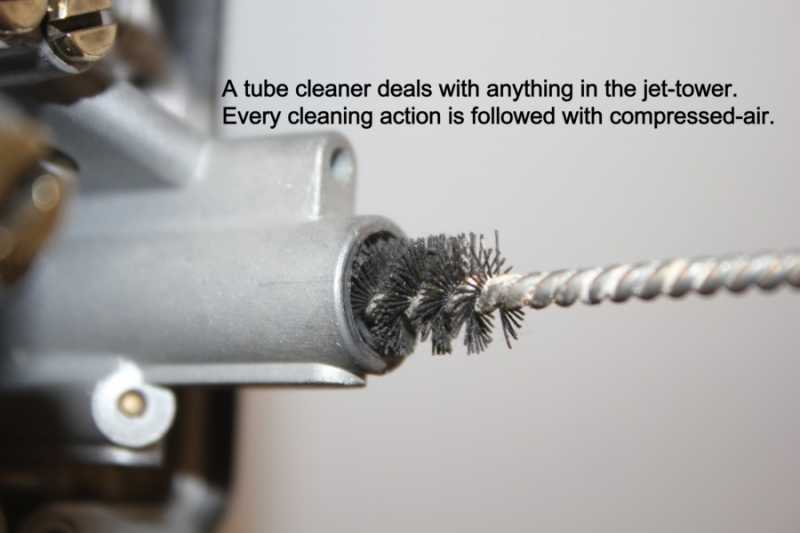
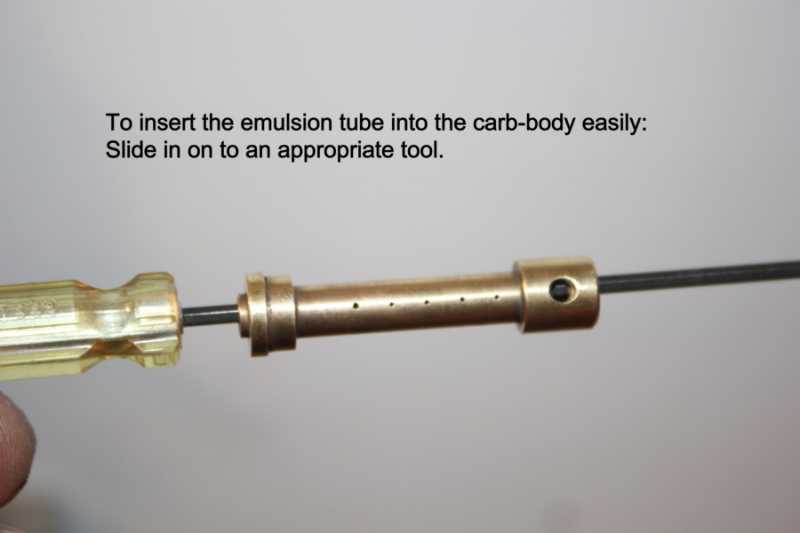
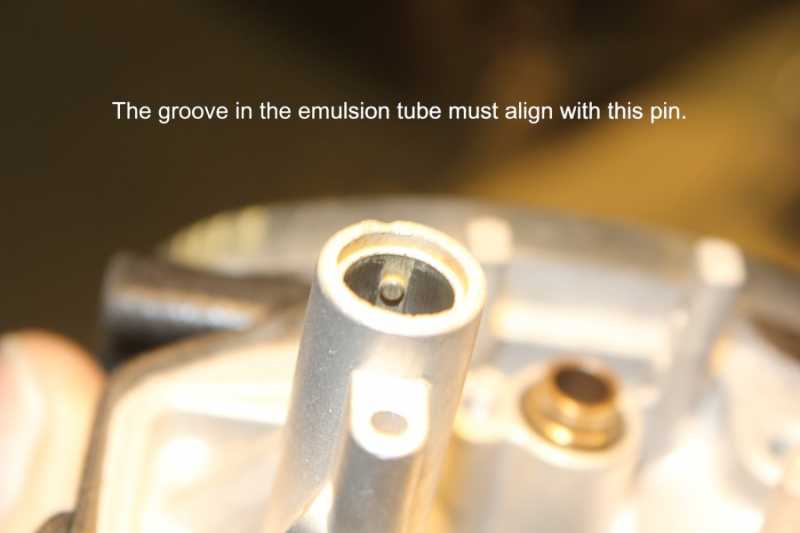
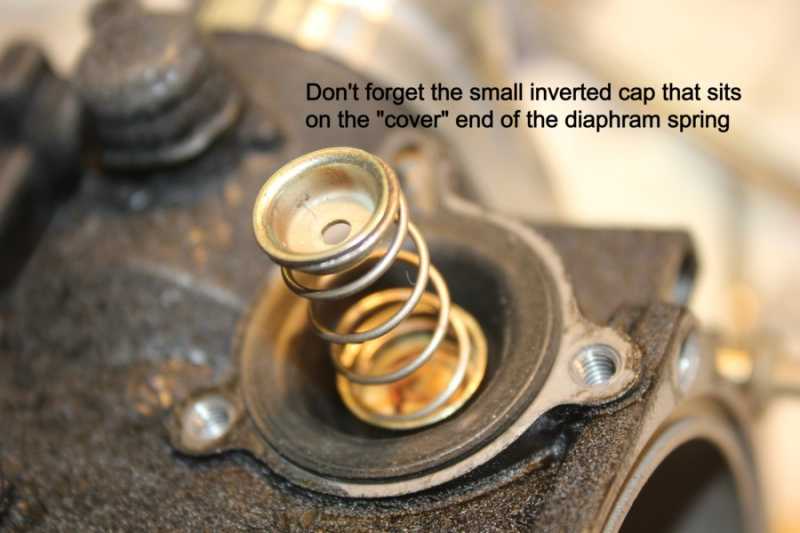
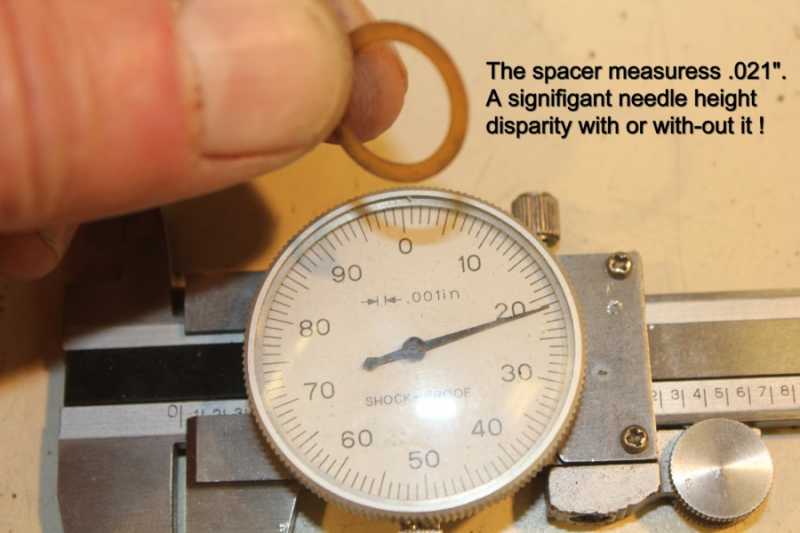
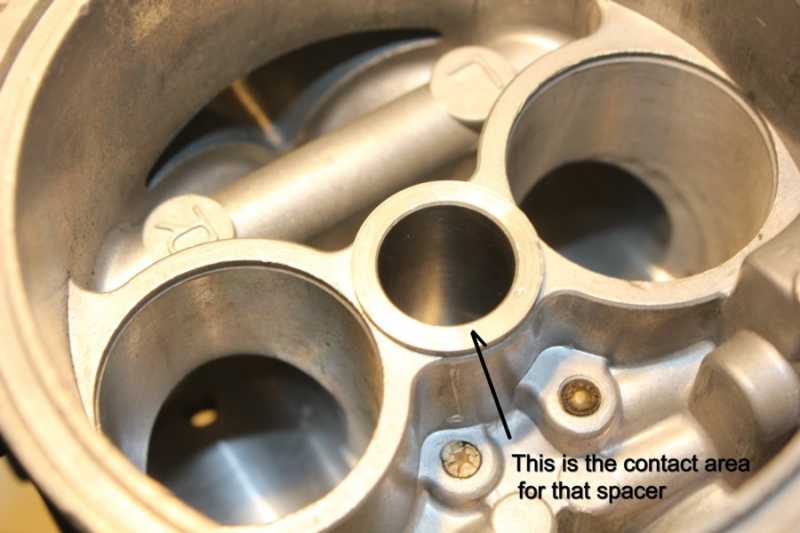
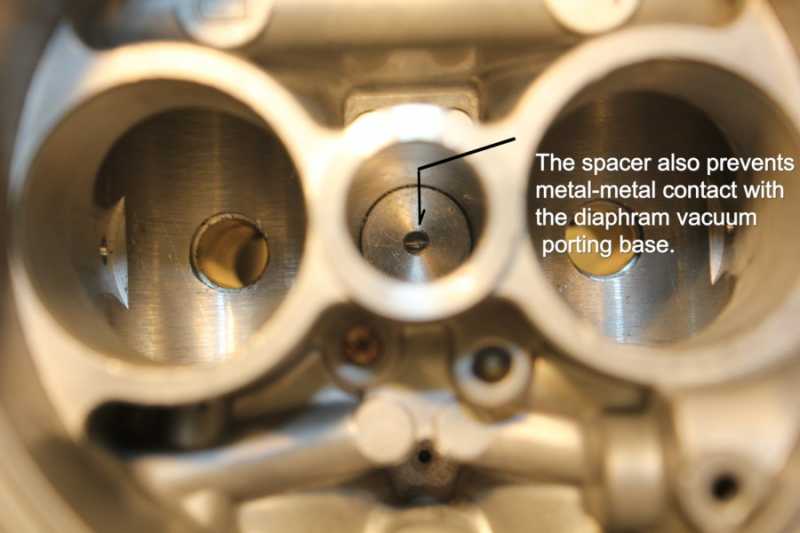
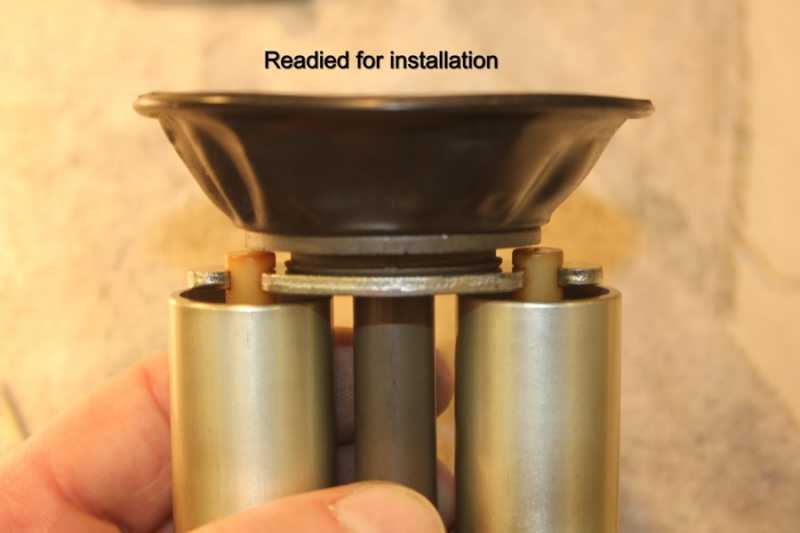
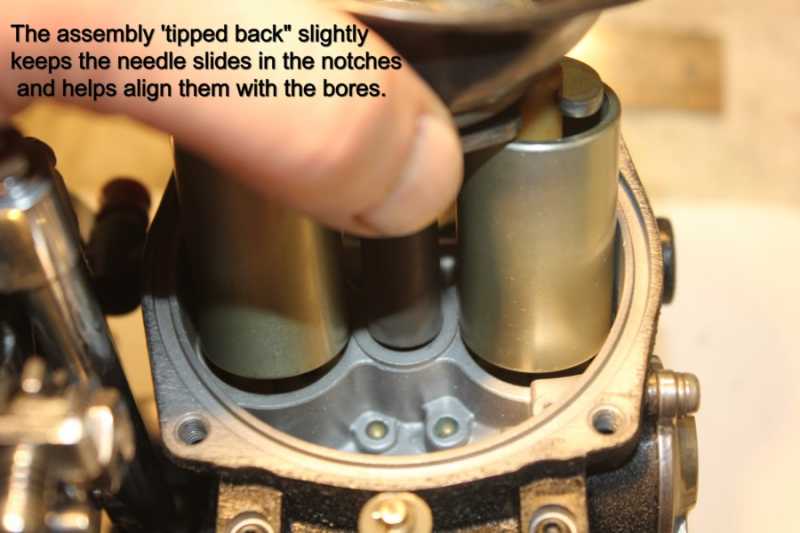
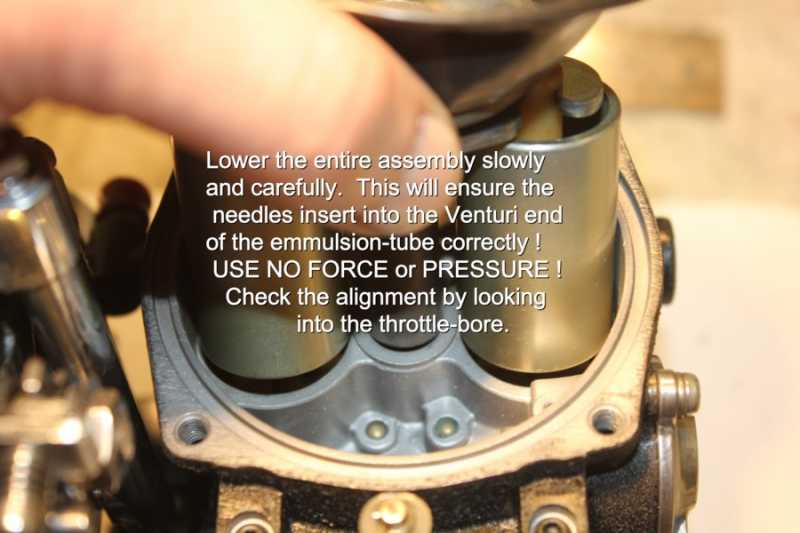
NOTE: The seals on the throttle shaft ends could be damaged if soaked excessively in strong cleaners such as lacquer-thinner. The use of lacquer-thinner for manual surface cleaning and gallery flushing using a syringe is OK.
The Tube-Cleaner is Nylon !


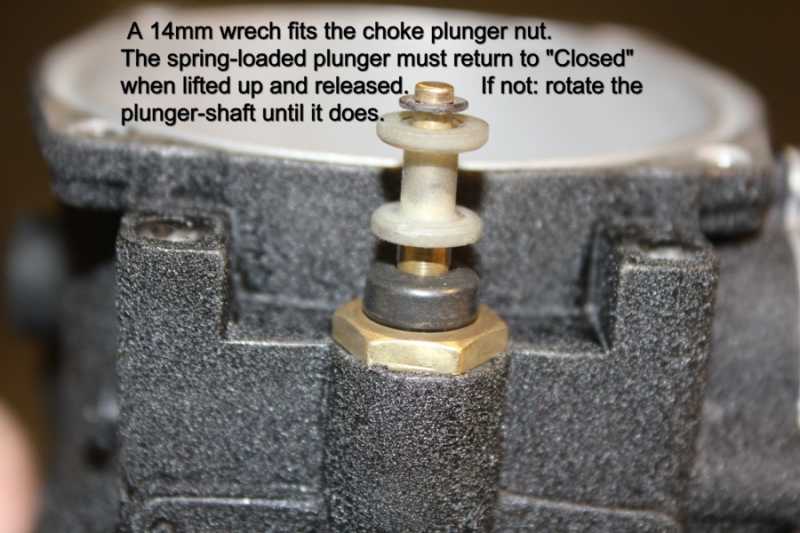
The Choke plunger Nut needs only to be "snugged" - NOT torqued !
The Tube-Cleaner is Nylon !
The Choke plunger Nut needs only to be "snugged" - NOT torqued !
1980 KZ 1300 sr# KZT30A-009997
Always High - Know Fear !
Always High - Know Fear !
Last edit: 5 months 1 week ago by scotch.
The following user(s) said Thank You: KZQ, PaulD
Please Log in or Create an account to join the conversation.
- scotch
-
Topic Author
- Offline
- Sustaining Member
-
- Posts: 2030
- Thanks: 932
Re: 1979 carb. rebuild (Pt 3): The final steps
11 years 5 months ago - 5 months 1 week ago
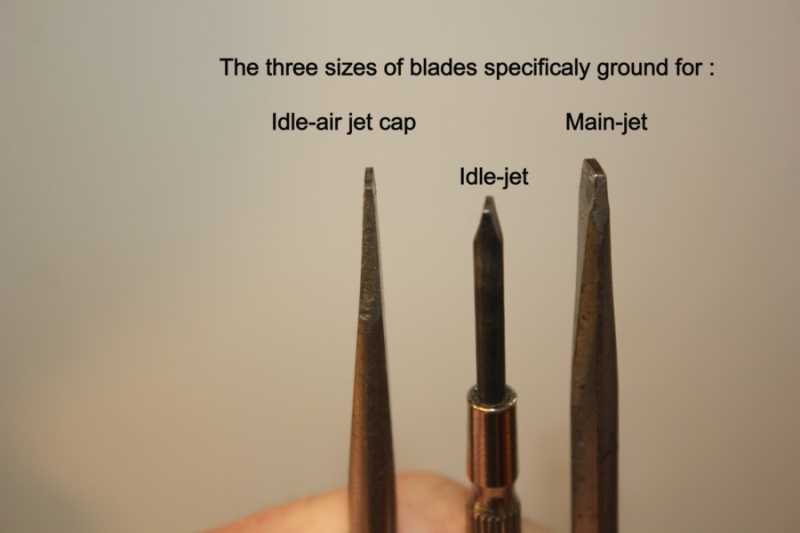
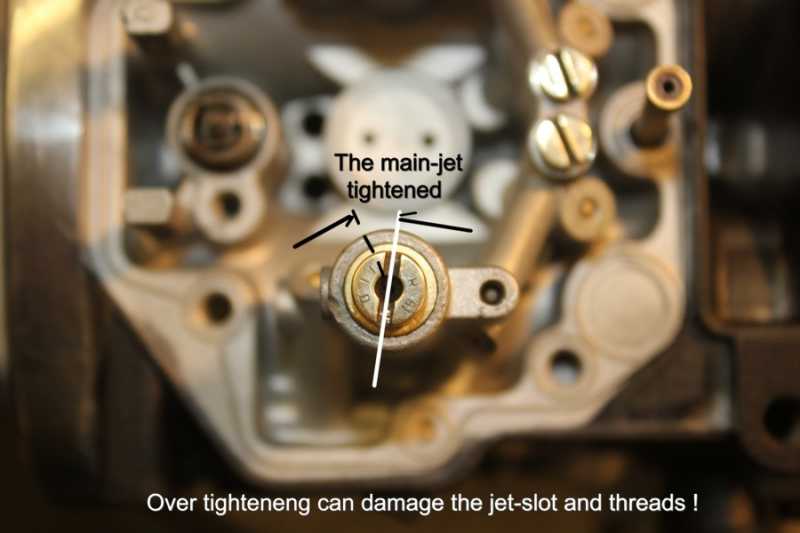
#1 NOTE: There are are number of internet articles regarding the very specific design and machining of fuel jets. These articles state very emphatically that when cleaning jets, attention be paid to not changing any shape to the entry and discharge-end bevels and steps that are specifically designed into the jet for optimum fuel dispersion. This includes the smoothness of the jet bore which is factory "reamed" for smoothness and perfect symmetry - not simply drilled. If in doubt - Replace !
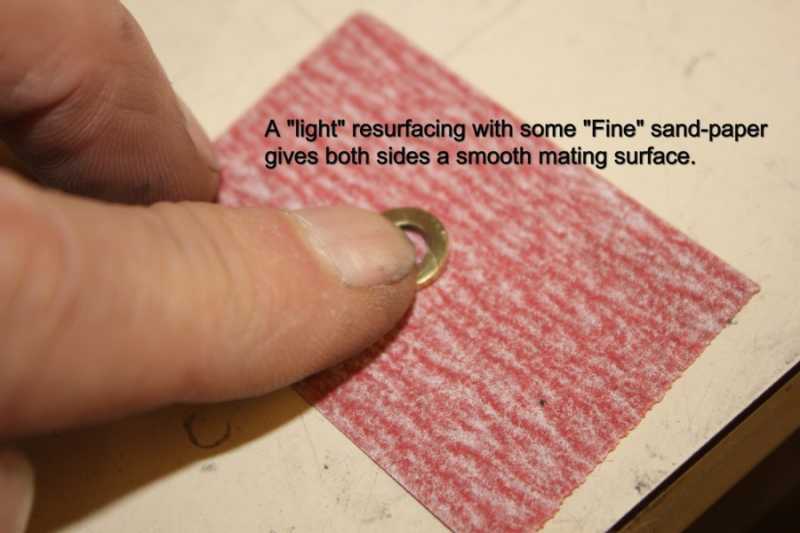
#2 NOTE: The seals on the throttle shaft ends could be damaged if soaked excessively in strong cleaners such as lacquer-thinner. The use of lacquer-thinner for manual surface cleaning and gallery flushing using a syringe is OK.
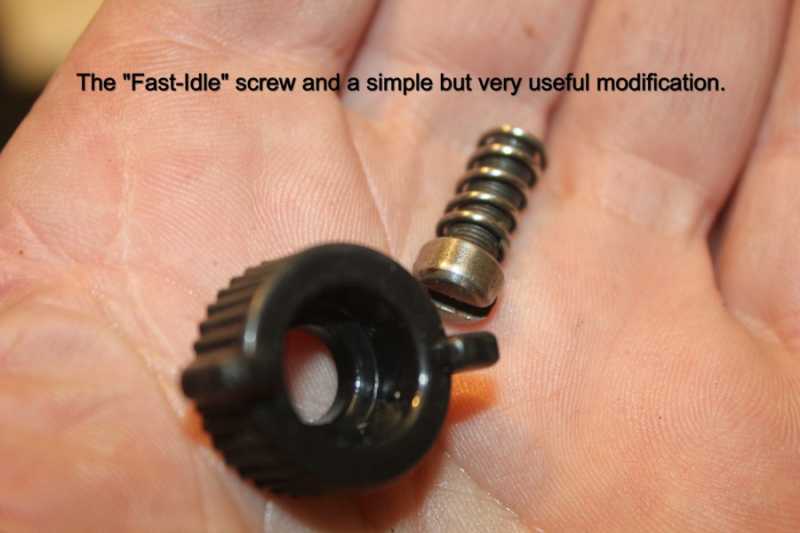
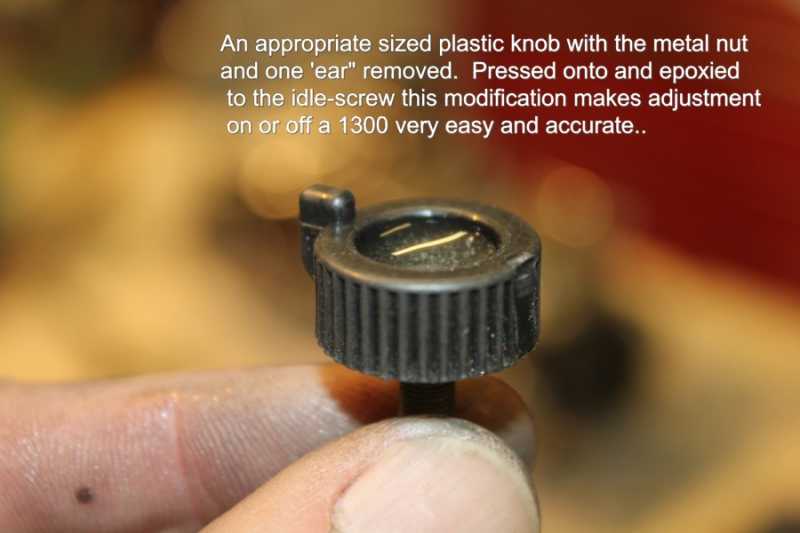
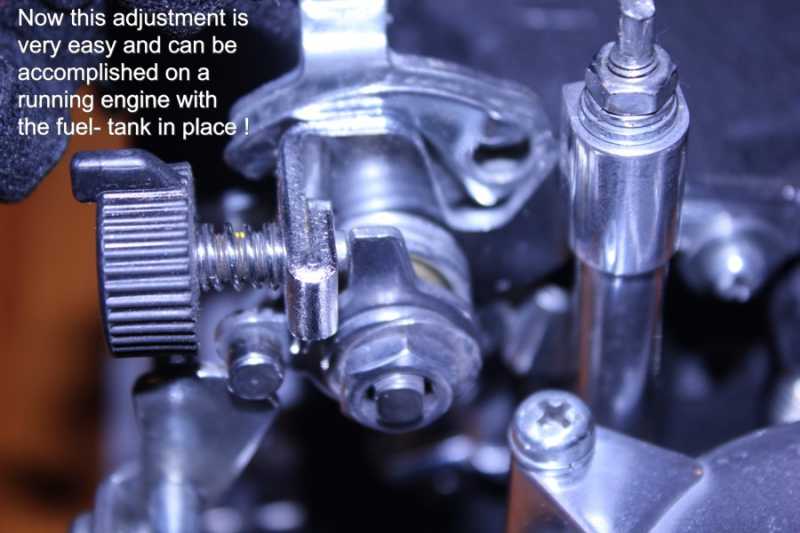
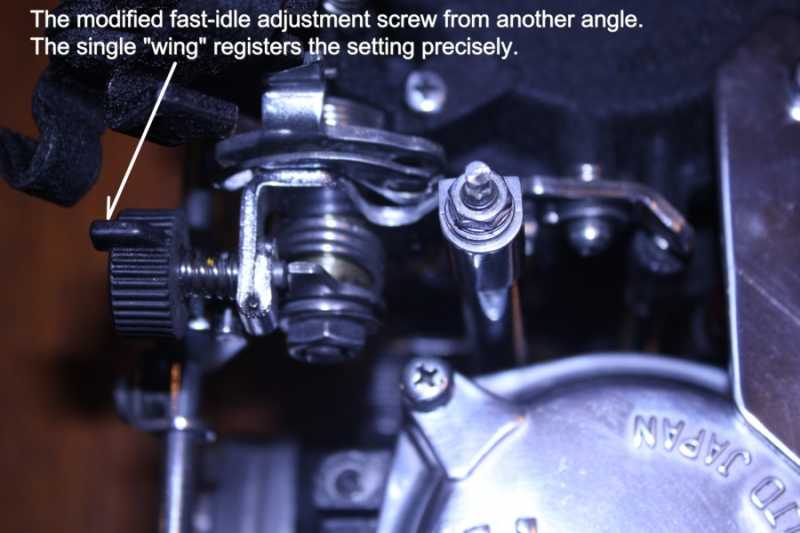
#3 NOTE:When choosing a knob for the fast idle screw mod. it's recommended the dia. not exceed 5/8" to avoid contact with the fuel-tank while operating the throttle. Insulation in the linkage travel area should be removed as well.
Cheers and Merry Christmas.

#2 NOTE: The seals on the throttle shaft ends could be damaged if soaked excessively in strong cleaners such as lacquer-thinner. The use of lacquer-thinner for manual surface cleaning and gallery flushing using a syringe is OK.
#3 NOTE:When choosing a knob for the fast idle screw mod. it's recommended the dia. not exceed 5/8" to avoid contact with the fuel-tank while operating the throttle. Insulation in the linkage travel area should be removed as well.
Cheers and Merry Christmas.
1980 KZ 1300 sr# KZT30A-009997
Always High - Know Fear !
Always High - Know Fear !
Last edit: 5 months 1 week ago by scotch.
The following user(s) said Thank You: Toddh, zed_thirteen, A1, PaulD
Please Log in or Create an account to join the conversation.
- Toddh
-
- Offline
- Platinum Member
-

- Posts: 440
- Thanks: 62
Re: 1979 carb. rebuild final steps
11 years 5 months ago
A great write up and one that should be saved for future reference.
The black crinkle coat is a nice touch
T.
The black crinkle coat is a nice touch
T.
KZ1300 A-4 4TH 1300 IN 30 YEARS
KZ1000 D-3/ Z1R
ZX900 GPZ A-3
KZ750 E-1
K1200GT
CB750F 1978
KZ1000 D-3/ Z1R
ZX900 GPZ A-3
KZ750 E-1
K1200GT
CB750F 1978
Please Log in or Create an account to join the conversation.
- tackelhappy
-
- Offline
- Platinum Member
-
- Posts: 413
- Thanks: 165
Re: 1979 carb. rebuild final steps
11 years 5 months ago
Have been watching with interest as well - very nice result.
The rather trouble-some balancing screws for setting the vacuum- mine look like they were made in a vice with a hand file - no two nuts are the same. Any plans for those ?
Merry Christmas to you and yours.
glenn
The rather trouble-some balancing screws for setting the vacuum- mine look like they were made in a vice with a hand file - no two nuts are the same. Any plans for those ?
Merry Christmas to you and yours.
glenn
" If you can't say what you think, very soon you won't be able to think !
OKANAGAN FALLS. BC ,Canada
OKANAGAN FALLS. BC ,Canada
Please Log in or Create an account to join the conversation.
Moderators: scotch
Time to create page: 0.209 seconds