
1981 KZ1300 A3 make over
- StanG
-
 Topic Author
- Offline
- Banned
-

- Posts: 1987
- Thanks: 237
Re: 1981 KZ1300 A3 make over
6 years 6 months ago
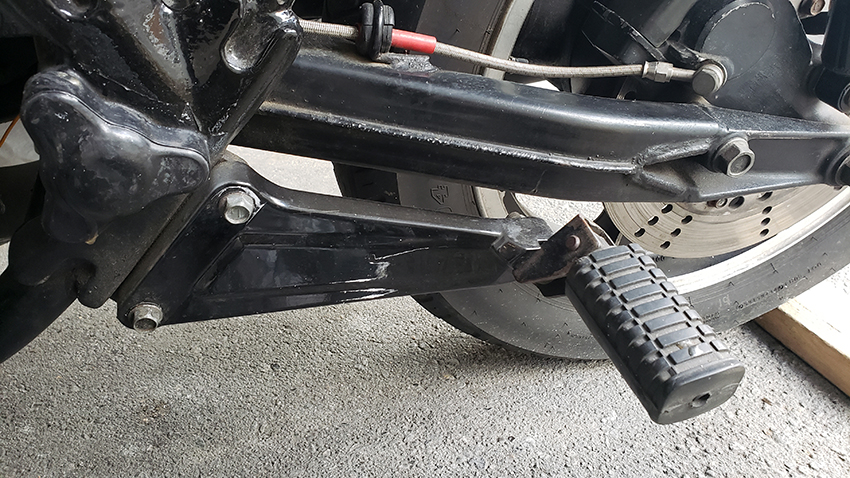
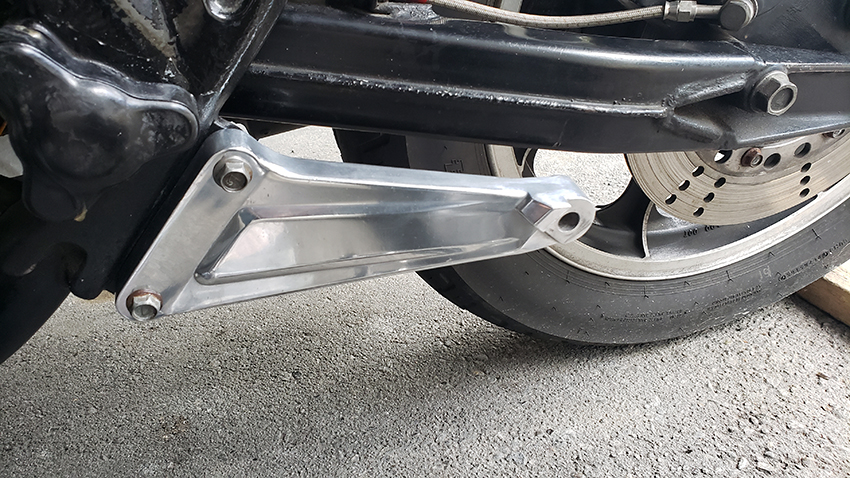
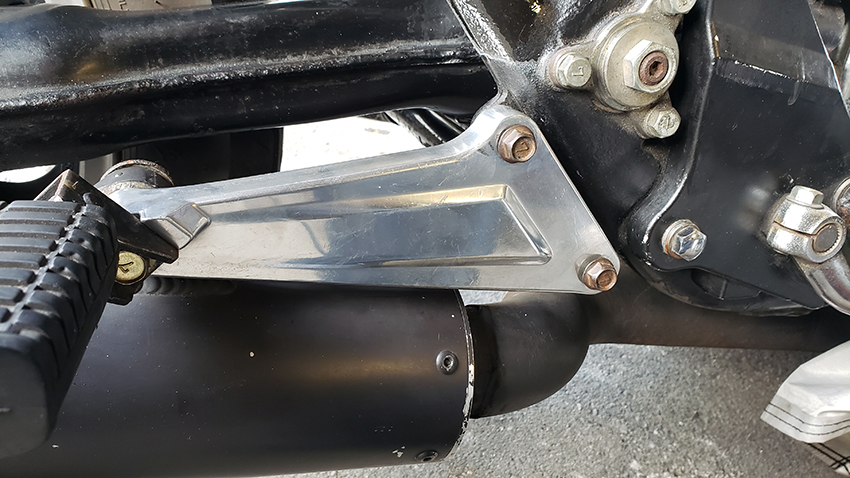
From the ready to go parts - already polished passenger footrest brackets! The bike already starting to look better. I didn't like these in black at all.
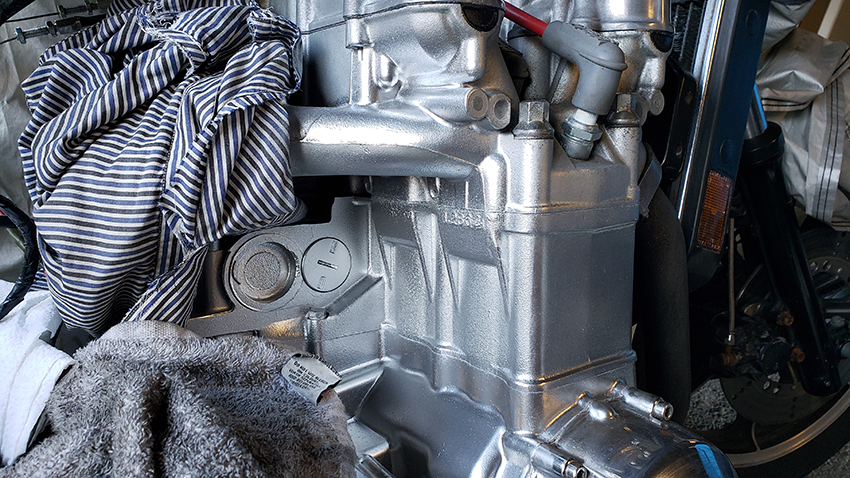
The engine is quite clean. It doesn't really need painting. Being this clean, it will be easy to prep it for a refreshing coat and touch ups. Why not! And that's what I have done. I washed a section on the right side and to already see what it will look like, painted it silver with engine case paint. And.. I like what I see. A lot! Gives me motivation to continue.
The engine is quite clean. It doesn't really need painting. Being this clean, it will be easy to prep it for a refreshing coat and touch ups. Why not! And that's what I have done. I washed a section on the right side and to already see what it will look like, painted it silver with engine case paint. And.. I like what I see. A lot! Gives me motivation to continue.
Please Log in or Create an account to join the conversation.
- StanG
-
Topic Author
- Offline
- Banned
-
- Posts: 1987
- Thanks: 237
Re: 1981 KZ1300 A3 make over
6 years 6 months ago
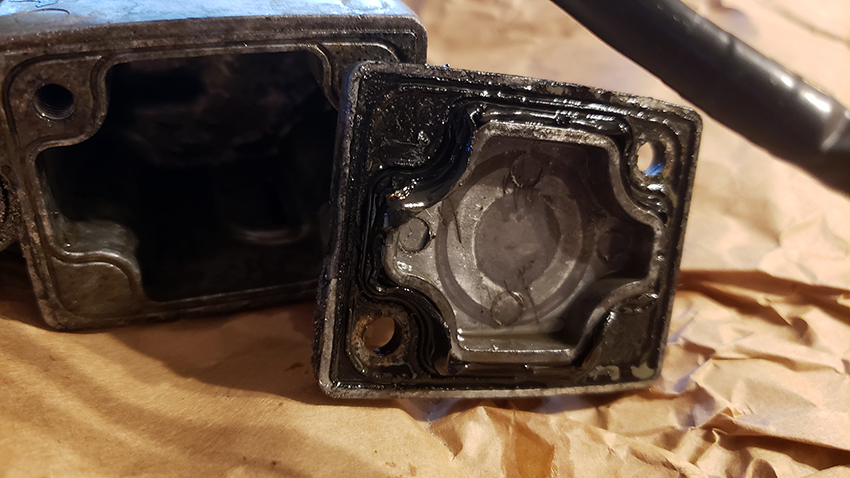
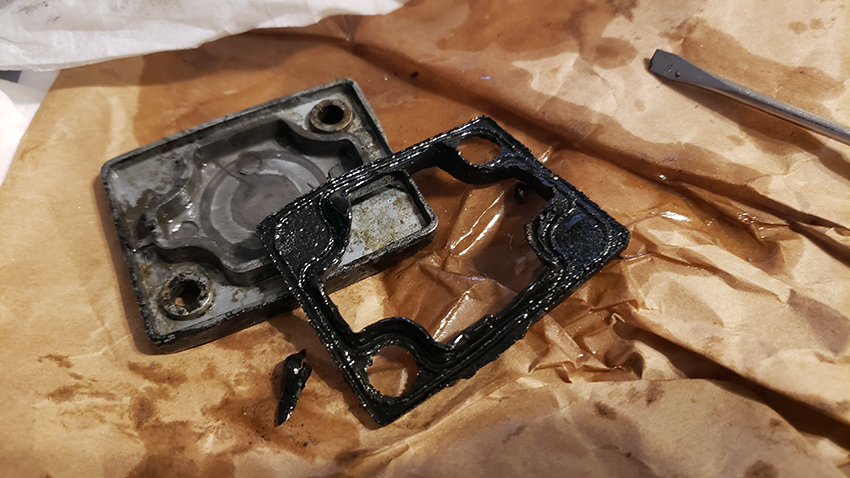
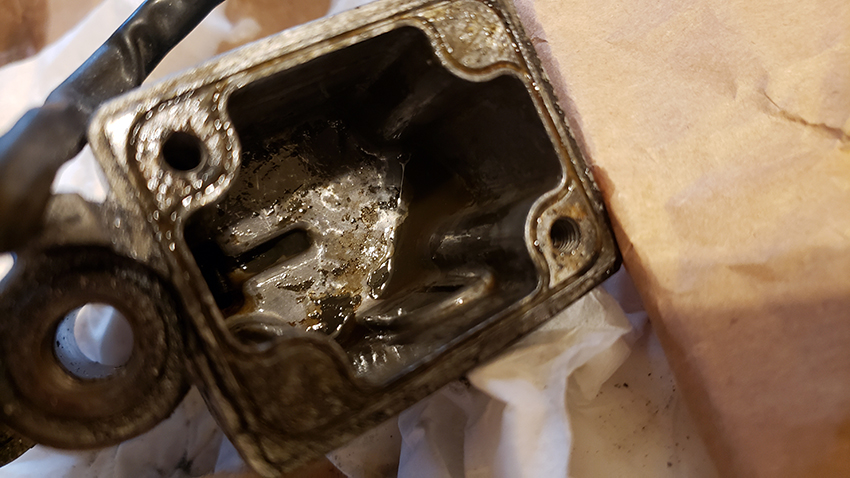
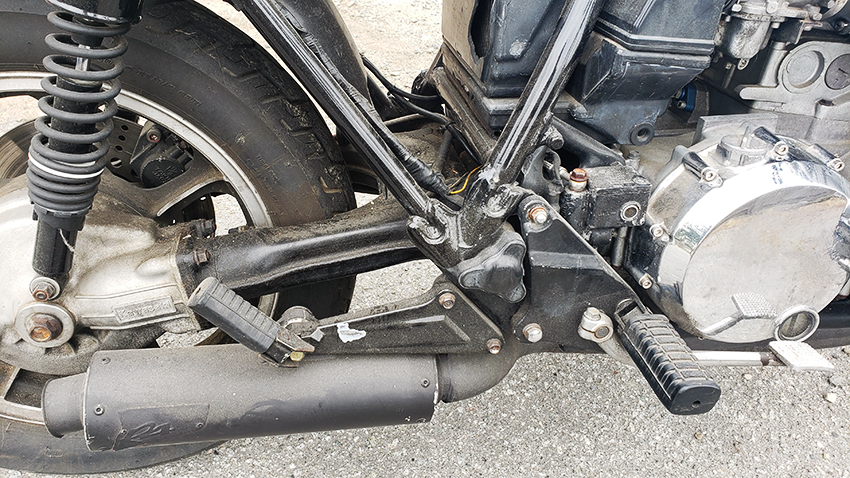
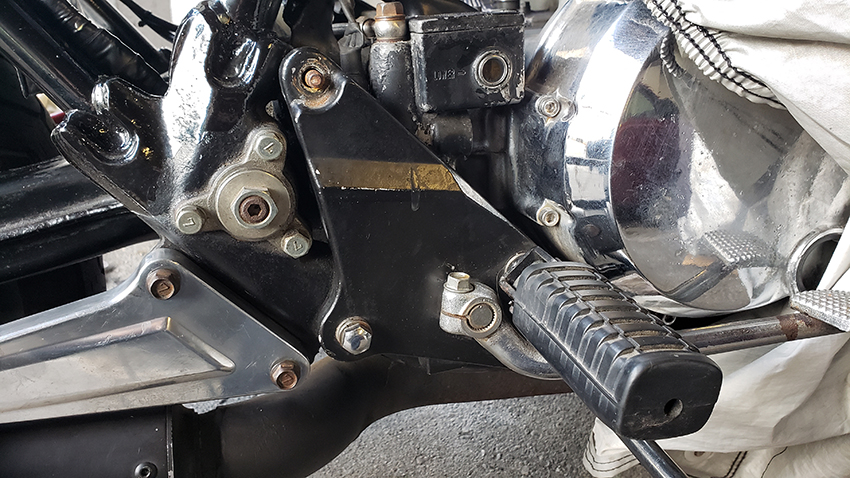
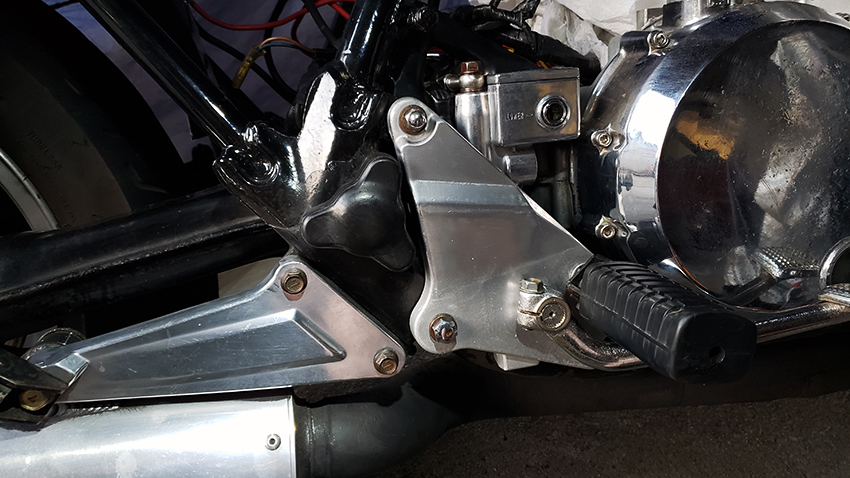
The rear brake fluid looked clean, but the whole assembly was a mess. Paint peeling off, rusty linkage, the dust boot raptured. Dirty sediments inside the master cylinder reservoir. Why? Because the installed diaphragm was not really a diaphragm! Just a very brittle what's left of it - the outer edge. That's what was left of it... and that's what was installed.
I pulled out a spare master cylinder and a media blasted spare bracket with clean linkage. I put it back together, new dust boot, diaphragm, the piston seals were in great shape and the bore smooth. Lubricated with some brake fluid and external moving parts with molybdenum grease, all fit together like a glove. After some polishing all were ready to go on the bike. It will need more polishing later, and maybe I'd paint part of the bracket black, but I am happy for now. All is rebuilt, functional, clean, and that's how it will stay.
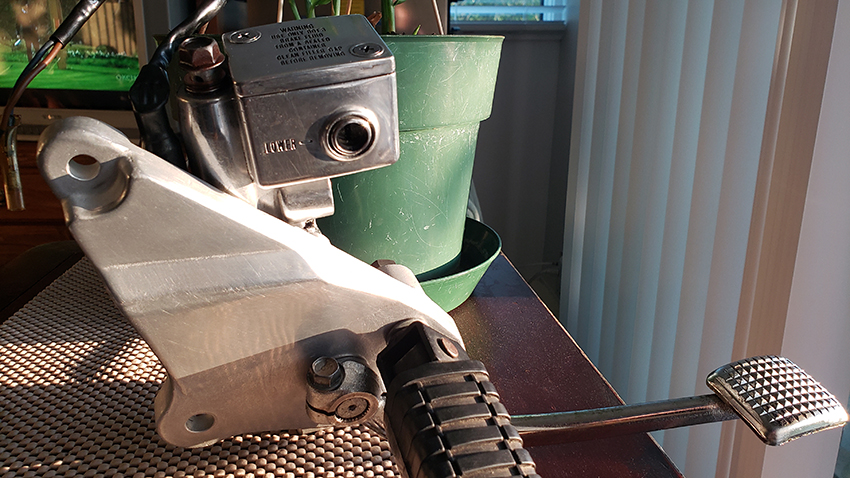
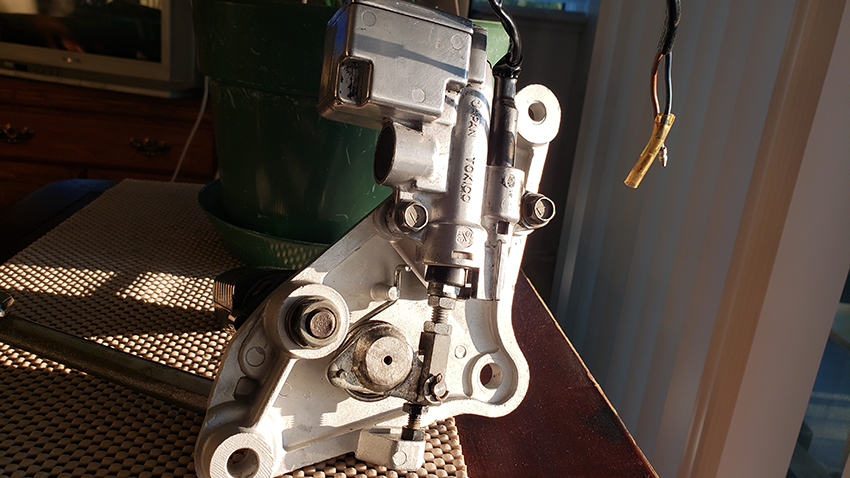
Before and after.
I pulled out a spare master cylinder and a media blasted spare bracket with clean linkage. I put it back together, new dust boot, diaphragm, the piston seals were in great shape and the bore smooth. Lubricated with some brake fluid and external moving parts with molybdenum grease, all fit together like a glove. After some polishing all were ready to go on the bike. It will need more polishing later, and maybe I'd paint part of the bracket black, but I am happy for now. All is rebuilt, functional, clean, and that's how it will stay.
Before and after.
Please Log in or Create an account to join the conversation.
- StanG
-
Topic Author
- Offline
- Banned
-
- Posts: 1987
- Thanks: 237
Re: 1981 KZ1300 A3 make over
6 years 6 months ago
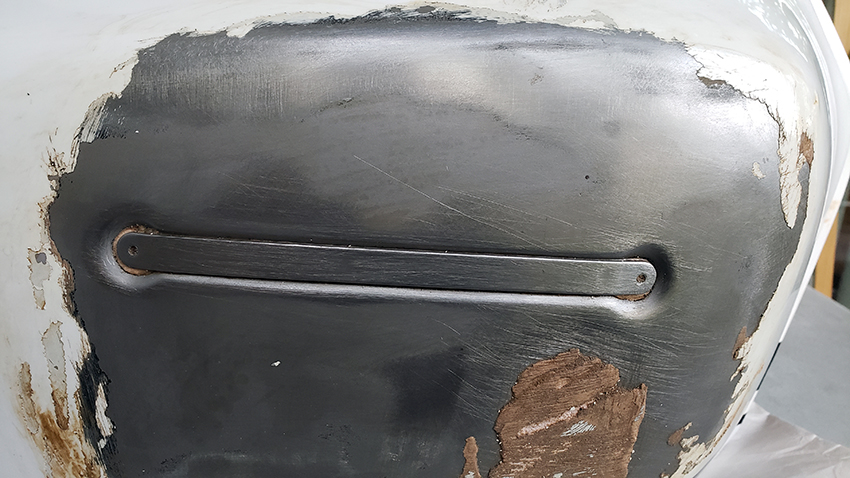
After a few times applying the aircraft paint stripper and some work with a wire brush, I saw what I was hoping to see: the bracket for mounting the Kawasaki gas tank badges is there! Very happy. It's the North American peanut shaped tank and I have a spare larger tank that I have been trying to get rid of rust. It's been a long battle and still not won. I might succeed with muriatic acid eventually. Maybe tomorrow. I am thinking about installing the bigger tank on this bike.
Please Log in or Create an account to join the conversation.
- biltonjim
-

- Offline
- Platinum Member
-

- Posts: 957
- Thanks: 249
Re: 1981 KZ1300 A3 make over
6 years 6 months ago - 6 years 6 months ago
Well done, Stan! I’m happy that you’ve started another project. I guess that from now on , for quite a while, there will always be new and interesting posts on the forum each day!
After you went to such lengths to achieve a great standard of finish on every part of your A4, are you sure you’ll be happy with the original paint on the A3 frame ? The factory finish was not very good , even when new.
Will you be doing a compression or leak down test on the A3 engine? Out of interest, it would be good to know what the compression figures are on your A4, now that the rings have bedded in a bit.
Last edit: 6 years 6 months ago by biltonjim.
The following user(s) said Thank You: StanG
Please Log in or Create an account to join the conversation.
- StanG
-
Topic Author
- Offline
- Banned
-
- Posts: 1987
- Thanks: 237
Re: 1981 KZ1300 A3 make over
6 years 6 months ago - 6 years 6 months ago
Thank you Jim! It's my last project like this, for a long time. Unless I suddenly find myself with a big house and even bigger garage, haha
Yes, this one is in many ways totally unexpected. I thought I will have a room full of ready to go engine, front end, and all the parts, waiting for frame one day. A year, two, whatever - in the future. And here I am, just because this bike at the price and the package just right, I will be emptying the shelves - and that's awesome! I need space! So, in a way, it's great that this bike came along with all except the bare minimum missing.
I will be posting updates, but not every day like before. I am running another project at the same time, and it's really time consuming. I am on a weight loss plan, and getting paid for it! 0r in less romantic and attractive terms - recently I started a full time job. Never thought I'd be doing this, but here I am doing construction work. Despite all the ailments I have. Good thing is I know my body and know how to control it and move it safely.
This bike doesn't require in depth rebuild like the other one. The engine stays in place, and it's mostly about removing small components to check, service and put back. But mostly, it is about moving electrical parts around and installing the spare parts I have mostly ready. If I had a garage, I'd be taking the engine out to completely beautify the frame. But in this case, the frame is clean, no rust, the engine is also clean, so I am confident all can stay as is and all it needs is touch ups where necessary - and that's in easy accessible areas. The goal is to have the bike all original, clean and running good.
The engine compression - I might do it, but it's not crucial as it ran right. Same with the A4 - I'm not going into academics at present time. In this A3 I will check the valves, cam chain sprocket, what's inside the oil pan (6.2 L deep one") ), change oil and filter despite being told it's been done - after seeing the rest I don't trust it. Already cleaned the radiator but will fush the hole system as the coolant was dirty. Maybe I will change the oil and mechanical water pump seals - depending on what I will find there. The rest - grease bearings etc.
), change oil and filter despite being told it's been done - after seeing the rest I don't trust it. Already cleaned the radiator but will fush the hole system as the coolant was dirty. Maybe I will change the oil and mechanical water pump seals - depending on what I will find there. The rest - grease bearings etc.
The main work will be properly hook up all electrical components. Would be great to find somewhere a complete harness for 1981 A3 model.
In my other project, I just celebrated 8 weeks without a single beer! Good for the bank, and weight loss. The new job helps as well - lots of calories burning especially that on top of having no choice than being active, I eat much less. I've lost 25 pounds in these 2 months, and I'm looking forward to losing another. I'll be close to what I should be. But enough about myself.
Going to the bike in a few with a plan. The radiator comes off!
Yes, this one is in many ways totally unexpected. I thought I will have a room full of ready to go engine, front end, and all the parts, waiting for frame one day. A year, two, whatever - in the future. And here I am, just because this bike at the price and the package just right, I will be emptying the shelves - and that's awesome! I need space! So, in a way, it's great that this bike came along with all except the bare minimum missing.
I will be posting updates, but not every day like before. I am running another project at the same time, and it's really time consuming. I am on a weight loss plan, and getting paid for it! 0r in less romantic and attractive terms - recently I started a full time job. Never thought I'd be doing this, but here I am doing construction work. Despite all the ailments I have. Good thing is I know my body and know how to control it and move it safely.
This bike doesn't require in depth rebuild like the other one. The engine stays in place, and it's mostly about removing small components to check, service and put back. But mostly, it is about moving electrical parts around and installing the spare parts I have mostly ready. If I had a garage, I'd be taking the engine out to completely beautify the frame. But in this case, the frame is clean, no rust, the engine is also clean, so I am confident all can stay as is and all it needs is touch ups where necessary - and that's in easy accessible areas. The goal is to have the bike all original, clean and running good.
The engine compression - I might do it, but it's not crucial as it ran right. Same with the A4 - I'm not going into academics at present time. In this A3 I will check the valves, cam chain sprocket, what's inside the oil pan (6.2 L deep one
), change oil and filter despite being told it's been done - after seeing the rest I don't trust it. Already cleaned the radiator but will fush the hole system as the coolant was dirty. Maybe I will change the oil and mechanical water pump seals - depending on what I will find there. The rest - grease bearings etc.The main work will be properly hook up all electrical components. Would be great to find somewhere a complete harness for 1981 A3 model.
In my other project, I just celebrated 8 weeks without a single beer!
Good for the bank, and weight loss. The new job helps as well - lots of calories burning especially that on top of having no choice than being active, I eat much less. I've lost 25 pounds in these 2 months, and I'm looking forward to losing another. I'll be close to what I should be. But enough about myself.Going to the bike in a few with a plan. The radiator comes off!
Last edit: 6 years 6 months ago by StanG.
Please Log in or Create an account to join the conversation.
- Daro
-
- Offline
- Premium Member
-

- Posts: 144
- Thanks: 80
Re: 1981 KZ1300 A3 make over
6 years 6 months ago
Hi Stan, this is great stuff, thanks for taking time and posting. Ill be looking up on You progress mate.
Daro
Daro
The following user(s) said Thank You: StanG
Please Log in or Create an account to join the conversation.
Moderators: dcarver220b
Time to create page: 0.196 seconds