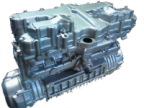
Cylinder head removal.
- zed_thirteen
-
- Offline
- Sustaining Member
-

- Posts: 553
- Thanks: 146
Re: Cylinder head removal.
4 years 3 months ago
I just smear my gaskets with fresh oil. It helps them to stay in place while the other mating surfice is fitted.
I never use a sealant as it's the gaskets job to make the seal and an additional sealant makes them really difficult to remove.
I have no technical reason to back this up - it''s just what I do
I never use a sealant as it's the gaskets job to make the seal and an additional sealant makes them really difficult to remove.
I have no technical reason to back this up - it''s just what I do
1980 KZ1300 B2 Touring/A2
1980 CBX1000-A
1990 ZZ-R1100 C1
1980 CBX1000-A
1990 ZZ-R1100 C1
The following user(s) said Thank You: Kawboy
Please Log in or Create an account to join the conversation.
- McZee
-
 Topic Author
- Offline
- Premium Member
-

- Posts: 83
- Thanks: 42
Re: Cylinder head removal.
4 years 3 months ago - 4 years 3 months ago
I was investigating Zed_13s suggestion regarding the crankcase breather and I may have found the possible cause for debris getting into crankcase. The airbox is in two parts with a rubber gasket glued to a thin metal frame sandwiched between them. The gasket sits in a recess in the lower part of the airbox. The rubber part on mine had come adrift from the metal frame, leaving quite a bit of space for rubbish to get drawn in. The bottom of the airbox was a bit gritty as well. I’ve marked on the photo where the gasket sits.
Last edit: 4 years 3 months ago by McZee.
Please Log in or Create an account to join the conversation.
- Bucko
-

- Offline
- Platinum Member
-

- Posts: 659
- Thanks: 165
Re: Cylinder head removal.
4 years 3 months agoMy 79 had that exact same problem - more than once.I was investigating Zed_13s suggestion regarding the crankcase breather and I may have found the possible cause for debris getting into crankcase. The airbox is in two parts with a rubber gasket glued to a thin metal frame sandwiched between them. The gasket sits in a recess in the lower part of the airbox. The rubber part on mine had come adrift from the metal frame, leaving quite a bit of space for rubbish to get drawn in. The bottom of the airbox was a bit gritty as well. I’ve marked on the photo where the gasket sits.
Hello from Canada's We(s)t coast.
Please Log in or Create an account to join the conversation.
- McZee
-
 Topic Author
- Offline
- Premium Member
-

- Posts: 83
- Thanks: 42
Re: Cylinder head removal.
4 years 3 months ago
Finally got the big old Z up and running again. Replacing the valve stem oil seals has cured the excessive oil burning, so no billowing smoke on start up. I had a problem getting the thermostat housing to seal, took me four attempts, a new gasket and several applications of sealant before I got it watertight. I Discovered that if you bung up the bottom hose with the cap from a T-cut bottle and fix a bit of plastic pipe to the top hose, you can fill the system with water and test for leaks without fitting the radiator. The repair I did to the exhaust is holding up well with no sign of leaking, so I’m going to call that a success - see photo- my repair lasted better than the exhaust paint I applied. Cleaned the carbs and set the needles to three and a half turns out, which if probably a bit rich but I will do a final adjustment on them later when give the cylinder head nuts a final check for torque. I also reverted back to a cable clutch, the hydraulic conversion worked well to start with but as time went on I felt it wasn’t fully disengaging, giving me clunky gear changes and difficulty finding neutral when stationary. Overall I’m pleased with how it’s turned out.
The following user(s) said Thank You: Kawboy
Please Log in or Create an account to join the conversation.
Moderators: dcarver220b
Time to create page: 0.169 seconds
