
Another basket case project, but with potentially a different end goal!
- StanG
-
- Offline
- Banned
-

- Posts: 2118
- Thanks: 248
Re: Another basket case project, but with potentially a different end goal!
6 years 3 months ago - 6 years 3 months ago
That front end sounds like a deal to push for indeed. I am not familiar with with Ducati particulars, but this sounds like ABS and some preventative suspension control? I read about a Honda racing bike that is used by a few top racers.They produced only a handful of them and it cost about US$185,000 and is not available even if you had the money. Some riders magazine guy tested it and he said the bike controls itself in corners against slipping. He was amazed like front or rear breaking at high speeds in corners didn't feel scary and the bike was correcting itself. I have no idea hot this works, but it gave me a great peace to know that while individual technique is of course the most important element in racing bikes and taking the corners scraping the asphalt, it can't be done well without proper technology starting with the bikes' design and especially the riders sitting and leaning position. I sat in a parking lot on a Ducati Diavel pretending taking corners and it felt really comfortable and natural leaning to the left and right, like if I was one with the bike. On a Vmax I would fall off! I can only imagine it done on a proper race bike. A couple times I just kind of laid down on the Vmax and it was sooo much easier and with more confidence leaning into corners. The road looks better and better the lower you are looking at it! haha So I think in race bikes this bike hugging leaning forward riding position must be half of the success towards impressive high speed cornering.
What about the rear wheel, if you haven't mention it already? I bet you have plans for this as well. I couldn't imagine leaving it stock! I imagine something fatter and radial. Maybe even a couple inches added with an extended swing arm?
What about the rear wheel, if you haven't mention it already? I bet you have plans for this as well. I couldn't imagine leaving it stock! I imagine something fatter and radial. Maybe even a couple inches added with an extended swing arm?
Last edit: 6 years 3 months ago by StanG.
Please Log in or Create an account to join the conversation.
- McBoney
-
 Topic Author
- Offline
- Platinum Member
-

- Posts: 585
- Thanks: 96
Re: Another basket case project, but with potentially a different end goal!
6 years 3 months ago
Well, I took a sharp intake on breath and took the head off again.
Two lessons learnt:
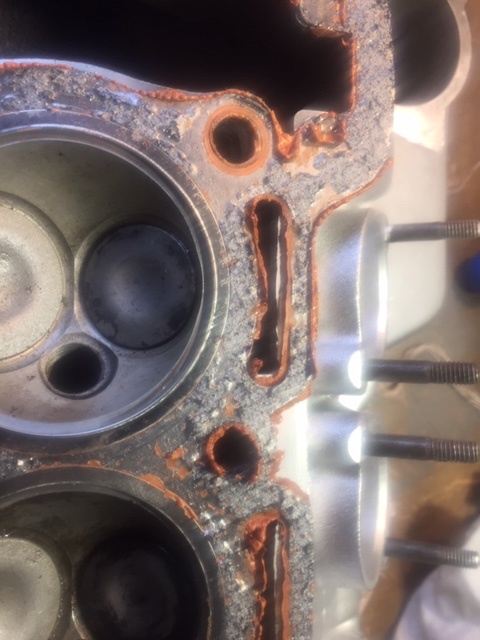
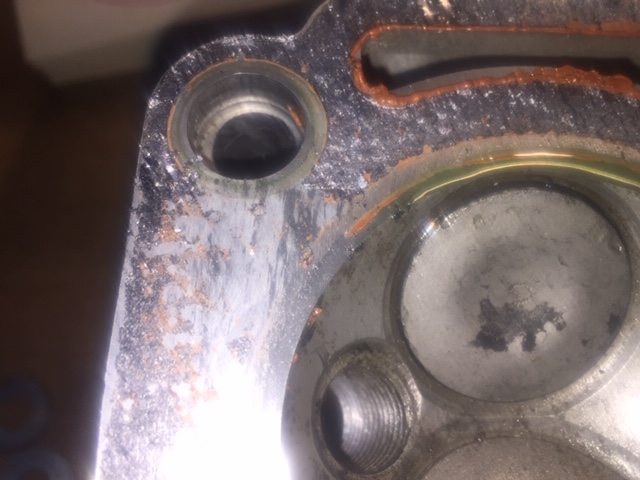
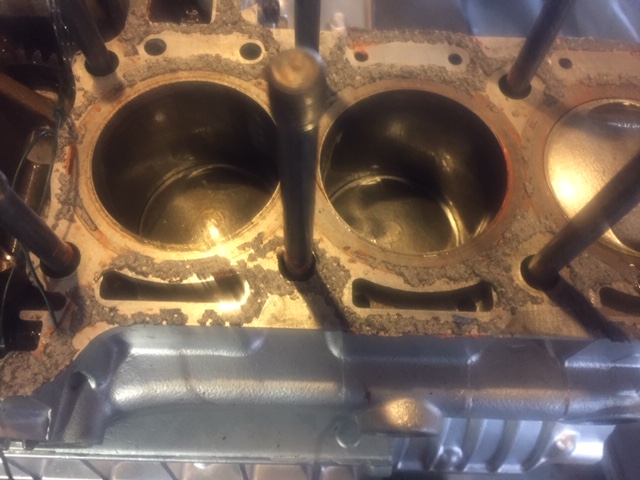
1) no need for liquid gasket when using a proper head gasket as it comes with its own 'soft coat', you can see from the pics that the extra (very thin!) layer of liquid gasket (in red) just squeezed everywhere it should not have gone
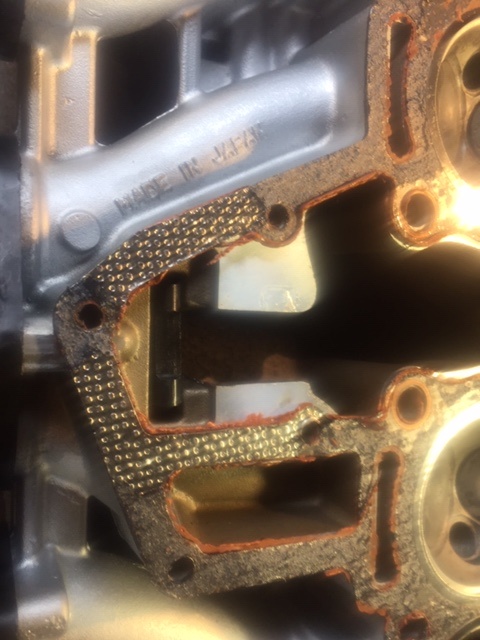
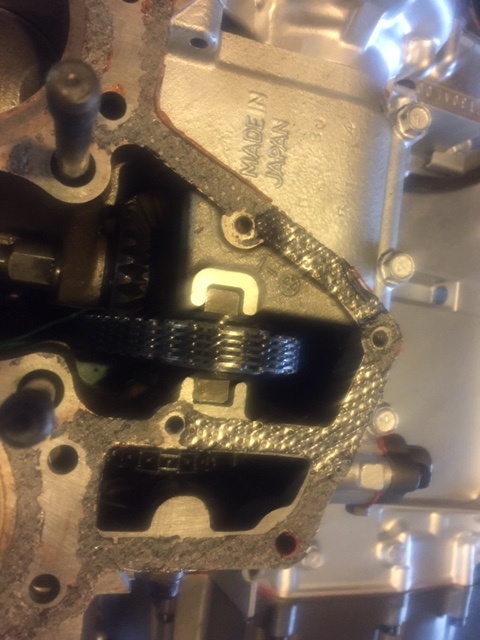
2) there is a proper way to insert the cam chain into the tensioner holder... please do not do what I do and just drop it in, the chain needs to wrap around the wheels in an S-shaped fashion.

I now have to clean off the old head gasket and liquid gasket without any of the debris falling into the motor or the waterways - what a nightmare - and get myself a new head gasket!
One lucky find: when cleaning the head my finger caught on a small piece of metal wire that was stuck in one of the valves. If I had not screwed up with the cam chain tensioner holder, that would have fallen into the cylinder and buggered everything up properly! :S Lucky escape!
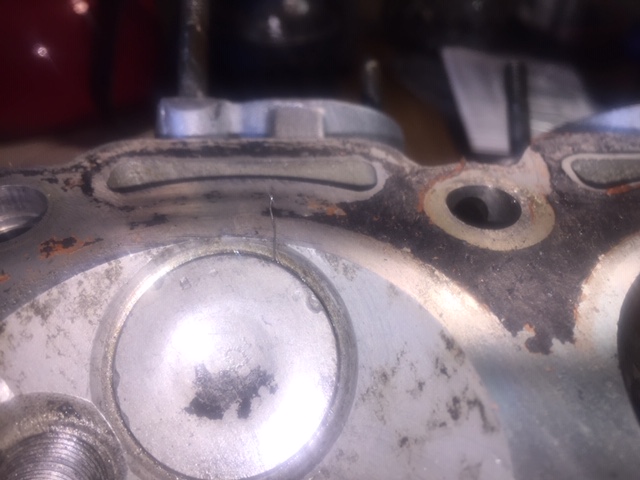
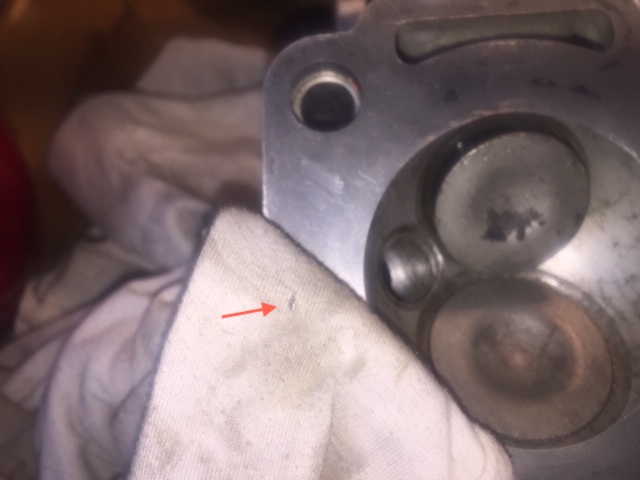
When fiddling with it, it broke off, so I had to open the valve and retrieve the bit still in there, you can just see it on the cloth.
Now I am cleaning everything again and once I have the new head gasket I'll carry on.
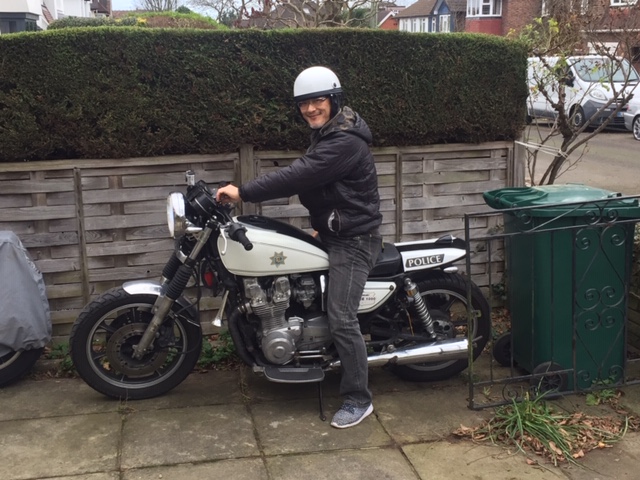
In the meantime, Koba (from Japan, we met on this forum) came for tea, a view of the project and took a ride on my KZ1000P. Think he enjoyed it!
Two lessons learnt:
1) no need for liquid gasket when using a proper head gasket as it comes with its own 'soft coat', you can see from the pics that the extra (very thin!) layer of liquid gasket (in red) just squeezed everywhere it should not have gone
2) there is a proper way to insert the cam chain into the tensioner holder... please do not do what I do and just drop it in, the chain needs to wrap around the wheels in an S-shaped fashion.
I now have to clean off the old head gasket and liquid gasket without any of the debris falling into the motor or the waterways - what a nightmare - and get myself a new head gasket!
One lucky find: when cleaning the head my finger caught on a small piece of metal wire that was stuck in one of the valves. If I had not screwed up with the cam chain tensioner holder, that would have fallen into the cylinder and buggered everything up properly! :S Lucky escape!
When fiddling with it, it broke off, so I had to open the valve and retrieve the bit still in there, you can just see it on the cloth.
Now I am cleaning everything again and once I have the new head gasket I'll carry on.
In the meantime, Koba (from Japan, we met on this forum) came for tea, a view of the project and took a ride on my KZ1000P. Think he enjoyed it!
Six-Pot-Cafe in the making...
The following user(s) said Thank You: StanG
Please Log in or Create an account to join the conversation.
- StanG
-
- Offline
- Banned
-
- Posts: 2118
- Thanks: 248
Re: Another basket case project, but with potentially a different end goal!
6 years 3 months ago - 6 years 3 months ago
That's a good story with a happy ending and complications avoided Paul. You could call it an example of a blessing in disguise.
I will reflect because I remember exactly the moment we were discussing the gaskets. It was about applying some liquid gasket to one side of the cylinder block gasket (bottom), and then your next post was with the head already on! I thought - that's fast! You mentioned something about applying a thin layer to both sides of the head gasket. I thought - ah.. too late! haha I remember just hoping it's a very, very thin layer, maybe only around the water passages. Now I see it was quite more, and it got squeezed and pushed into the undesirable areas. One, undesirable around the combustion chamber. Two, it went inside the water passages. I am sure it would pollute them eventually for sure, perhaps causing sealing issues around the water pump, maybe got stuck inside the thermostat. The piece of wire - actually I think it would get blown out as soon as you'd crank the engine. I think your engine would be fine if you left it as is and the bits of silicone, if broken off, would come out after flushing a couple times down the road would you experience any problems.
Just to reiterate, the stock head gasket already has a very very thin coating of solid silicone, and there is extra solid line around the water passages. That's different from liquid gasket - these stay in place and don't get squeezed out. No need for anything extra with stock gasket. Different story when using some aftermarket gaskets, or damaged gaskets. People used thin lines of silicone around the water passages on those with good results.
I think lesson three would be to double or triple check everything, especially in an unfamiliar environment. I admit I have a tendency to unnecessarily rush through things myself, and still learning to take a deep breath sometimes! haha We are not in a field at war, haha, no need to make quick decisions. Although I know you had a deadline")
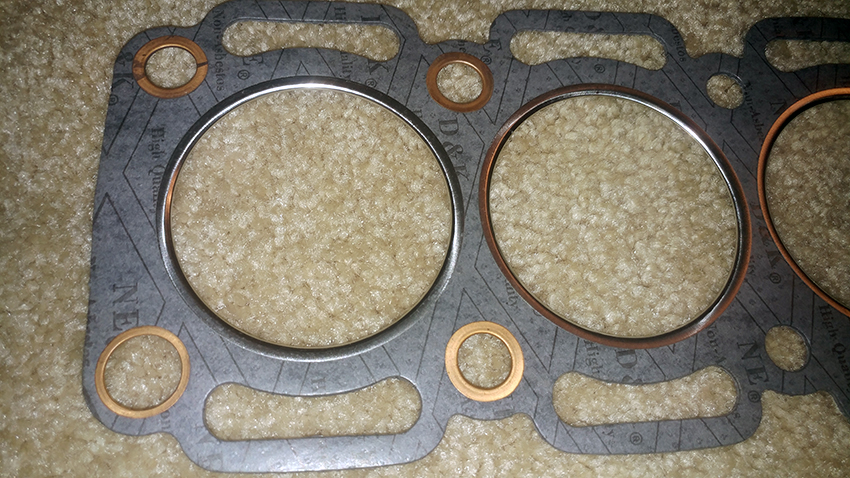
Stock Kawasaki gasket with damaged silicon (brittle). This one is from eBay. One that I bought from Kawasaki dealership, although expensive, was perfect.
Aftermarket head gasket without any silicone.
I think the smile on Koba's face says it all!
no need for liquid gasket when using a proper head gasket as it comes with its own 'soft coat', you can see from the pics that the extra (very thin!) layer of liquid gasket (in red) just squeezed everywhere it should not have gone
I will reflect because I remember exactly the moment we were discussing the gaskets. It was about applying some liquid gasket to one side of the cylinder block gasket (bottom), and then your next post was with the head already on! I thought - that's fast! You mentioned something about applying a thin layer to both sides of the head gasket. I thought - ah.. too late! haha I remember just hoping it's a very, very thin layer, maybe only around the water passages. Now I see it was quite more, and it got squeezed and pushed into the undesirable areas. One, undesirable around the combustion chamber. Two, it went inside the water passages. I am sure it would pollute them eventually for sure, perhaps causing sealing issues around the water pump, maybe got stuck inside the thermostat. The piece of wire - actually I think it would get blown out as soon as you'd crank the engine. I think your engine would be fine if you left it as is and the bits of silicone, if broken off, would come out after flushing a couple times down the road would you experience any problems.
Just to reiterate, the stock head gasket already has a very very thin coating of solid silicone, and there is extra solid line around the water passages. That's different from liquid gasket - these stay in place and don't get squeezed out. No need for anything extra with stock gasket. Different story when using some aftermarket gaskets, or damaged gaskets. People used thin lines of silicone around the water passages on those with good results.
I think lesson three would be to double or triple check everything, especially in an unfamiliar environment. I admit I have a tendency to unnecessarily rush through things myself, and still learning to take a deep breath sometimes! haha We are not in a field at war, haha, no need to make quick decisions. Although I know you had a deadline
Stock Kawasaki gasket with damaged silicon (brittle). This one is from eBay. One that I bought from Kawasaki dealership, although expensive, was perfect.
Aftermarket head gasket without any silicone.
In the meantime, Koba (from Japan, we met on this forum) came for tea, a view of the project and took a ride on my KZ1000P. Think he enjoyed it!
I think the smile on Koba's face says it all!
Last edit: 6 years 3 months ago by StanG.
The following user(s) said Thank You: McBoney
Please Log in or Create an account to join the conversation.
- StanG
-
- Offline
- Banned
-
- Posts: 2118
- Thanks: 248
Re: Another basket case project, but with potentially a different end goal!
6 years 3 months ago - 6 years 3 months ago
Just for the record, to have things in one place..
This is how stock Kawasaki head gasket looks (fresh and ready):
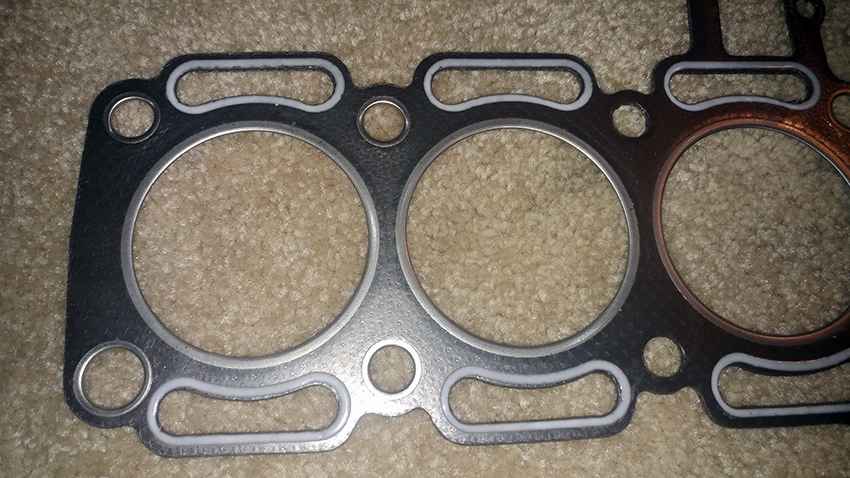
This how it looks after removing (after sitting with flooded rusting cylinders for 20+ years):

This is how stock Kawasaki head gasket looks (fresh and ready):
This how it looks after removing (after sitting with flooded rusting cylinders for 20+ years):
Last edit: 6 years 3 months ago by StanG.
Please Log in or Create an account to join the conversation.
- StanG
-
- Offline
- Banned
-
- Posts: 2118
- Thanks: 248
Re: Another basket case project, but with potentially a different end goal!
6 years 3 months ago - 6 years 3 months ago
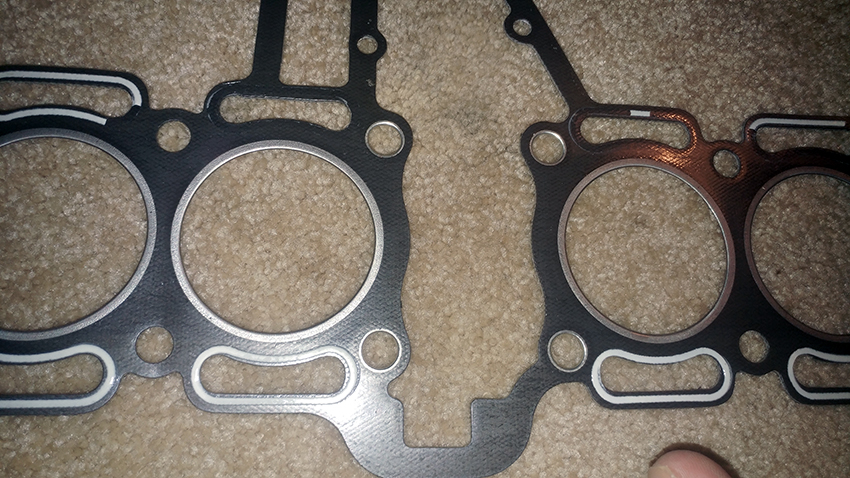
From left:
From what I gather, if using aftermarket or 'sour' stock gaskets, apply thin line of high temperature silicone and let it sit to dry. That will mimic a good stock gasket and will not get squeezed out like in it's semi-liquid state when freshly applied.
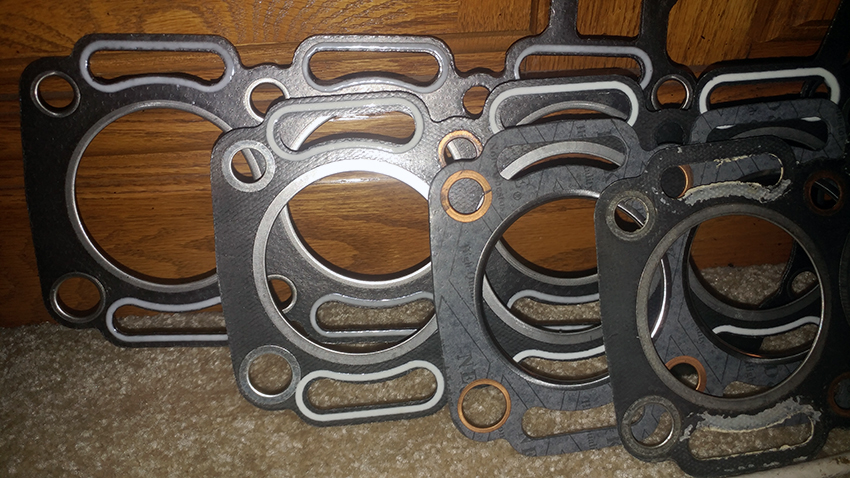
- OEM Kawasaki current stock from dealership
- OEM Kawasaki old stock from eBay; damaged silicone peels off and chips; discoloration due to hardening over time and bad storage, see above for nice fresh
- aftermarket from eBay; common style
- OEM Kawasaki removed from my bike; 1982
From what I gather, if using aftermarket or 'sour' stock gaskets, apply thin line of high temperature silicone and let it sit to dry. That will mimic a good stock gasket and will not get squeezed out like in it's semi-liquid state when freshly applied.
Last edit: 6 years 3 months ago by StanG.
The following user(s) said Thank You: zed_thirteen, McBoney
Please Log in or Create an account to join the conversation.
- McBoney
-
Topic Author
- Offline
- Platinum Member
-
- Posts: 585
- Thanks: 96
Re: Another basket case project, but with potentially a different end goal!
6 years 3 months ago
Right, got the new gasket by post today and head is back on, properly torqued. I did put a very thin layer of silicone sealant around the water passages only, and I mean VERY thin, much less than I did last time!
Next jobs are to put the valve shims in and then mount the camshafts, properly timed.
Then lastly the cam chain tensioner, the head cover, starter motor cover and the two remaining side panels.
The end is near! Well... engine rebuild - wise...
This weekend I'll be at Kempton Race park for the bike jumble, see if I can secure a front end. The electronic Ducati one is far too complicated as it needs the Ducati engine CPU to set itself up properly. I'm trying to keep it simple so will look out of manually adjustable shocks.
Six-Pot-Cafe in the making...
Please Log in or Create an account to join the conversation.
Moderators: dcarver220b
Time to create page: 0.232 seconds