
Muzzy Fan Installation
- SacredKaw
-
 Topic Author
- Offline
- New Member
-

- Posts: 5
- Thanks: 6
Muzzy Fan Installation
11 years 10 months ago - 11 years 10 months ago
Since the first one rolled off the assembly line, the KZ1300 has struggled to “keep its cool” under anything less than favorable conditions. David Ewing, the founder of KZ1300.com and the man responsible for bringing international recognition to the site, once did a Muzzy fan upgrade for the big six. After joining this site a few months ago, I researched (what I thought) were all the tech articles, but was unable to find any detailed information on the conversion. I am certain that the process I used is not identical to the one he used. I am equally certain there are most likely numerous other ways to accomplish a successful installation. The following process worked best for me with a minimal investment of time and money and yielded satisfactory results. Hopefully, I have provided an adequate explanation of the process, along with pictures, which should make it a fairly straightforward procedure for anyone wanting to cool down the big behemoth. Feel free to contact me with any questions or suggestions that others might use in the future to make it a still simpler process.
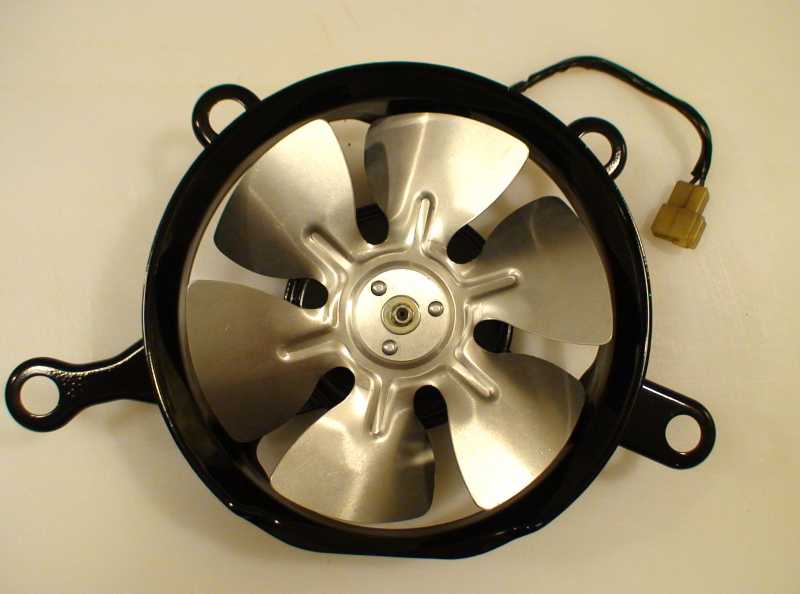
4 Blade stock fan and the new 6 blade Muzzy fan
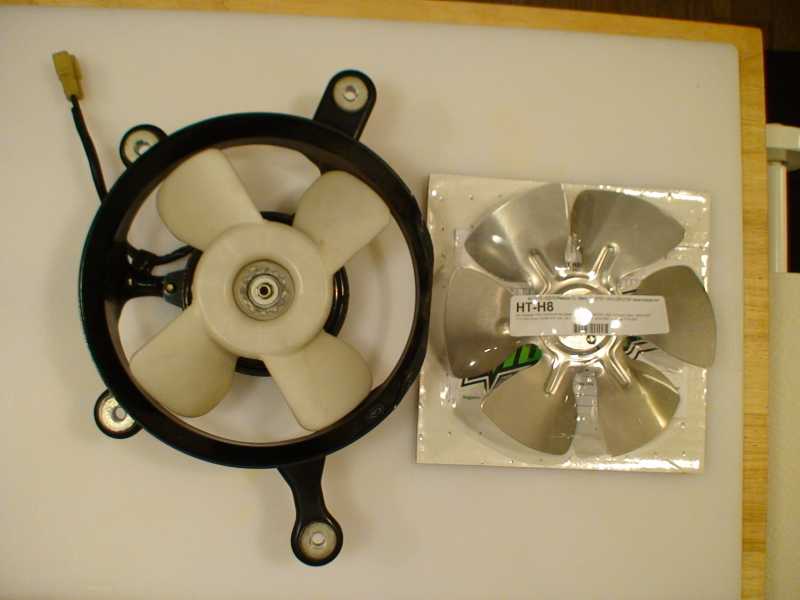

Notice: This particular fan (Model HT-H8) is still available through Muzzy for $39.95 and is designed to fit every 1300 model EXCEPT the KZ.
With a few modifications, this becomes an easy install for the KZ.
Muzzys Inc. • 62910 Peerless Ct. • Bend, OR 97701 / ph 541-385-0706 fax 541-382-9406
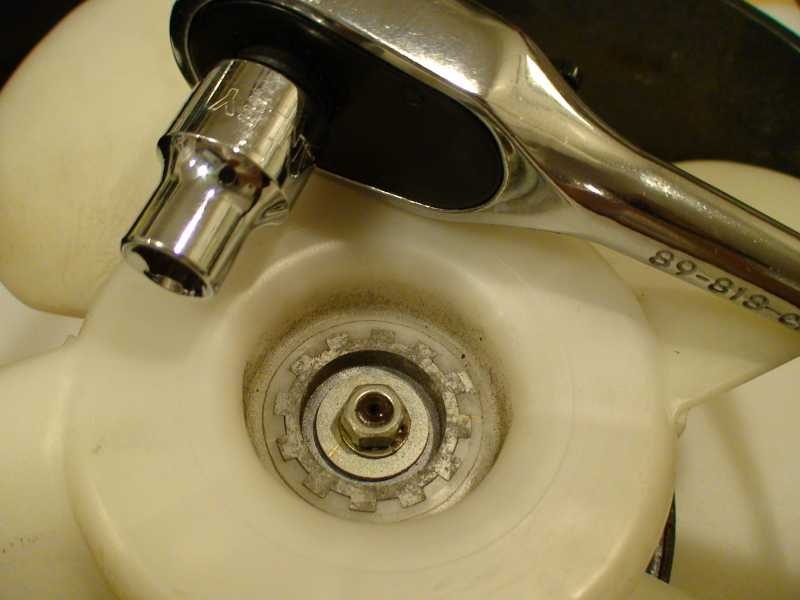
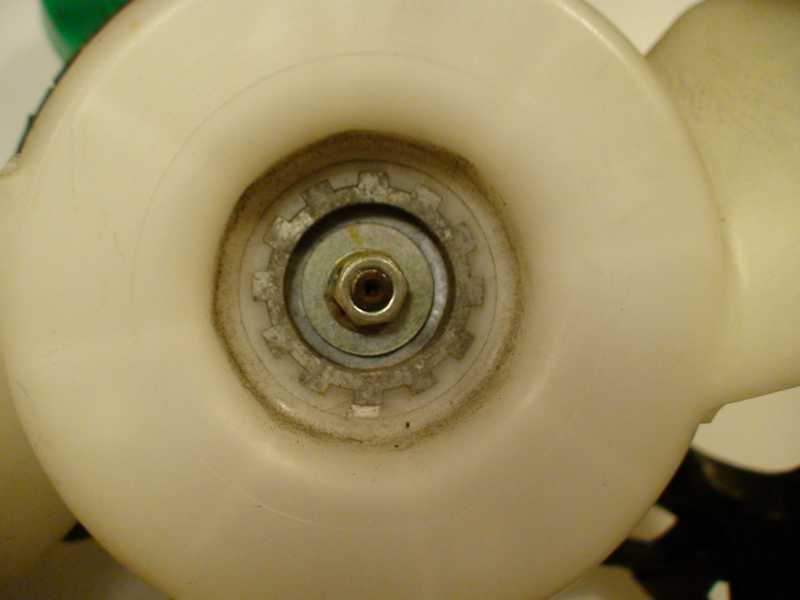
After removing the 8mm nut and two washers, you'll need to remove the center aluminum hub from the stock fan blade. Don't worry about salvaging the old fan....you're done with it.
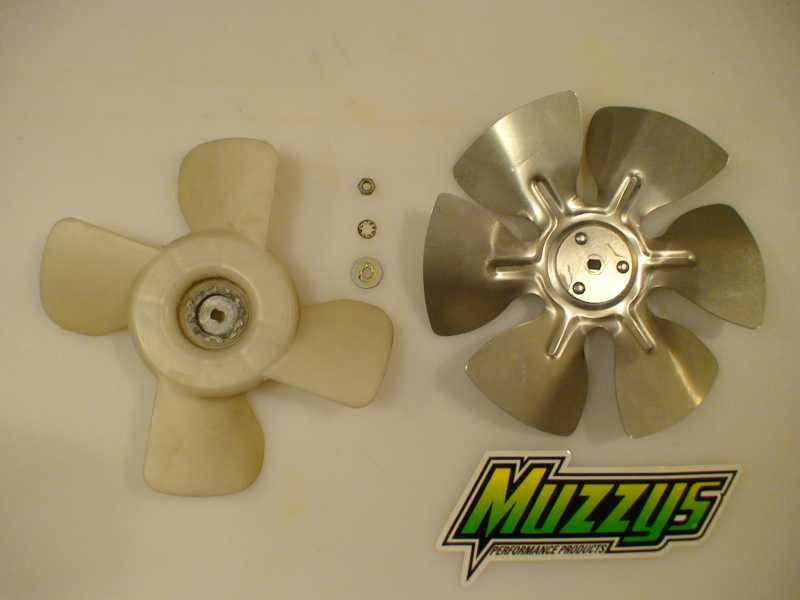
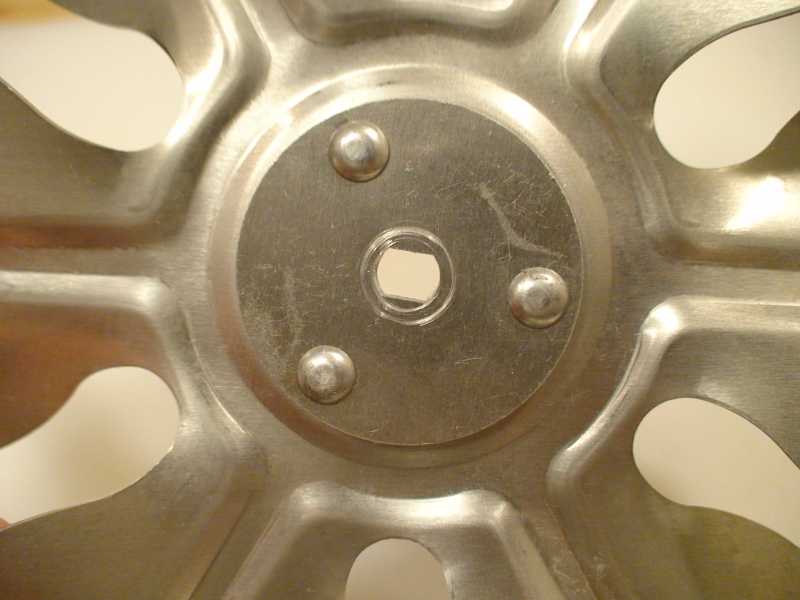
Notice you not only pick up two additional blades, but they appear to be at least 25% to 30% larger than the stock blades.
Using an arbor press, remove the center hub from the stock fan. If a press is not available, using an appropriately sized drift or socket, (with a hammer), drive the hub from the fan. Don't worry about salvaging the stock fan...... you're done with it.
4 Blade stock fan and the new 6 blade Muzzy fan
Notice: This particular fan (Model HT-H8) is still available through Muzzy for $39.95 and is designed to fit every 1300 model EXCEPT the KZ.
With a few modifications, this becomes an easy install for the KZ.
Muzzys Inc. • 62910 Peerless Ct. • Bend, OR 97701 / ph 541-385-0706 fax 541-382-9406
After removing the 8mm nut and two washers, you'll need to remove the center aluminum hub from the stock fan blade. Don't worry about salvaging the old fan....you're done with it.
Notice you not only pick up two additional blades, but they appear to be at least 25% to 30% larger than the stock blades.
Using an arbor press, remove the center hub from the stock fan. If a press is not available, using an appropriately sized drift or socket, (with a hammer), drive the hub from the fan. Don't worry about salvaging the stock fan...... you're done with it.
Last edit: 11 years 10 months ago by SacredKaw.
The following user(s) said Thank You: KZQ
Please Log in or Create an account to join the conversation.
- SacredKaw
-
Topic Author
- Offline
- New Member
-
- Posts: 5
- Thanks: 6
Re: Muzzy Fan Installation
11 years 10 months ago - 11 years 10 months ago
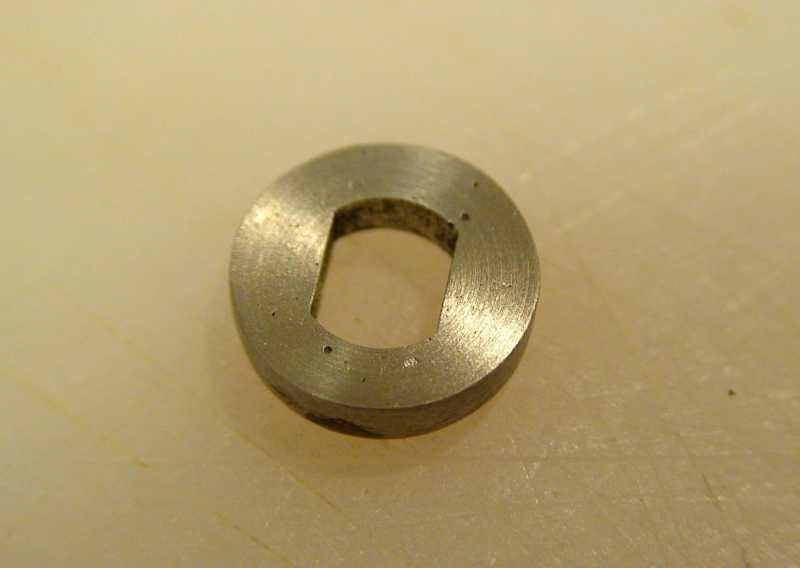
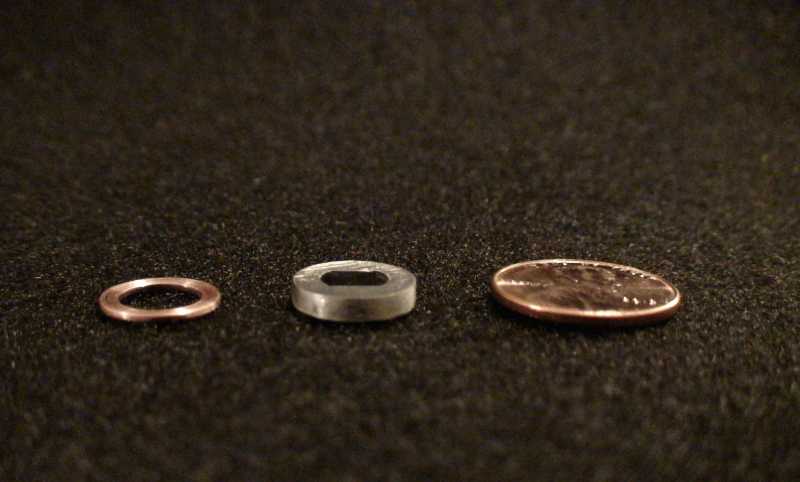
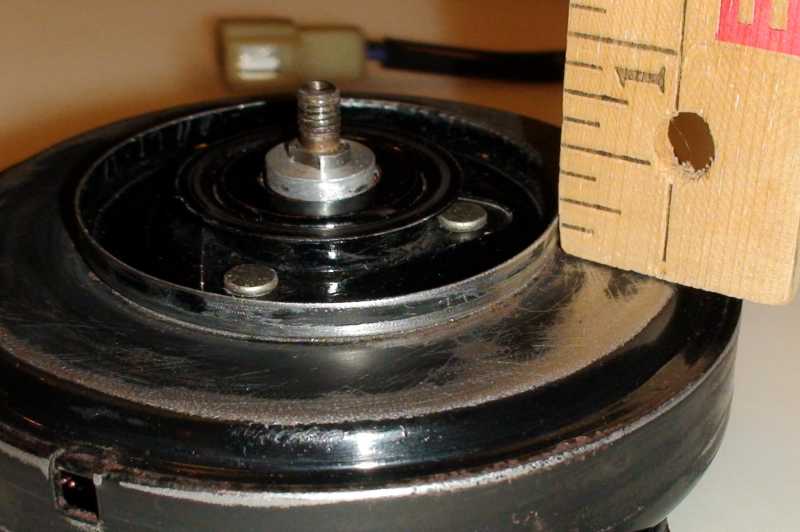
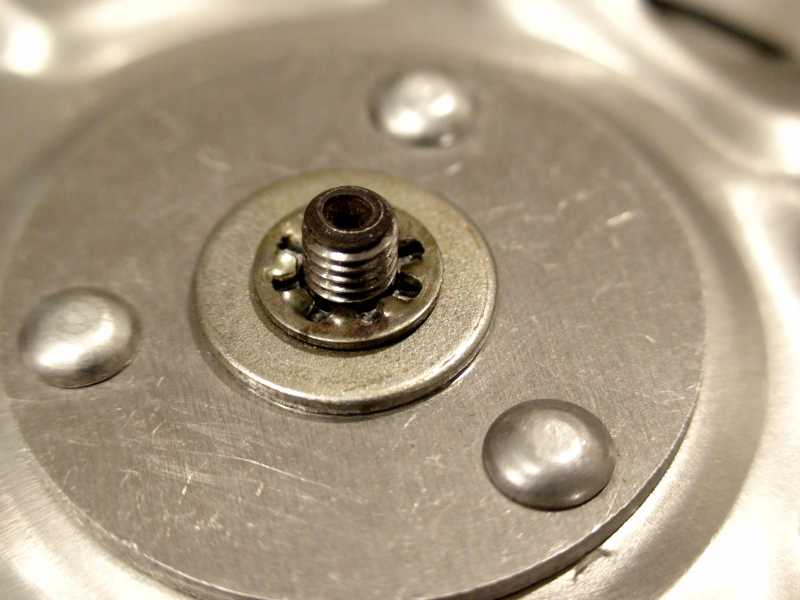
After pressing the center hub from the stock fan blade, acquire the services of a competent machinist. (On a lathe), turn the large end of the hub down until it is JUST removed, leaving nothing but the small end of the hub. In the pic below, the remaining hub is .105 (one hundred and five thousandths) thick. It should be no less than .100 thick and no more than .110 thick. These were the instructions I left with my machinist, who MAY have removed slightly more stock from the small end of the hub. Once you have machined the large end completely off, using a micrometer, measure the remaining small end. IF you have a thickness of .125 or more, there is a strong likelihood you may not need to add the copper washer described below.
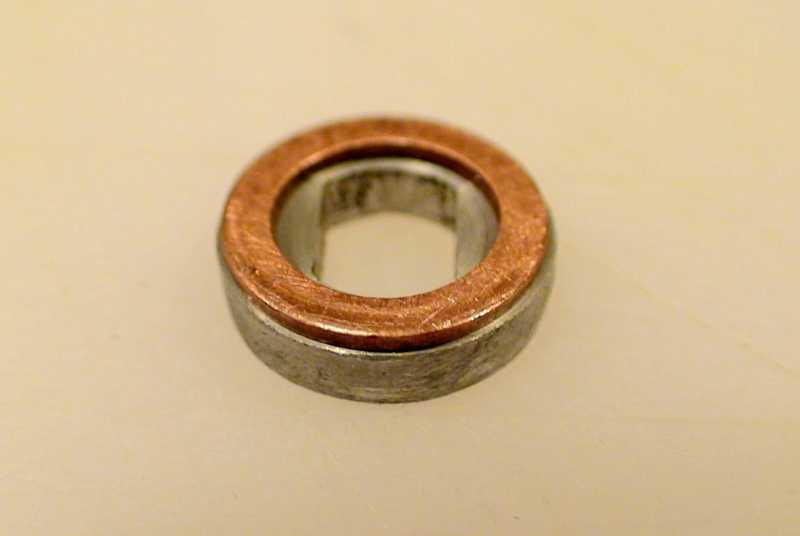
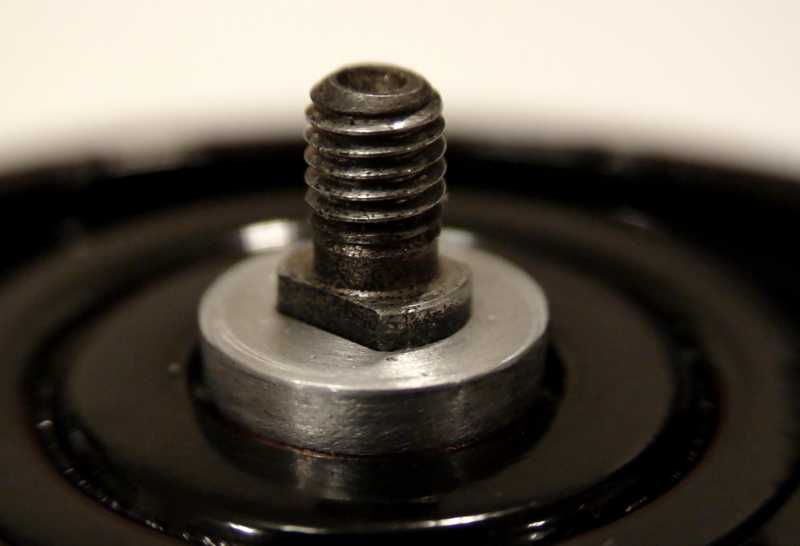
After machining the hub (so only the small end remains), I installed a copper washer UNDER the hub,
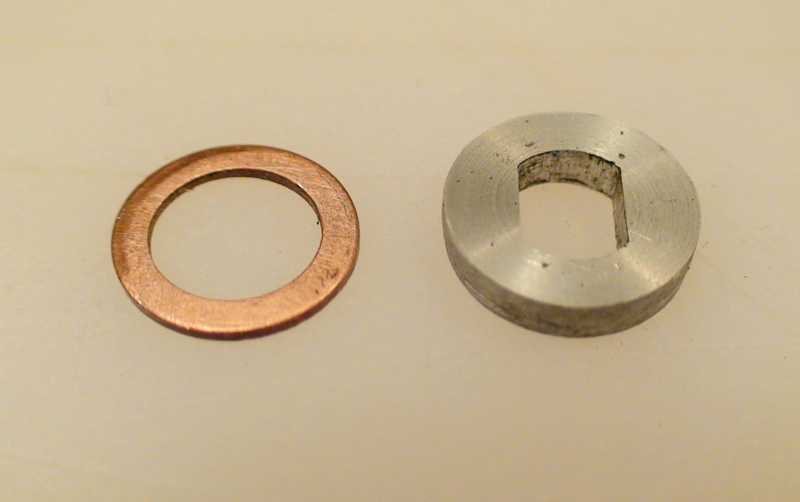
to give it enough height so the rivets in the new fan did not make contact with the inner flange of the fan motor.
Sorry.... no dimensions on the copper washer. It was in a box of old washers I had lying around. It was NOT an exact fit for the fan motor shaft, BUT it was perfect in thickness, to give me the necessary fan clearance, and its diameter was identical to that of the machined hub.
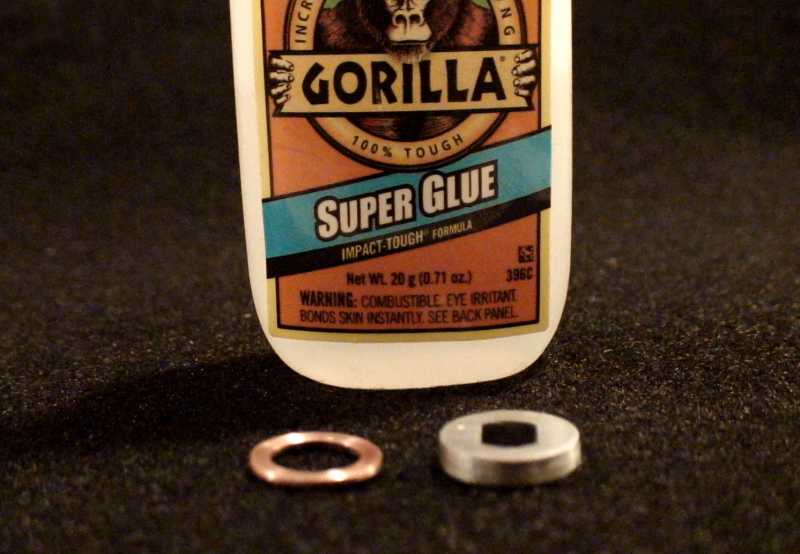
A TOUCH of Super Glue perfectly marries the copper washer to the machined hub. Apply a MINUTE drop of Super Glue at 12, 3, 6, and 9 o'clock on the bottom of the machined hub, then align, press and hold the two together for approximately 60 seconds.
After machining the hub (so only the small end remains), I installed a copper washer UNDER the hub,
to give it enough height so the rivets in the new fan did not make contact with the inner flange of the fan motor.
Sorry.... no dimensions on the copper washer. It was in a box of old washers I had lying around. It was NOT an exact fit for the fan motor shaft, BUT it was perfect in thickness, to give me the necessary fan clearance, and its diameter was identical to that of the machined hub.
A TOUCH of Super Glue perfectly marries the copper washer to the machined hub. Apply a MINUTE drop of Super Glue at 12, 3, 6, and 9 o'clock on the bottom of the machined hub, then align, press and hold the two together for approximately 60 seconds.
Last edit: 11 years 10 months ago by SacredKaw. Reason: Final Corrections
The following user(s) said Thank You: KZQ
Please Log in or Create an account to join the conversation.
- SacredKaw
-
Topic Author
- Offline
- New Member
-
- Posts: 5
- Thanks: 6
Re: Muzzy Fan Installation
11 years 10 months ago - 11 years 10 months ago
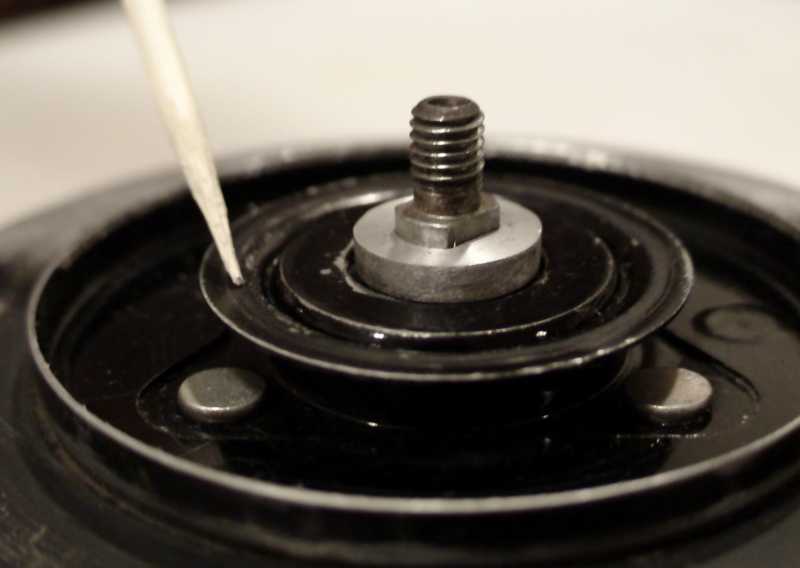
Remove the three 5mm screws and washers that secure the fan motor to the motor shroud.
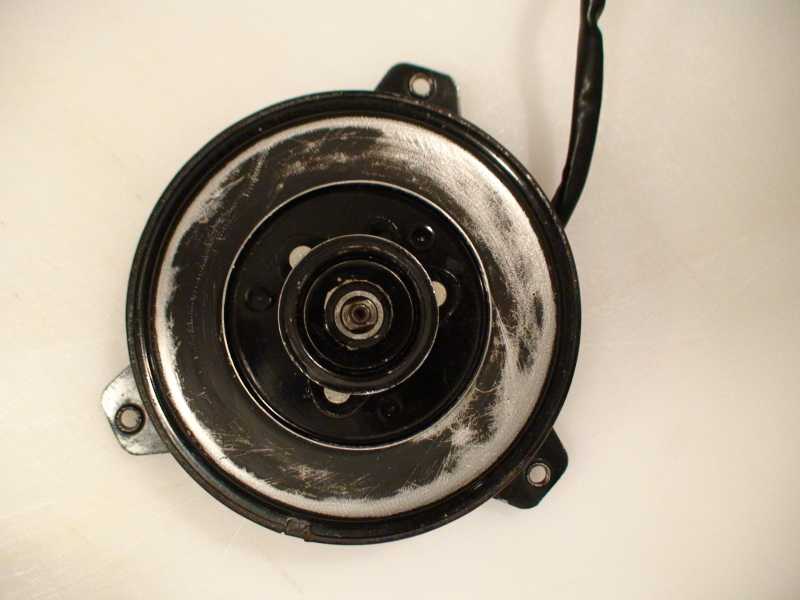
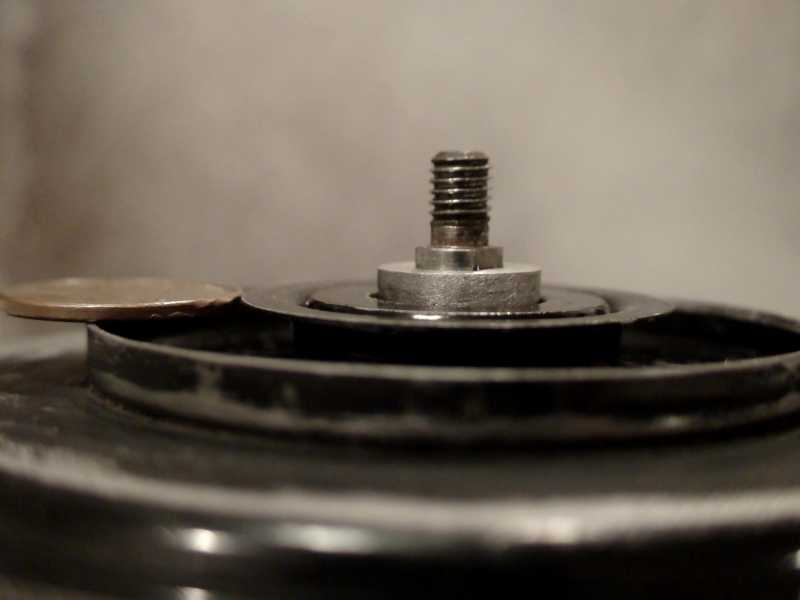
Chuck the fan motor in a lathe and turn the outer motor flange to a height of approximately 3/16". Turning it any shorter serves no purpose, as this is all that is necessary to give adequate clearance between the outer motor flange and the new fan.
After machining, the height difference between the inner and outer motor flange is about the thickness of a penny.
You're all done with the machine work. (Total cost for machining the hub and outer motor flange was $20 and about 15 minutes). You could hacksaw, grind, or file down the parts (and it will look like you did), but it's hardly worth the hassle for 20 bucks.....and you've only got ONE center hub.
I elected to paint the motor and shroud with VHT high heat gloss black paint ($9 at O'Reilly Auto Parts)... (good to 550 degrees)... but ONLY if you cure the paint. I scuffed it all up with a red scotch bright pad and dusted on two coats about 10 minutes apart, then sprayed on a medium wet coat. After 36 hours, I hung it in the middle of a 200 degree oven and "cooked" it for 1 hour. No, it didn't melt the fan wires or plastic plug in. After letting it cool completely, I reassembled it.
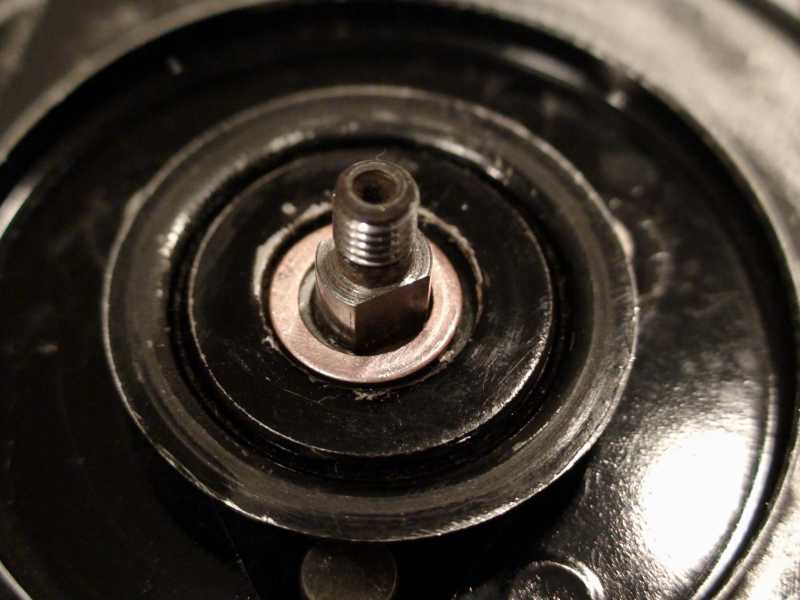
Riveted washer on Muzzy fan faces UP
There is a "rounded" side and a "flat" side to the flat washer. Make sure the "flat" side is down, against the riveted washer on the new fan.
Before reinstalling it on your bike, test that the fan spins freely with no interference or drag of any kind. Connect jumper wires from a 12 volt battery charger (negative lead to the black wire and positive lead to the blue wire). You should feel a noticeable increase in the fan volume. If it works without issues, you're good to go.
Chuck the fan motor in a lathe and turn the outer motor flange to a height of approximately 3/16". Turning it any shorter serves no purpose, as this is all that is necessary to give adequate clearance between the outer motor flange and the new fan.
After machining, the height difference between the inner and outer motor flange is about the thickness of a penny.
You're all done with the machine work. (Total cost for machining the hub and outer motor flange was $20 and about 15 minutes). You could hacksaw, grind, or file down the parts (and it will look like you did), but it's hardly worth the hassle for 20 bucks.....and you've only got ONE center hub.
I elected to paint the motor and shroud with VHT high heat gloss black paint ($9 at O'Reilly Auto Parts)... (good to 550 degrees)... but ONLY if you cure the paint. I scuffed it all up with a red scotch bright pad and dusted on two coats about 10 minutes apart, then sprayed on a medium wet coat. After 36 hours, I hung it in the middle of a 200 degree oven and "cooked" it for 1 hour. No, it didn't melt the fan wires or plastic plug in. After letting it cool completely, I reassembled it.
Riveted washer on Muzzy fan faces UP
There is a "rounded" side and a "flat" side to the flat washer. Make sure the "flat" side is down, against the riveted washer on the new fan.
Before reinstalling it on your bike, test that the fan spins freely with no interference or drag of any kind. Connect jumper wires from a 12 volt battery charger (negative lead to the black wire and positive lead to the blue wire). You should feel a noticeable increase in the fan volume. If it works without issues, you're good to go.
Last edit: 11 years 10 months ago by SacredKaw.
The following user(s) said Thank You: KZQ, Bob4717, biltonjim, zed_thirteen
Please Log in or Create an account to join the conversation.
- biltonjim
-
- Offline
- Platinum Member
-

- Posts: 972
- Thanks: 250
Re: Muzzy Fan Installation
11 years 10 months ago
Thanks for this article. Interesting and very well explained. How is it working for you?
Please Log in or Create an account to join the conversation.
- SacredKaw
-
Topic Author
- Offline
- New Member
-
- Posts: 5
- Thanks: 6
Re: Muzzy Fan Installation
11 years 10 months ago
I have just begun the restoration and am probably still a few months out from having any "on the road" data. Hopefully, doing this fan mod and adding some super coolant like Hyper Lube or Engine Ice will be all that's necessary to keep it cool I'm also looking into having a custom radiator made.... just in case.
Please Log in or Create an account to join the conversation.
- HotRodSixxer
-

- Offline
- Junior Member
-

- Posts: 30
- Thanks: 4
Re: Muzzy Fan Installation
11 years 10 months ago
Good job! You did it almost exactly like the Mejing mod on the old site. He also removed the ridge on the motor for clearance and cut down the remaining slotted washer from the old fan. He must not have cut it down as much as you did as he didn't add any washers. I tried putting this fan on myself before knowing of this mod and of course it did not work even though it was advertised to. I went so far as sending my motor to Muzzy and they sent it back saying they had nothing that would fit. So I sent the fan back and now after letting my project sit for over 10 yrs I am going to have to get another one and do this mod on it! Problem is they are hard to find now. I called Muzzy a couple months ago and they are in the middle of a change of who does their fans. They may be available by now, I don't know. It's great that you posted this with pics, I still have a copy off the original site but no pics. Thanks, Jake
Please Log in or Create an account to join the conversation.
Moderators: dcarver220b
Time to create page: 0.206 seconds